
Springboot+vue 前后端分离登录验证码功能
第一步:在后端创建一个生成随机验证码的工具类和接收请求验证码的接口。工具类的主要作用生成随机验证码和对应的图片。接口的作用是将生成的随机验证码保存到session,同时,将图片进行base64编码,然后返回给前端。
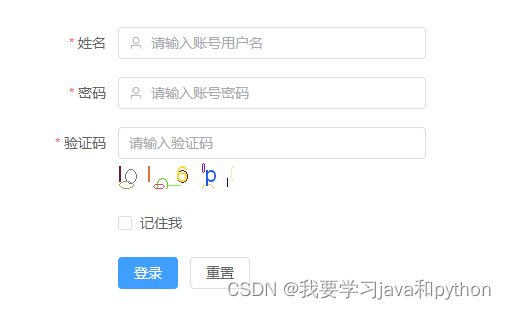
第二步:在登录页面创建的同时获取验证码,并将后端传回来得key和编码后的字符串拼接,绑定img标签的src属性。此外,当用户点击验证码的img标签时,重新获取验证码,后端session更新验证码。
第三步:后端登录接口接收登录请求时,将用户提交的验证码和session中的验证码进行比对,不相同则返回相应信息给前端进行提示,相同则进行账号密码的匹配。
实验截图

关键代码如下:
element-plus 前端页面
<template>

    <el-form
            ref="ruleFormRef"
            :model="ruleForm"
            :rules="rules"
            label-width="120px"
            class="demo-ruleForm"
            :size="formSize"
            status-icon
    >
        <el-form-item label="姓名" prop="username">
            <el-input  v-model="ruleForm.username" placeholder="请输入账号用户名">
                <template #prefix><el-icon><User /></el-icon></template>
            </el-input>
        </el-form-item>
        <el-form-item label="密码"  prop="password">
            <el-input v-model="ruleForm.password" placeholder="请输入账号密码">
                <template #prefix><el-icon><User /></el-icon></template>
            </el-input>
        </el-form-item>
        <el-form-item label="验证码" prop="checkcode">
            <el-input placeholder="请输入验证码" v-model="ruleForm.checkcode"></el-input>
            <img :src="checkcodeurl" @click="getcode">
        </el-form-item>
        <el-form-item prop="">
            <el-checkbox v-model="ruleForm.rememberme " v-bind:lable="true">记住我</el-checkbox>
        </el-form-item>
        <el-form-item>
            <el-button type="primary" @click="submitForm(ruleFormRef)">
                登录
            </el-button>
            <el-button @click="resetForm(ruleFormRef)">重置</el-button>
        </el-form-item>


    </el-form>
</template>

<script lang="ts"  setup>


    import { reactive, ref } from 'vue'
    import type { FormInstance, FormRules } from 'element-plus'
    import request from "../utitiles/request"
    import {ElMessage} from "element-plus";
    import axios from "axios";

    const formSize = ref()
    const ruleFormRef = ref<FormInstance>()
    const ruleForm = reactive({
       username:'',
        password:'',
        checkcode:'',
        rememberme:''
    })
    const checkcodeurl=ref("http://localhost:8080/login/getcode?"+new Date().getTime())
    const getcode=()=>{
        checkcodeurl.value="http://localhost:8080/login/getcode?"+new Date().getTime()
    }

    const rules = reactive<FormRules>({
        username: [
            { required: true, message: 'Please input username', trigger: 'blur' },
            { min: 3, max: 5, message: 'Length should be 3 to 5', trigger: 'blur' },
        ],
        password: [
            { required: true, message: 'Please input username', trigger: 'blur' },
        ],
        checkcode:[
            { required: true, message: '请输入验证码', trigger: 'blur' },
        ]
    })

    const submitForm = async (formEl: FormInstance | undefined) => {
        if (!formEl) return
        await formEl.validate((valid, fields) => {
            if (valid) {
               request.get("/login",{
                   params:{
                       username:ruleForm.username,
                       password:ruleForm.password,
                       checkcode:ruleForm.checkcode
                   }
               }).then(response=>{
                   console.log(response.data)
                   if(response.data=="success"){
                      alert("登录成功")
                   }
                   else
                       alert("登陆失败")
               })

            } else {
                console.log('error submit!', fields)
            }
        })
    }

    const resetForm = (formEl: FormInstance | undefined) => {
        if (!formEl) return
        formEl.resetFields()
    }


</script>
验证码这里我采取redis进行存储,java后端代码如下
@Controller
public class MyblogController {
    @Autowired
    RedisUtil redisUtil;
    @Autowired
    LoginMapper loginMapper;

    @RequestMapping("/login/getcode")
    public void getcode(HttpServletResponse response) throws IOException {
        CircleCaptcha circleCaptcha = CaptchaUtil.createCircleCaptcha(116, 30, 4, 10);
        redisUtil.set("code",circleCaptcha.getCode());
        ServletOutputStream outputStream = response.getOutputStream();
        circleCaptcha.write(outputStream);
        outputStream.close();
    }


    @RequestMapping("/login")
    @ResponseBody
    public String  login(String username,String password,String checkcode){
        QueryWrapper<Login> queryWrapper=new QueryWrapper<>();
        queryWrapper.eq("username",username).eq("password",password);
        Login login = loginMapper.selectOne(queryWrapper);
        String code=(String)redisUtil.get("code");
        if(login!=null&&code.equals(checkcode))
            return "success";
        else
            return "error";
    }
}
番外篇
由于此篇代码较多文字较少,这里介绍Springboot从入门到实战的书评
《Springboot从入门到实战》这本书是一本非常适合Java初学者的入门指南。作者通过详细的介绍让读者了解Springboot框架的基本原理以及如何使用它来构建高效的应用程序。
首先,本书介绍了Springboot框架的基本概念和背景。阐述了Springboot对于Java开发者来说有多么重要,以及其优势和特点,包括自动配置、快速开发等方面的内容。同时还介绍了Springboot的历史,让读者对该框架有一个更加深入的认识。
接着,作者开始讲解如何使用Springboot框架进行项目构建。从环境搭建、依赖管理到基本的应用程序搭建,都有详细的讲解。书中还提供了很多代码示例和实例让读者更好地掌握Springboot的使用方法。
除此之外,本书还介绍了Springboot框架的高级特性,如如何集成MyBatis等ORM框架、如何使用Spring Security进行权限控制等。这些内容不仅可以帮助读者进一步深入了解Springboot框架,同时也可以帮助读者开发出更加完善的应用程序。
总的来说,《Springboot从入门到实战》是一本非常好的学习Springboot框架的书籍。它不仅详细介绍了Springboot框架的基础和高级特性,而且还提供了很多实例和代码示例,可以帮助读者更好地掌握该框架的使用方法。如果你是Java初学者,并且想要深入学习Springboot框架,那么这本书绝对值得一读。
关于如何将这些原则实施到日常生活中的可操作步骤列表:
-
了解自己的目标和动机 – 明确自己为什么要追求成功,设定具体的目标。
-
制定计划 – 根据自己的目标和时间安排,制定周密的计划。
-
持之以恒 – 勇敢面对困难,在遇到挫折时不要放弃,坚持下去。
-
学习新知识 – 不断学习新的技能和知识,以保证自己在行业中处于领先地位。
-
与他人合作 – 学会与他人合作、交流、分享,以达到更好的成果。
-
精通细节 – 在实际操作中注重细节,不断完善自己的工作流程和技能。
-
保持积极态度 – 保持乐观、积极的心态,用积极的情绪来影响周围的人和事物。
版权声明:本文内容由互联网用户自发贡献,该文观点仅代表作者本人。本站仅提供信息存储空间服务,不拥有所有权,不承担相关法律责任。如发现本站有涉嫌侵权/违法违规的内容, 请发送邮件至 举报,一经查实,本站将立刻删除。
文章由极客之音整理,本文链接:https://www.bmabk.com/index.php/post/197073.html

