
项目背景介绍:公司新开发的APP,需要使用系统公告功能,实现实时更新系统公告功能。
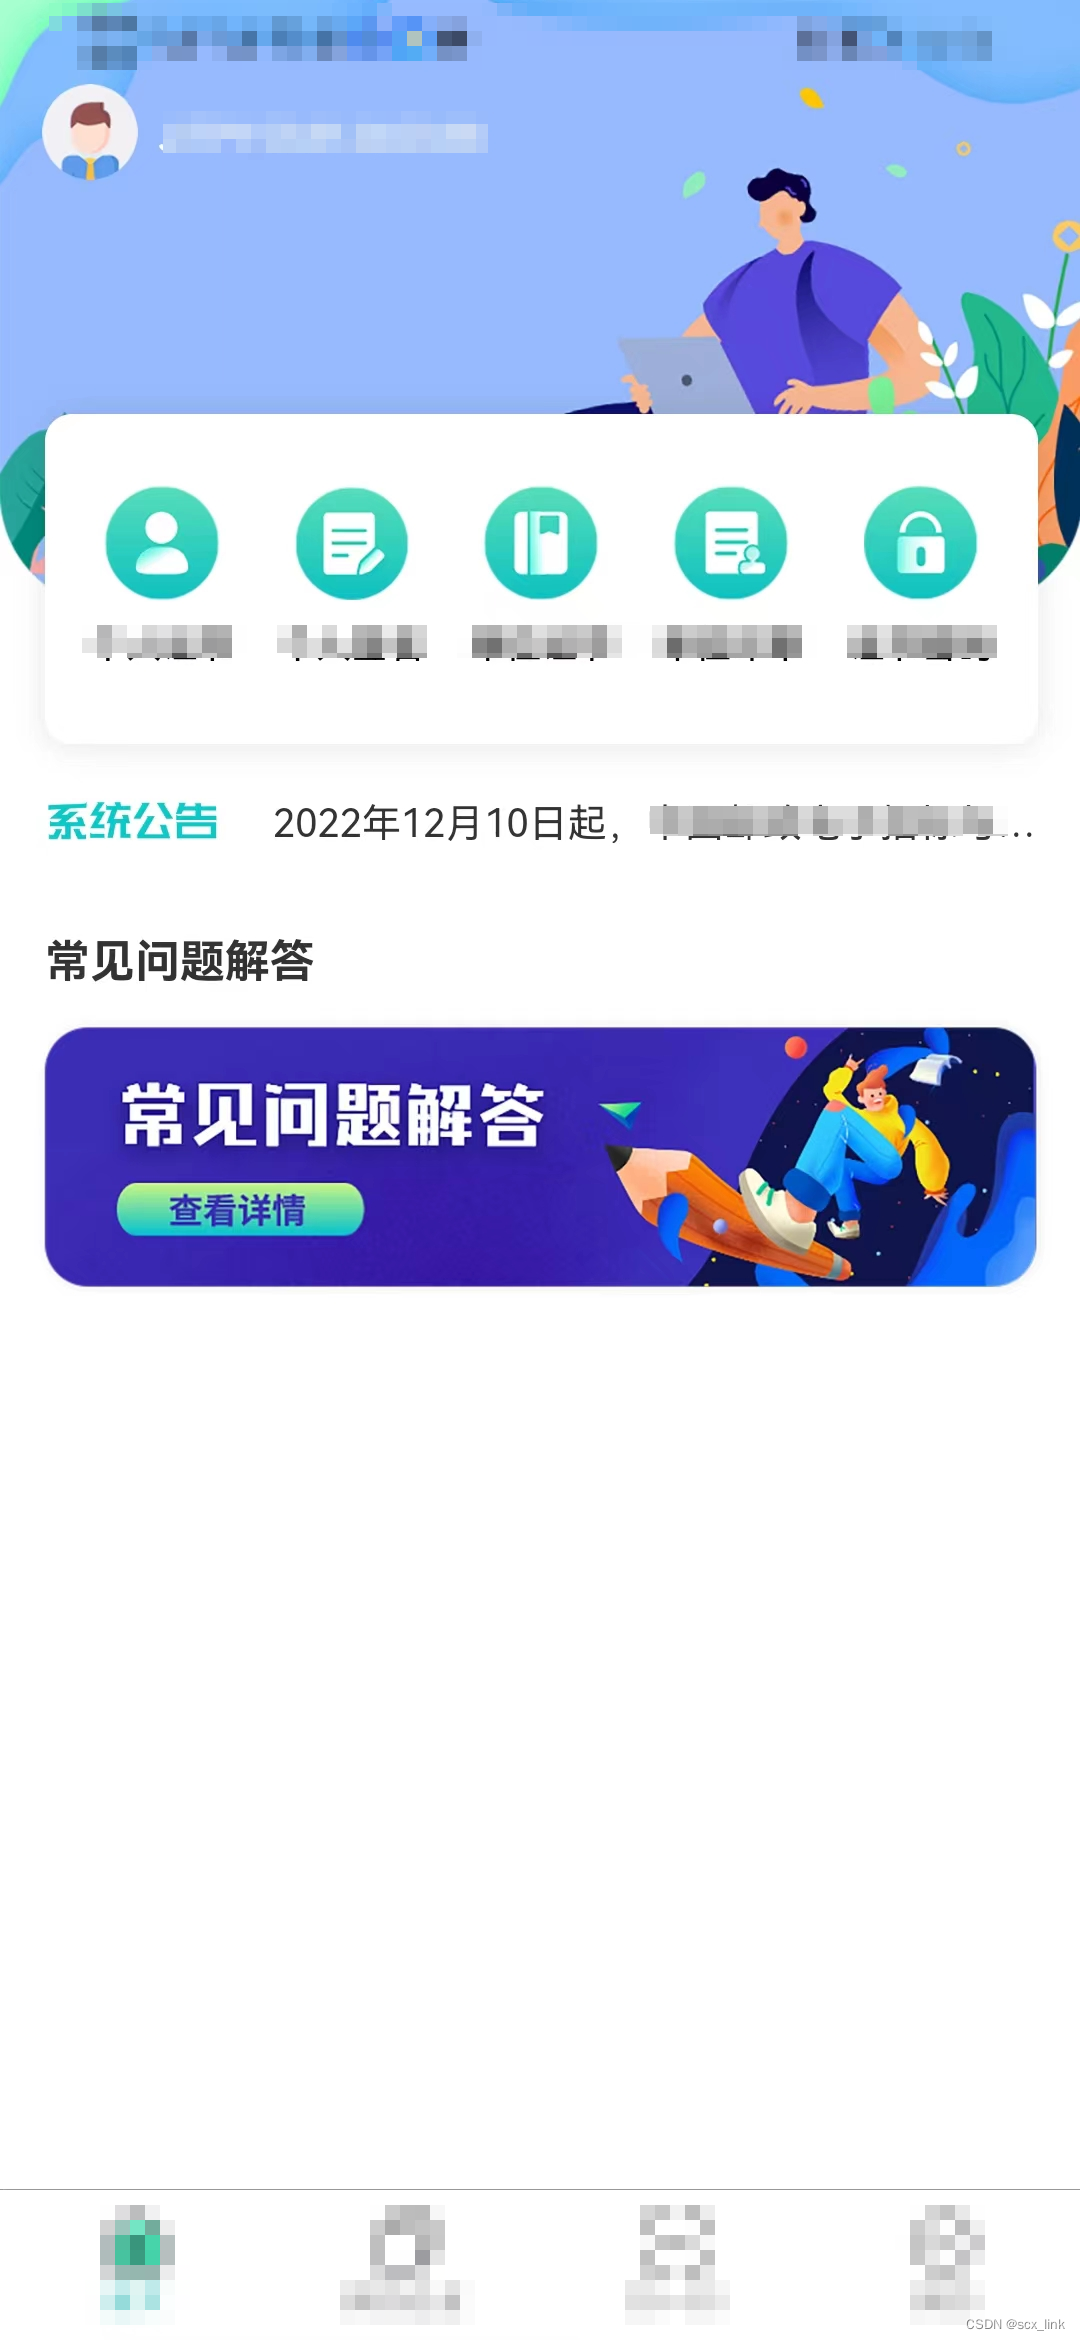
公告的修改功能,由PC端的运营管理界面来进行修改更新发布。当修改完后,要保证APP端,在用户不刷新或重新登录APP的情况下,更新公告内容。
项目的实际架构部署:
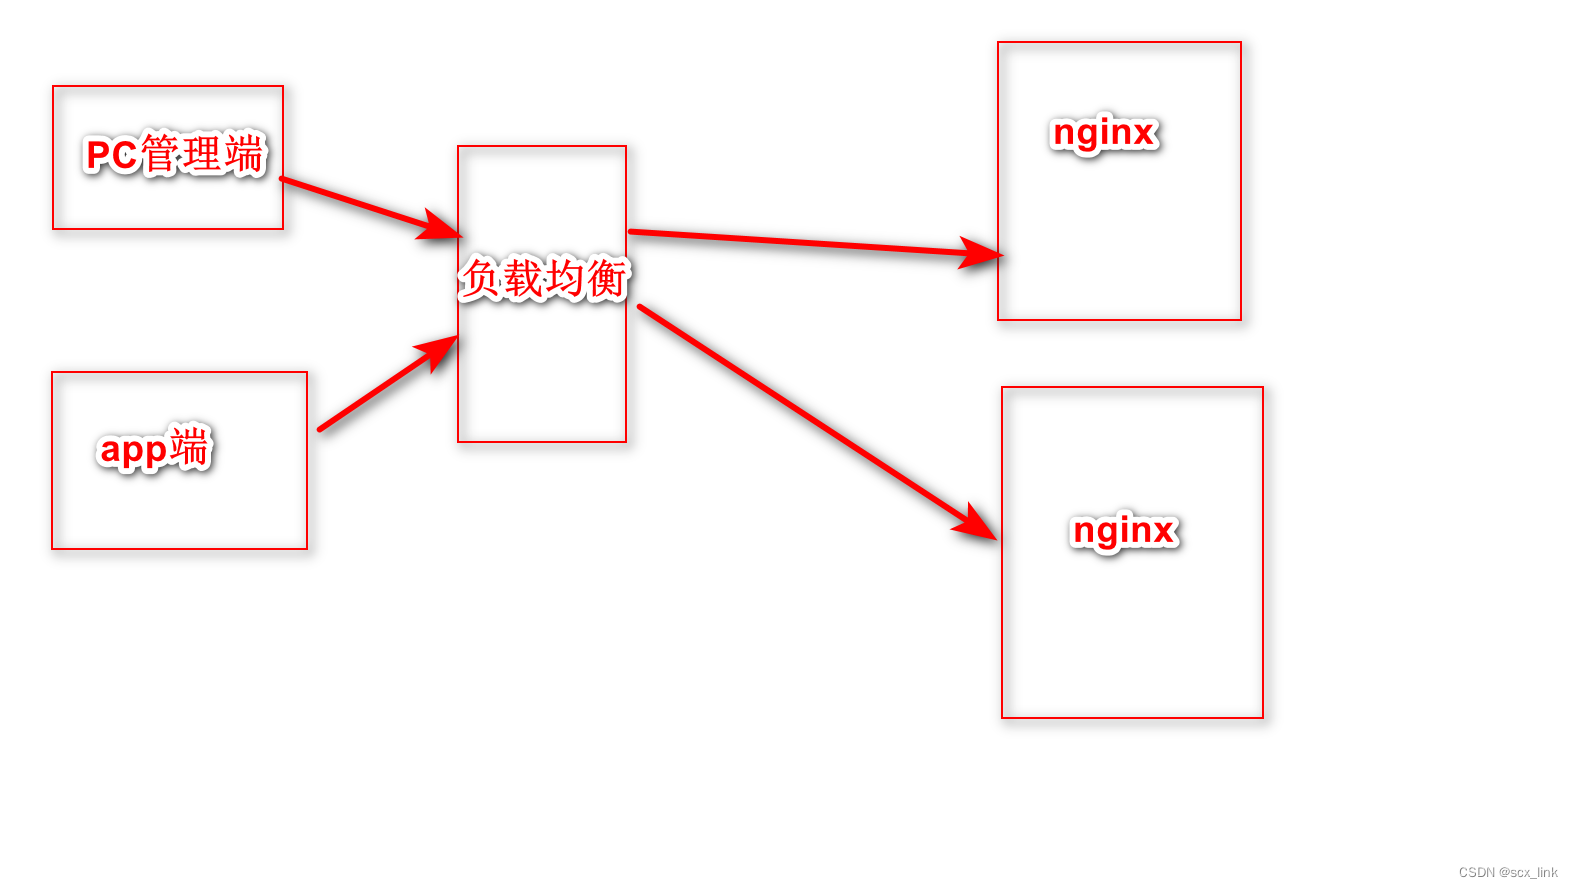
负载均衡的后面有两台服务器,部署的服务都是一样的。通过nginx来代理转发请求的具体服务。
多实例部署的情况下,会造成websocket的session不能共享。这里采用的是:redis的发布和订阅功能,实现修改后的公告消息在每台服务器上都能收到,然后再获取每台机器上的websocket会话,给APP端发送消息。
public class Constants
{
    /** redis 订阅消息通道标识*/
    public final static String REDIS_CHANNEL = "onMessage";
    public final static String REDIS_CHANNEL_CLOSE="close";
    public final static String REDIS_CHANNEL_SEND="send";
}
 @Autowired
 private StringRedisTemplate stringRedisTemplate;

 private void sendMessage(String message) {
        String newMessge= null;
        try {
            newMessge = new String(message.getBytes(Constants.UTF8), Constants.UTF8);
        } catch (UnsupportedEncodingException e) {
            e.printStackTrace();
        }
//        Map<String,String> map = new HashMap<String, String>();
//        map.put(Constants.REDIS_MESSAGE_KEY, key);
//        map.put(Constants.REDIS_MESSAGE_VALUE, newMessge);
        stringRedisTemplate.convertAndSend(Constants.REDIS_CHANNEL, newMessge);//发布消息
        System.out.println("将消息: "+newMessge+ "发布出去...");
    }
package cn.com.yuanquanyun.config;
import cn.com.yuanquanyun.client.service.ws.WebSocketServer;
import cn.com.yuanquanyun.common.constant.Constants;
import cn.com.yuanquanyun.common.utils.StringUtils;
import com.alibaba.fastjson.JSON;
import com.alibaba.fastjson.JSONObject;
import org.slf4j.Logger;
import org.slf4j.LoggerFactory;
import org.springframework.beans.factory.annotation.Autowired;
import org.springframework.data.redis.connection.Message;
import org.springframework.data.redis.connection.MessageListener;
import org.springframework.stereotype.Component;
import java.io.IOException;
import java.util.Collection;
import java.util.Iterator;
import java.util.concurrent.ConcurrentHashMap;
/**
* 消息监听对象,接收订阅消息 -- 每台服务器都订阅公告消息
*/
@Component
public class RedisReceiver implements MessageListener {
Logger log = LoggerFactory.getLogger(this.getClass());
//@Autowired
//private WebSocketServer webSocketServer;
/**
* 处理接收到的订阅消息
*/
@Override
public void onMessage(Message message, byte[] pattern) {
String channel = new String(message.getChannel());// 订阅的频道名称
String msg = "";
try {
msg = new String(message.getBody(), Constants.UTF8);//注意与发布消息编码一致,否则会乱码
System.out.println("打印订阅的消息:" + msg);
if (!StringUtils.isEmpty(msg)) {
if (Constants.REDIS_CHANNEL.endsWith(channel))// 最新消息
{
//JSONObject jsonObject = JSON.parseObject(msg);
//将更新后的公告推送给在线的用户手机端
ConcurrentHashMap<String, WebSocketServer> webSocketMap = WebSocketServer.getWebSocketMap();
Collection<WebSocketServer> values = webSocketMap.values();
System.err.println("values ===" + values.size());
Iterator<WebSocketServer> it = values.iterator();
while (it.hasNext()) {
WebSocketServer ws = it.next();
try {
ws.sendMessage(msg);
} catch (IOException e) {
System.err.println("sendMessage_error=" + e);
}
}
// webSocketServer.sendMessageByWayBillId(
// Long.parseLong(jsonObject.get(Constants.REDIS_MESSAGE_KEY).toString())
// ,jsonObject.get(Constants.REDIS_MESSAGE_VALUE).toString());
} else {
//TODO 其他订阅的消息处理
}
} else {
log.info("消息内容为空,不处理。");
}
} catch (Exception e) {
log.error("处理消息异常:" + e.toString());
e.printStackTrace();
}
}
}
package cn.com.yuanquanyun.config;

import org.springframework.context.annotation.Bean;
import org.springframework.context.annotation.Configuration;
import org.springframework.web.socket.config.annotation.EnableWebSocket;
import org.springframework.web.socket.server.standard.ServerEndpointExporter;
/**
 * 开启websocket支持
 * @author Administrator
 */
@Configuration
//@EnableWebSocket
public class WebSocketConfig {

	@Bean
    public ServerEndpointExporter serverEndpointExporter() {
        System.err.println("WebSocketConfig 初始化 ");
	    return new ServerEndpointExporter();
    }
}
<!-- springboot集成websocket -->
<dependency>
    <groupId>org.springframework.boot</groupId>
    <artifactId>spring-boot-starter-websocket</artifactId>
</dependency>
package cn.com.yuanquanyun.client.service.ws;

import cn.com.yuanquanyun.client.dto.CustNotice;
import cn.com.yuanquanyun.client.service.impl.CustNoticeServiceImpl;
import cn.com.yuanquanyun.common.utils.spring.SpringUtils;
import cn.hutool.log.Log;
import cn.hutool.log.LogFactory;
import org.springframework.stereotype.Component;

import javax.websocket.*;
import javax.websocket.server.PathParam;
import javax.websocket.server.ServerEndpoint;
import java.io.IOException;
import java.util.concurrent.ConcurrentHashMap;

/**
 * 此方法使用于工程部署是单例的情况下,若是多例的情况下,存在userId不在一台机器上,webSocketMap中查询不到。
 * 多机的情况下,要考虑数据共享的问题,可采用redis发布和订阅来解决.
 * @author Administrator
 *
 */
@Component
@ServerEndpoint("/ws/{userId}")
public class WebSocketServer {
	static Log log=LogFactory.get(WebSocketServer.class);
    /**静态变量,用来记录当前在线连接数。应该把它设计成线程安全的。*/
//    private static int onlineCount = 0;
    /**concurrent包的线程安全Set,用来存放每个客户端对应的MyWebSocket对象。*/
    private static ConcurrentHashMap<String,WebSocketServer> webSocketMap = new ConcurrentHashMap<>();
    /**与某个客户端的连接会话,需要通过它来给客户端发送数据*/
    private Session session;
    /**接收userId*/
    private String userId="";

    public WebSocketServer() {
		System.out.println("WebSocketServer 初始化... hashCode="+this.hashCode());
	}
    public static ConcurrentHashMap<String,WebSocketServer> getWebSocketMap(){
        return webSocketMap;
    }

    /**
     * 连接建立成功调用的方法 只调一次
     *
     */
    @OnOpen
    public void onOpen(Session session,@PathParam("userId") String userId) {
    	System.out.println("onOpen hashCode="+this.hashCode()+", userId="+userId);//根据打印的hashCode每建立一个连接就会生成一个新的WebSocketServer对象,与对应的userId对应
        this.session = session;
        this.userId=userId;
        if(webSocketMap.containsKey(userId)){
            webSocketMap.remove(userId);
            webSocketMap.put(userId,this);
            //加入set中
        }else{
            webSocketMap.put(userId,this);
            //加入set中
            //addOnlineCount();
            //在线数加1
        }

        //log.info("用户连接:"+userId+",当前在线人数为:" + getOnlineCount());

        try {
//            System.out.println("custNoticeService======"+SpringUtils.getBean(CustNoticeServiceImpl.class));
            CustNotice custNotice = SpringUtils.getBean(CustNoticeServiceImpl.class).selectNotice();
//            CustNotice custNotice = custNoticeService.selectNotice();
//            System.out.println("custNotice======"+custNotice.toString());
            sendMessage(custNotice.getNoticeContent());
        } catch (IOException e) {
            log.error("用户:"+userId+",网络异常!!!!!!");
        }
    }

    /**
     * 收到客户端消息后调用的方法
     *
     * @param message 客户端发送过来的消息*/
    @OnMessage
    public void onMessage(String message, Session session) {
    	/*System.out.println("onMessage hashcode=="+this.hashCode());
        log.info("onMessage 用户消息:"+userId+",报文:"+message);
        //可以群发消息
        //消息保存到数据库、redis
        if(StringUtils.isNotBlank(message)){
            try {
                //解析发送的报文
                JSONObject jsonObject = JSON.parseObject(message);
                //追加发送人(防止串改)
                jsonObject.put("fromUserId",this.userId);
                String toUserId=jsonObject.getString("toUserId");
                //传送给对应toUserId用户的websocket
                if(StringUtils.isNotBlank(toUserId)&&webSocketMap.containsKey(toUserId)){
                    webSocketMap.get(toUserId).sendMessage(jsonObject.toJSONString());
                }else{
                    log.error("请求的userId:"+toUserId+"不在该服务器上");
                    //否则不在这个服务器上,发送到mysql或者redis
                }
            }catch (Exception e){
                e.printStackTrace();
            }
        }*/
    }

    /**
     * 页面socket连接关闭,自动调用的方法
     */
    @OnClose
    public void onClose() {
        if(webSocketMap.containsKey(userId)){
            webSocketMap.remove(userId);
            //从set中删除
//            subOnlineCount();
        }
//        log.info("用户退出:"+userId+",当前在线人数为:" + getOnlineCount());
    }

    /**
    *
    * @param session
    * @param error
    */
   @OnError
   public void onError(Session session, Throwable error) {
       log.error("用户错误:"+this.userId+",原因:"+error.getMessage());
       error.printStackTrace();
   }

   /**
    * 实现服务器主动推送
    */
   public void sendMessage(String message) throws IOException {
       this.session.getBasicRemote().sendText(message);
   }

   /**
    * 发送自定义消息
   */
   /*public static void sendInfo(String message,@PathParam("userId") String userId) throws IOException {
       log.info("发送消息到:"+userId+",报文:"+message);
       if(StringUtils.isNotBlank(userId)&&webSocketMap.containsKey(userId)){
           webSocketMap.get(userId).sendMessage(message);
       }else{
           log.error("用户"+userId+",不在线!");
       }
   }*/

}
<html>
<head>
    <meta charset="utf-8">
    <title>websocket通讯</title>
</head>
<script src="https://cdn.bootcss.com/jquery/3.3.1/jquery.js"></script>
<script>
    var socket;

    function openSocket() {
        if (typeof (WebSocket) == "undefined") {
            console.log("您的浏览器不支持WebSocket");
        } else {
            console.log("您的浏览器支持WebSocket");
            //实现化WebSocket对象,指定要连接的服务器地址与端口  建立连接
            //等同于socket = new WebSocket("ws://localhost:8888/xxxx/im/25");
            //var socketUrl="${request.contextPath}/im/"+$("#userId").val();
            // var socketUrl = "https://localhost:9093/websocket/" + $("#userId").val();
            // var socketUrl = "wss://localhost:8096/v3/ws/" + $("#userId").val();
            // var socketUrl = "wss://yu_ming:8096/v3/ws/" + $("#userId").val();
            var socketUrl = "wss://yu_ming:8093/websk/ws/" + $("#userId").val();
            socketUrl = socketUrl.replace("https", "wss").replace("http", "ws");
            console.log(socketUrl);
            if (socket != null) {
                socket.close();
                socket = null;
            }
            socket = new WebSocket(socketUrl);
            //打开事件
            socket.onopen = function () {
                console.log("websocket已打开");
                //socket.send("这是来自客户端的消息" + location.href + new Date());
            };
            //获得消息事件
            socket.onmessage = function (msg) {
                console.log(msg.data);
                //发现消息进入    开始处理前端触发逻辑
            };
            //关闭事件
            socket.onclose = function () {
                console.log("websocket已关闭");
            };
            //发生了错误事件
            socket.onerror = function () {
                console.log("websocket发生了错误");
            }
        }
    }

    function sendMessage() {
        if (typeof (WebSocket) == "undefined") {
            console.log("您的浏览器不支持WebSocket");
        } else {
            console.log("您的浏览器支持WebSocket");
            console.log($("#contentText").val());
            socket.send($("#contentText").val());
        }
    }
</script>
<body>
<p>【userId】:
<div><input id="userId" name="userId" type="text" value="10"></div>
<p>【toUserId】:
<div><input id="toUserId" name="toUserId" type="text" value="20"></div>
<p>【toUserId】:
<div><input id="contentText" name="contentText" type="text" value="hello websocket"></div>
<p>【操作】:
<div><a onclick="openSocket()">开启socket</a></div>
<p>【操作】:
<div><a onclick="sendMessage()">发送消息</a></div>
</body>

</html>
通过html界面功能可以模拟和后端建立websocket长连接。使用wss时app端要通过域名来访问。
这里有个小插曲:
生产环境app端请求后台是通过nginx代理转发到服务端的。测试环境没有通过nginx转发。
这里的nginx下的nginx.conf文件里需要配置一下支持websocket协议。
#user  nobody;
worker_processes  1;

#error_log  logs/error.log;
#error_log  logs/error.log  notice;
#error_log  logs/error.log  info;

#pid        logs/nginx.pid;


events {
    worker_connections  1024;
}


http {
    include       mime.types;
    default_type  application/octet-stream;

    #log_format  main  '$remote_addr - $remote_user [$time_local] "$request" '
    #                  '$status $body_bytes_sent "$http_referer" '
    #                  '"$http_user_agent" "$http_x_forwarded_for"';

    #access_log  logs/access.log  main;

    sendfile        on;
    #tcp_nopush     on;

    #keepalive_timeout  0;
    keepalive_timeout  65;

    #gzip  on;
    map $http_upgrade $connection_upgrade {
    default upgrade;
    ''      close;
    }
    server {
        listen       8093;
        server_name  localhost;

        #charset koi8-r;

        #access_log  logs/host.access.log  main;


        location /v2 {
            proxy_pass  http://10.0.0.10:8082/v2;
        }

	location /v3 {
            proxy_pass  http://10.0.0.10:8083/v3;
        }

	location /websk {
            proxy_pass http://10.0.0.10:8083/v3;

            proxy_read_timeout 300s;
            proxy_send_timeout 300s;

            proxy_set_header Host $host;
            proxy_set_header X-real-ip $remote_addr;
            proxy_set_header X-Forwarded-For $proxy_add_x_forwarded_for;

            proxy_http_version 1.1;
            proxy_set_header Upgrade $http_upgrade;
            proxy_set_header Connection $connection_upgrade;
        }

        location /404 {
                index index.html index.htm;
                root  /usr/share/nginx/html;
                error_page 404 /index.html;
        }
        location / {
                index index.html index.htm;
                root  /usr/share/nginx/html;
                error_page 404 /index.html;
        }
        # redirect server error pages to the static page /50x.html
        #
        #error_page   500 502 503 504  /50x.html;
        location = /50x.html {
            root   html;
        }

        # proxy the PHP scripts to Apache listening on 127.0.0.1:80
        #
        #location ~ \.php$ {
        #    proxy_pass   http://127.0.0.1;
        #}

        # pass the PHP scripts to FastCGI server listening on 127.0.0.1:9000
        #
        #location ~ \.php$ {
        #    root           html;
        #    fastcgi_pass   127.0.0.1:9000;
        #    fastcgi_index  index.php;
        #    fastcgi_param  SCRIPT_FILENAME  /scripts$fastcgi_script_name;
        #    include        fastcgi_params;
        #}

        # deny access to .htaccess files, if Apache's document root
        # concurs with nginx's one
        #
        #location ~ /\.ht {
        #    deny  all;
        #}
    }


    # another virtual host using mix of IP-, name-, and port-based configuration
    #
    #server {
    #    listen       8000;
    #    listen       somename:8080;
    #    server_name  somename  alias  another.alias;

    #    location / {
    #        root   html;
    #        index  index.html index.htm;
    #    }
    #}


    # HTTPS server
    #
    #server {
    #    listen       443 ssl;
    #    server_name  localhost;

    #    ssl_certificate      cert.pem;
    #    ssl_certificate_key  cert.key;

    #    ssl_session_cache    shared:SSL:1m;
    #    ssl_session_timeout  5m;

    #    ssl_ciphers  HIGH:!aNULL:!MD5;
    #    ssl_prefer_server_ciphers  on;

    #    location / {
    #        root   html;
    #        index  index.html index.htm;
    #    }
    #}

}
里面的关键部分是:
map $http_upgrade $connection_upgrade {
    default upgrade;
    ''      close;
}

location /websk {
            proxy_pass http://10.0.0.10:8083/v3;

            proxy_read_timeout 300s;
            proxy_send_timeout 300s;

            proxy_set_header Host $host;
            proxy_set_header X-real-ip $remote_addr;
            proxy_set_header X-Forwarded-For $proxy_add_x_forwarded_for;

            proxy_http_version 1.1;
            proxy_set_header Upgrade $http_upgrade;
            proxy_set_header Connection $connection_upgrade;
}
版权声明:本文内容由互联网用户自发贡献,该文观点仅代表作者本人。本站仅提供信息存储空间服务,不拥有所有权,不承担相关法律责任。如发现本站有涉嫌侵权/违法违规的内容, 请发送邮件至 举报,一经查实,本站将立刻删除。
文章由极客之家整理,本文链接:https://www.bmabk.com/index.php/post/142708.html

