
1.添加依赖
在pom.xml中的<dependencies> * </dependencies>标签中添加jsp、jstl依赖。
        <!--整合jsp-->
        <dependency>
            <groupId>org.apache.tomcat.embed</groupId>
            <artifactId>tomcat-embed-jasper</artifactId>
        </dependency>
        <!--jstl-->
        <dependency>
            <groupId>javax.servlet</groupId>
            <artifactId>jstl</artifactId>
            <version>1.2</version>
        </dependency>
2.在pom.xml中将项目打包方式改为war。
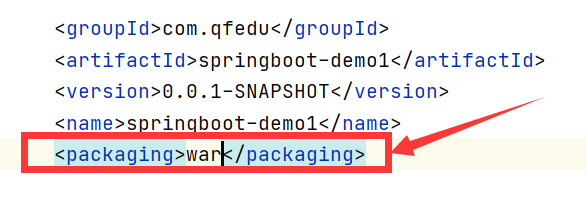
<packaging>war</packaging>
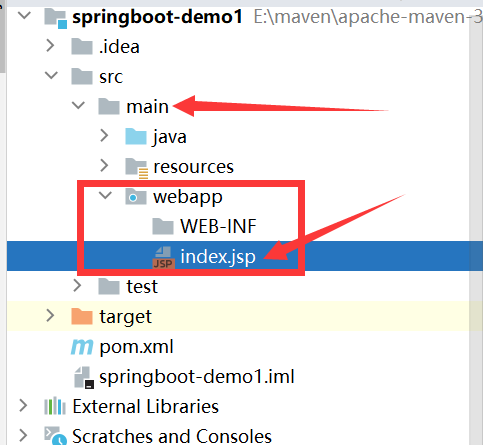
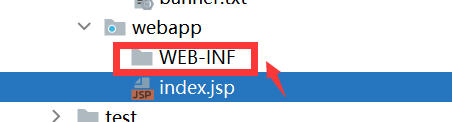
3.在main下面新建一个目录webapp,在webapp下新建一个目录WEB-INF。在WEB-INF下边新建一个jsp文件:index.jsp。
index.jsp:
  Created by IntelliJ IDEA.
  User: 临易
  Date: 2022/4/15
  Time: 20:10
  To change this template use File | Settings | File Templates.
--%>
<%@ page contentType="text/html;charset=UTF-8" language="java" %>
<html>
<head>
    <title>Title</title>
</head>
<body>
index..
</body>
</html>
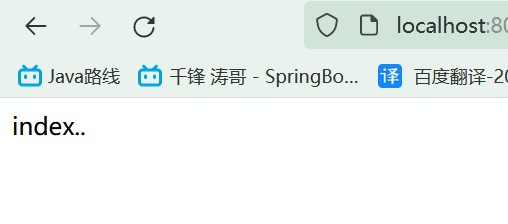
4.启动springboot项目运行。
在浏览器网址栏输入: http://localhost:8080/demo1/index.jsp
页面显示 index.. ,jsp整合成功。

5.如果不想异步,则修改UserController
(删去@ResponseBody,将方法rigist的类型改为String,在rigist方法中返回 “/index.jsp”)
UserController.java:
package com.qfedu.springboot.demo.controller;

import com.qfedu.springboot.demo.entity.User;
import com.qfedu.springboot.demo.service.UserService;
import org.springframework.stereotype.Controller;
import org.springframework.web.bind.annotation.RequestMapping;

import javax.annotation.Resource;

@Controller
@RequestMapping("/user")
public class UserController {

    //通过Resoure注入UserService
    @Resource
    private UserService userService;

    //前后端分离。前端所有消息都是异步请求。
    @RequestMapping("/regist")
    //@ResponseBody
    public String regist(User user){
        userService.userRegist(user);
        return "/index.jsp";
    }
}
6.执行
http://localhost:8081/demo1/user/regist?userName=Lucy&userPwd=99999&userRealname=Lulu&userImg=05.jpg

执行成功!
7.在application.yml文件中,增加mvc前缀与后缀属性。
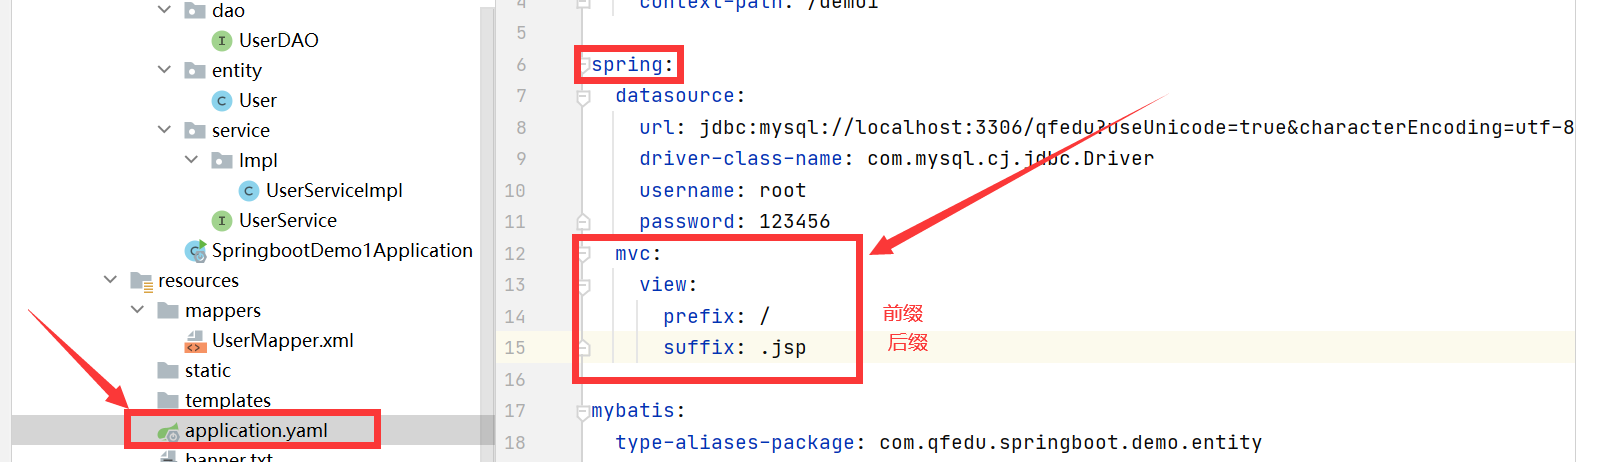
application.yml的spring部分:
spring:
  datasource:
    url: jdbc:mysql://localhost:3306/qfedu?useUnicode=true&characterEncoding=utf-8&serverTimezone=UTC&useSSL=true
    driver-class-name: com.mysql.cj.jdbc.Driver
    username: root
    password: 123456
  mvc:
    view:
      prefix: /
      suffix: .jsp
此时,UserController中的跳转就可以直接写index。

UserController.java:
package com.qfedu.springboot.demo.controller;

import com.qfedu.springboot.demo.entity.User;
import com.qfedu.springboot.demo.service.UserService;
import org.springframework.stereotype.Controller;
import org.springframework.web.bind.annotation.RequestMapping;

import javax.annotation.Resource;

@Controller
@RequestMapping("/user")
public class UserController {

    //通过Resoure注入UserService
    @Resource
    private UserService userService;

    //前后端分离。前端所有消息都是异步请求。
    @RequestMapping("/regist")
    //@ResponseBody
    public String regist(User user){
        userService.userRegist(user);
        return "index";
    }
}
8.提高页面的安全性:将index.jsp放到WEB-INF文件夹下后,index.jap文件将只能通过controller访问。

然后将application.yml配置文件中的前缀改为 “/WEB-INF/” ,则可访问。
application.yml的spring部分:
spring:
  datasource:
    url: jdbc:mysql://localhost:3306/qfedu?useUnicode=true&characterEncoding=utf-8&serverTimezone=UTC&useSSL=true
    driver-class-name: com.mysql.cj.jdbc.Driver
    username: root
    password: 123456
  mvc:
    view:
      prefix: /WEB-INF/
      suffix: .jsp
在包controller中重新创建一个类PageController,只做页面的请求转发。
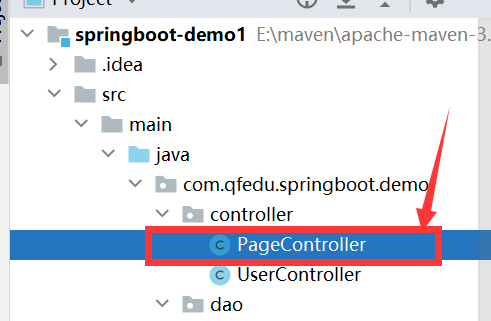
PageController.java:
package com.qfedu.springboot.demo.controller;

import org.springframework.stereotype.Controller;
import org.springframework.web.bind.annotation.RequestMapping;

@Controller
public class PageController {

    @RequestMapping("/index.html")      //障眼法
    public String index(){
        return "index";
    }
}
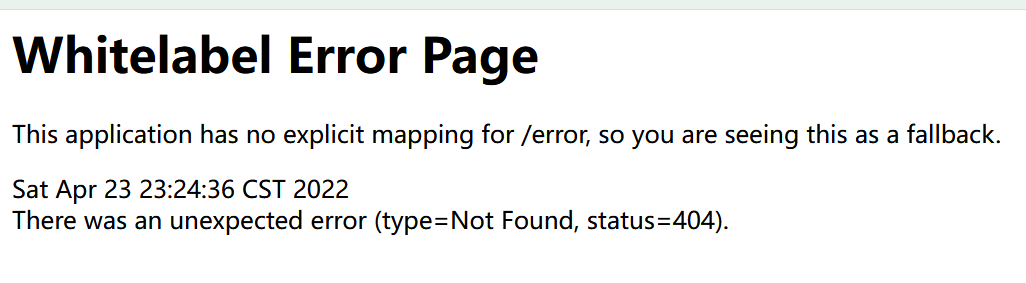
9.测试
输入 “http://localhost:8081/demo1/index.jsp”

结果不能访问到页面了。
而输入 “http://localhost:8081/demo1/index.html”

则可以访问 index.jsp 页面。
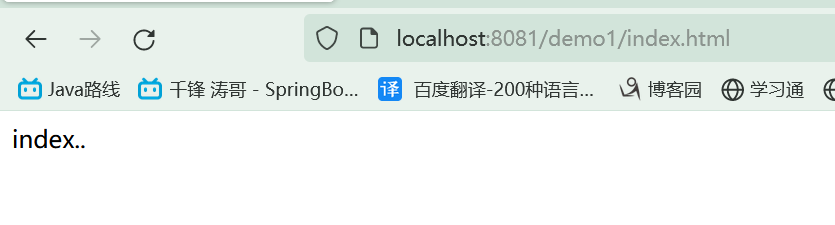
实际过程:这个请求被controller拦截,然后controller转发到了index,再通过application.yml的mvc增加前缀,后缀配置,最后成功访问!
版权声明:本文内容由互联网用户自发贡献,该文观点仅代表作者本人。本站仅提供信息存储空间服务,不拥有所有权,不承担相关法律责任。如发现本站有涉嫌侵权/违法违规的内容, 请发送邮件至 举报,一经查实,本站将立刻删除。
文章由极客之家整理,本文链接:https://www.bmabk.com/index.php/post/128194.html

