
概述
在实际的企业开发环境中,往往都会将环境分为开发环境、测试环境和生产环境,并且每个环境基本上都是互相隔离的,也就是说,开发环境、测试环境和生产环境它们之间是互不相通的。
通过@Profile注解可以实现不同环境的配置和切换。
@Profile注解概述
在容器中如果存在同一类型的多个组件,那么可以使用@Profile注解标识要获取的是哪一个bean。也可以说@Profile注解是Spring为我们提供的可以根据当前环境,动态地激活和切换一系列组件的功能。这个功能在不同的环境使用不同的变量的情景下特别有用,例如,开发环境、测试环境、生产环境使用不同的数据源,在不改变代码的情况下,可以使用这个注解来动态地切换要连接的数据库。
接下来,我们来看下@Profile注解的源码,如下所示。


从其源码中我们可以得出如下三点结论:
- @Profile注解可以标注在方法、配置类上。
- 如果@Profile注解标注在配置类上,那么只有是在指定的环境的时候,整个配置类里面的所有配置才会生效。
- 如果一个bean上没有使用@Profile注解进行标注,那么这个bean在任何环境下都会被注册到IOC容器中,当然了,前提是在整个配置类生效的情况下。
案例
案例使用@Profile注解实现开发、测试和生产环境的配置和切换。这里,我们以开发过程中要用到的数据源为例(数据源也是一种组件哟😊)。我们希望在开发环境中,数据源是连向A数据库的;在测试环境中,数据源是连向B数据库的,而且在这一过程中,测试人员压根就不需要改动任何代码;最终项目上线之后,数据源连向C数据库,而且最重要的一点是在整个过程中,我们不希望改动大量的代码,而实现数据源的切换。
环境搭建
首先,我们需要在pom.xml文件中添加c3p0数据源和MySQL驱动的依赖,如下所示。
<dependency>
    <groupId>c3p0</groupId>
    <artifactId>c3p0</artifactId>
    <version>0.9.1.2</version>
</dependency>
<dependency>
    <groupId>mysql</groupId>
    <artifactId>mysql-connector-java</artifactId>
    <version>5.1.44</version>
</dependency>
添加完以上依赖之后,我们还得在项目中新建一个配置类,例如MainConfigOfProfile,并在该配置类中模拟开发、测试、生产环境的数据源,如下所示。
package com.meimeixia.config;

import javax.sql.DataSource;

import org.springframework.context.annotation.Bean;
import org.springframework.context.annotation.Configuration;

import com.mchange.v2.c3p0.ComboPooledDataSource;

/**
 *
 * @author liayun
 *
 */
@Configuration
public class MainConfigOfProfile {

	@Bean("testDataSource")
	public DataSource dataSourceTest() throws Exception {
		ComboPooledDataSource dataSource = new ComboPooledDataSource();
		dataSource.setUser("root");
		dataSource.setPassword("liayun");
		dataSource.setJdbcUrl("jdbc:mysql://localhost:3306/test");
		dataSource.setDriverClass("com.mysql.jdbc.Driver");
		return dataSource;
	}

	@Bean("devDataSource")
	public DataSource dataSourceDev() throws Exception {
		ComboPooledDataSource dataSource = new ComboPooledDataSource();
		dataSource.setUser("root");
		dataSource.setPassword("liayun");
		dataSource.setJdbcUrl("jdbc:mysql://localhost:3306/ssm_crud");
		dataSource.setDriverClass("com.mysql.jdbc.Driver");
		return dataSource;
	}

	@Bean("prodDataSource")
	public DataSource dataSourceProd() throws Exception {
		ComboPooledDataSource dataSource = new ComboPooledDataSource();
		dataSource.setUser("root");
		dataSource.setPassword("liayun");
		dataSource.setJdbcUrl("jdbc:mysql://localhost:3306/scw_0515");
		dataSource.setDriverClass("com.mysql.jdbc.Driver");
		return dataSource;
	}
}
该配置类这样写,是一点儿问题都没有的,但你有没有想过这一点,在真实项目开发中,那些数据库连接的相关信息,例如用户名、密码以及MySQL数据库驱动类的全名,这些都是要抽取在一个配置文件中的。
因此,我们需要在项目的src/main/resources目录下新建一个配置文件,例如dbconfig.properties,在其中写上数据库连接的相关信息,如下所示。
db.user=root
db.password=liayun
db.driverClass=com.mysql.jdbc.Driver
这里很容易获取配置文件中的信息,我们利用之前的知识通过不同的方式把配置值注入组件中。
该MainConfigOfProfile配置类实现了一个EmbeddedValueResolverAware接口,我们通过该接口能够获取到String值解析器。也就是说,IOC容器启动时会自动地将String值的解析器(即StringValueResolver)传递过来给我们用,咱们可以用它来解析一些字符串。
package com.meimeixia.config;

import javax.sql.DataSource;

import org.springframework.beans.factory.annotation.Value;
import org.springframework.context.EmbeddedValueResolverAware;
import org.springframework.context.annotation.Bean;
import org.springframework.context.annotation.Configuration;
import org.springframework.context.annotation.PropertySource;
import org.springframework.util.StringValueResolver;

import com.mchange.v2.c3p0.ComboPooledDataSource;

/**
 *
 * @author liayun
 *
 */
@PropertySource("classpath:/dbconfig.properties") // 加载外部的配置文件
@Configuration
public class MainConfigOfProfile implements EmbeddedValueResolverAware {

	@Value("${db.user}")
	private String user;

	private StringValueResolver valueResolver;

	private String dirverClass;

	@Bean("testDataSource")
	public DataSource dataSourceTest(@Value("${db.password}") String pwd) throws Exception {
		ComboPooledDataSource dataSource = new ComboPooledDataSource();
		dataSource.setUser(user);
		dataSource.setPassword(pwd);
		dataSource.setJdbcUrl("jdbc:mysql://localhost:3306/test");
		dataSource.setDriverClass(dirverClass);
		return dataSource;
	}

	@Bean("devDataSource")
	public DataSource dataSourceDev(@Value("${db.password}") String pwd) throws Exception {
		ComboPooledDataSource dataSource = new ComboPooledDataSource();
		dataSource.setUser(user);
		dataSource.setPassword(pwd);
		dataSource.setJdbcUrl("jdbc:mysql://localhost:3306/ssm_crud");
		dataSource.setDriverClass(dirverClass);
		return dataSource;
	}

	@Bean("prodDataSource")
	public DataSource dataSourceProd(@Value("${db.password}") String pwd) throws Exception {
		ComboPooledDataSource dataSource = new ComboPooledDataSource();
		dataSource.setUser(user);
		dataSource.setPassword(pwd);
		dataSource.setJdbcUrl("jdbc:mysql://localhost:3306/scw_0515");
		dataSource.setDriverClass(dirverClass);
		return dataSource;
	}

	@Override
	public void setEmbeddedValueResolver(StringValueResolver resolver) {
		this.valueResolver = resolver;
		dirverClass = valueResolver.resolveStringValue("${db.driverClass}");
	}
}
这个配置类相对来说还算是比较简单的,其中使用@Bean(“devDataSource”)注解标注的是开发环境使用的数据源;使用@Bean(“testDataSource”)注解标注的是测试环境使用的数据源;使用@Bean(“prodDataSource”)注解标注的是生产环境使用的数据源。
接着,我们创建一个单元测试类,例如IOCTest_Profile,并在该类中新建一个test01()方法来进行测试,如下所示。
package com.meimeixia.test;

import javax.sql.DataSource;

import org.junit.Test;
import org.springframework.context.annotation.AnnotationConfigApplicationContext;

import com.meimeixia.config.MainConfigOfProfile;

public class IOCTest_Profile {

	@Test
	public void test01() {
		AnnotationConfigApplicationContext applicationContext = new AnnotationConfigApplicationContext(MainConfigOfProfile.class);

		String[] namesForType = applicationContext.getBeanNamesForType(DataSource.class);
		for (String name : namesForType) {
			System.out.println(name);
		}
		// 关闭容器
		applicationContext.close();
	}
}
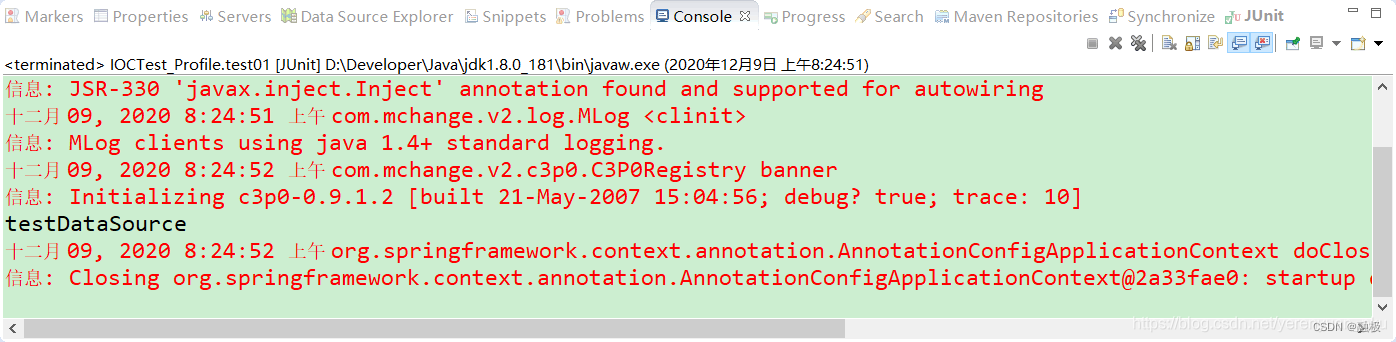
最后,运行以上test01()方法,输出的结果信息如下所示。

可以看到三种不同的数据源成功注册到了IOC容器中,说明我们的环境搭建成功了。
根据环境注册bean
我们成功搭建环境之后,接下来,就是要实现根据不同的环境来向IOC容器中注册相应的bean了。也就是说,我们要实现在开发环境注册开发环境下使用的数据源;在测试环境注册测试环境下使用的数据源;在生产环境注册生产环境下使用的数据源。此时,@Profile注解就显示出其强大的特性了。
我们在MainConfigOfProfile配置类中为每个数据源添加@Profile注解标识,如下所示。
package com.meimeixia.config;

import javax.sql.DataSource;

import org.springframework.beans.factory.annotation.Value;
import org.springframework.context.EmbeddedValueResolverAware;
import org.springframework.context.annotation.Bean;
import org.springframework.context.annotation.Configuration;
import org.springframework.context.annotation.Profile;
import org.springframework.context.annotation.PropertySource;
import org.springframework.util.StringValueResolver;

import com.mchange.v2.c3p0.ComboPooledDataSource;

/**
 *
 * @author liayun
 *
 */
@PropertySource("classpath:/dbconfig.properties") // 加载外部的配置文件
@Configuration
public class MainConfigOfProfile implements EmbeddedValueResolverAware {

	@Value("${db.user}")
	private String user;

	private StringValueResolver valueResolver;

	private String dirverClass;

	@Profile("test")
	@Bean("testDataSource")
	public DataSource dataSourceTest(@Value("${db.password}") String pwd) throws Exception {
		ComboPooledDataSource dataSource = new ComboPooledDataSource();
		dataSource.setUser(user);
		dataSource.setPassword(pwd);
		dataSource.setJdbcUrl("jdbc:mysql://localhost:3306/test");
		dataSource.setDriverClass(dirverClass);
		return dataSource;
	}

	@Profile("dev") // 定义了一个环境标识,只有当dev环境被激活以后,我们这个bean才能被注册进来
	@Bean("devDataSource")
	public DataSource dataSourceDev(@Value("${db.password}") String pwd) throws Exception {
		ComboPooledDataSource dataSource = new ComboPooledDataSource();
		dataSource.setUser(user);
		dataSource.setPassword(pwd);
		dataSource.setJdbcUrl("jdbc:mysql://localhost:3306/ssm_crud");
		dataSource.setDriverClass(dirverClass);
		return dataSource;
	}

	@Profile("prod")
	@Bean("prodDataSource")
	public DataSource dataSourceProd(@Value("${db.password}") String pwd) throws Exception {
		ComboPooledDataSource dataSource = new ComboPooledDataSource();
		dataSource.setUser(user);
		dataSource.setPassword(pwd);
		dataSource.setJdbcUrl("jdbc:mysql://localhost:3306/scw_0515");
		dataSource.setDriverClass(dirverClass);
		return dataSource;
	}

	@Override
	public void setEmbeddedValueResolver(StringValueResolver resolver) {
		this.valueResolver = resolver;
		dirverClass = valueResolver.resolveStringValue("${db.driverClass}");
	}
}
可以看到,我们使用@Profile(“dev”)注解来标识在开发环境下注册devDataSource;使用@Profile(“test”)注解来标识在测试环境下注册testDataSource;使用@Profile(“prod”)注解来标识在生产环境下注册prodDataDource。
此时,我们运行IOCTest_Profile类中的test01()方法,发现Eclipse控制台并未输出任何结果信息。 说明我们为不同的数据源添加@Profile注解后,默认是不会向IOC容器中注册bean的,需要我们根据环境显示指定向IOC容器中注册相应的bean。
换句话说,通过@Profile注解加了环境标识的bean,只有这个环境被激活的时候,相应的bean才会被注册到IOC容器中。
如果我们需要一个默认的环境,那么该怎么办呢?此时,我们可以通过@Profile(“default”)注解来标识一个默认的环境,例如,我们将devDataSource环境标识为默认环境,如下所示。
@Profile("default")
// @Profile("dev") // 定义了一个环境标识,只有当dev环境被激活以后,我们这个bean才能被注册进来
@Bean("devDataSource")
public DataSource dataSourceDev(@Value("${db.password}") String pwd) throws Exception {
    ComboPooledDataSource dataSource = new ComboPooledDataSource();
    dataSource.setUser(user);
    dataSource.setPassword(pwd);
    dataSource.setJdbcUrl("jdbc:mysql://localhost:3306/ssm_crud");
    dataSource.setDriverClass(dirverClass);
    return dataSource;
}
此时,我们运行IOCTest_Profile类中的test01()方法,输出的结果信息如下所示。

可以看到,我们在devDataSource数据源上使用@Profile(“default”)注解将其设置为默认的数据源,运行测试方法时Eclipse控制台会输出devDataSource。
接下来,我们将devDataSource数据源上的@Profile(“default”)注解还原成@Profile(“dev”)注解,重新标识它为一个开发环境下注册的数据源,好方便下面的测试。
那么,我们如何根据不同的环境来注册相应的bean呢?例如,我们想在程序运行的时候,将其切换到测试环境下。
第一种方式就是根据命令行参数来确定环境,我们在运行程序的时候可以添加相应的命令行参数。例如,如果我们现在的环境是测试环境,那么可以在运行程序的时候添加如下命令行参数。

此时,点击Run按钮运行IOCTest_Profile类中的test01()方法,输出的结果信息如下所示。
第二种方式就是通过写代码的方式来激活某种环境,其实主要是通过AnnotationConfigApplicationContext类的无参构造方法来实现,具体步骤如下:
- 在bean上加@Profile注解,其value属性值为环境标识,可以自定义
- 使用AnnotationConfigApplicationContext类的无参构造方法创建容器
- 设置容器环境,其值为第1步设置的环境标识
- 设置容器的配置类
- 刷新容器
温馨提示:2、4、5步其实是AnnotationConfigApplicationContext类中带参构造方法的步骤,以上这几个步骤相当于是把其带参构造方法拆开,在其中插入一条语句设置容器环境,这些我们可以在AnnotationConfigApplicationContext类的带参构造方法中看到,如下所示。

好了,我们要开始正式编写代码来激活某种环境了。我们先在程序中调用AnnotationConfigApplicationContext类的无参构造方法来创建一个IOC容器,然后在容器进行初始化之前,为其设置相应的环境,接着再为容器设置主配置类,最后刷新一下容器。例如,我们将IOC容器设置为测试环境,如下所示。
@Test
public void test02() {
	// 1. 使用无参构造器创建一个IOC容器
	AnnotationConfigApplicationContext applicationContext = new AnnotationConfigApplicationContext();
	// 2. 在我们容器还没启动创建其他bean之前,先设置需要激活的环境(可以设置激活多个环境哟)
	applicationContext.getEnvironment().setActiveProfiles("test");
	// 3. 注册主配置类
	applicationContext.register(MainConfigOfProfile.class);
	// 4. 启动刷新容器
	applicationContext.refresh();

	String[] namesForType = applicationContext.getBeanNamesForType(DataSource.class);
	for (String name : namesForType) {
		System.out.println(name);
	}

	// 关闭容器
	applicationContext.close();
}
此时,我们运行以上test02()方法,输出的结果信息如下所示。

@Profile注解不仅可以标注在方法上,也可以标注在配置类上。如果标注在配置类上,那么只有是在指定的环境的时候,整个配置类里面的所有配置才会生效。例如,我们在MainConfigOfProfile配置类上标注上@Profile(“dev”)注解,如下所示。
@Profile("dev") // @Profile注解除了能写到bean上,还能写到类上
@PropertySource("classpath:/dbconfig.properties") // 加载外部的配置文件
@Configuration
public class MainConfigOfProfile implements EmbeddedValueResolverAware {
	/*********代码省略*********/
}
小结
如果一个bean上没有使用@Profile注解进行标注,那么这个bean在任何环境下都会被注册到IOC容器中。
通过spring.profiles.active指定profile文件
配置文件合并与加载顺序
参考
Spring注解驱动开发第24讲——使用@Profile注解实现开发、测试和生产环境的配置和切换,看完这篇我彻底会了!!
版权声明:本文内容由互联网用户自发贡献,该文观点仅代表作者本人。本站仅提供信息存储空间服务,不拥有所有权,不承担相关法律责任。如发现本站有涉嫌侵权/违法违规的内容, 请发送邮件至 举报,一经查实,本站将立刻删除。
文章由极客之音整理,本文链接:https://www.bmabk.com/index.php/post/99988.html

