
SpringDataJpa多对多关联关系
前言
案例Github地址(可以用git clone 到本地) https://github.com/chenxiban/SpringDataJpa-Many-To-Many.git
今天为大家分享:SpringDataJpa多对多关联关系。
前面讲了SpringDataJpa自定义查询语句(JPQL),请查看博主的SpringDataJpa系列文章。欢迎关注!
多对多实体关系
我们来介绍一下表与表之间的多对多关系。这种关系在CRM管理系统中用的非常多(比如:用户和角色之间,角
色和模块之间等)。Spring Data Jpa框架为我们提供了非常简单的处理操作(在实体类中添加相关的注解),接下来我们以springbootjpamanytomany数据库中的用户表和角色表为例进行演示,属性文件,项目主类,pom.xml文件与上一文章(SpringDataJpa一对多、多对一关系关联以及一对多多对一双向关联)案例相同,不再介绍:
1.新建实体类
在com.cyj.springboot.entity下创建用户和角色实体,代码如下:
User
package com.cyj.springboot.entity;

import java.util.HashSet;
import java.util.Set;

import javax.persistence.Entity;
import javax.persistence.FetchType;
import javax.persistence.GeneratedValue;
import javax.persistence.Id;
import javax.persistence.JoinColumn;
import javax.persistence.JoinTable;
import javax.persistence.ManyToMany;
import javax.persistence.Table;

import org.hibernate.annotations.Cascade;
import org.hibernate.annotations.CascadeType;
import org.hibernate.annotations.GenericGenerator;
import org.hibernate.annotations.NotFound;
import org.hibernate.annotations.NotFoundAction;

import com.fasterxml.jackson.annotation.JsonIgnore;

@Entity                                                //实体
@Table(name="usertb")                                  //表名
@GenericGenerator(name="userId", strategy="increment")  //声明主键生成策略
public class User {
    @Id                                                //指定主键
    @GeneratedValue	//自动增长列               //设定主键生成策略
    private Long userId;//用户唯一标识userId
    private String userName;//用户姓名
    private String userSex;//用户性别

    @JsonIgnore
    @ManyToMany(fetch = FetchType.EAGER)                                      //指定多对多关系    //默认懒加载,只有调用getter方法时才加载数据
    @Cascade(value={CascadeType.SAVE_UPDATE})          //设置级联关系
    @JoinTable(name="user_role_tb",                       //指定第三张中间表名称
                 joinColumns={@JoinColumn(name="user_role_tb_user_id")},             //本表主键userId与第三张中间表user_role_tb的外键user_role_tb_user_id对应
                    inverseJoinColumns={@JoinColumn(name="user_role_tb_role_id")})  //多对多关系另一张表与第三张中间表表的外键的对应关系
    @NotFound(action = NotFoundAction.IGNORE)	//NotFound : 意思是找不到引用的外键数据时忽略,NotFound默认是exception
    private Set<Role> roleSet = new HashSet<Role>();//用户所拥有的角色集合

	//----------------------------- 以下是构造方法 ------------------------

	//----------------------------- 以下是Getter和setter方法 ------------------------
    public Long getUserId() {
		return userId;
	}
	public void setUserId(Long userId) {
		this.userId = userId;
	}
	public String getUserName() {
		return userName;
	}
	public void setUserName(String userName) {
		this.userName = userName;
	}
	public String getUserSex() {
		return userSex;
	}
	public void setUserSex(String userSex) {
		this.userSex = userSex;
	}
	public Set<Role> getRoleSet() {
		return roleSet;
	}
	public void setRoleSet(Set<Role> roleSet) {
		this.roleSet = roleSet;
	}

  //----------------------------- 以下是重写的toString方法 ------------------------

	@Override
	public String toString() {
		return "User [userId=" + userId + ", userName=" + userName + ", userSex=" + userSex + "]";
	}

	public String showUserAndRoleSet() {
		return "User [userId=" + userId + ", userName=" + userName + ", userSex=" + userSex + ", roleSet=" + roleSet
				+ "]";
	}

   /* @Override
    public String toString() {
        return "UserBean [id=" + id + ", name=" + name + ", sex=" + sex
                + ", role=" + role + "]";
    }*/
}
Role
package com.cyj.springboot.entity;

import java.util.HashSet;

import java.util.Set;

import javax.persistence.Column;
import javax.persistence.Entity;
import javax.persistence.FetchType;
import javax.persistence.GeneratedValue;
import javax.persistence.Id;
import javax.persistence.JoinColumn;
import javax.persistence.JoinTable;
import javax.persistence.ManyToMany;
import javax.persistence.Table;

import org.hibernate.annotations.Cascade;
import org.hibernate.annotations.CascadeType;
import org.hibernate.annotations.GenericGenerator;
import org.hibernate.annotations.NotFound;
import org.hibernate.annotations.NotFoundAction;

import com.fasterxml.jackson.annotation.JsonIgnore;
import com.cyj.springboot.entity.User;


@Entity                                              //实体
@Table(name="roletb")                                //表名
@GenericGenerator(name="roleId", strategy="increment")//声明主键生成策略
public class Role {
    @Id                                              //主键
    @GeneratedValue	//自动增长列                   //设置主键生成策略
    private Long roleId;//角色唯一标识roleId
    private String rolePost;//角色的职位
    private int rolePay;    //角色的薪资

    @JsonIgnore
    @ManyToMany(fetch=FetchType.EAGER)                                      //多对多关系
    @Cascade(value={CascadeType.SAVE_UPDATE})        //级联关系
    @JoinTable(name="user_role_tb",                       //指定第三张中间表名称
                joinColumns={@JoinColumn(name="user_role_tb_role_id")},   //本表主键roleId与第三张中间表user_role_tb的外键user_role_tb_role_id对应.本表与中间表的外键对应关系
                    inverseJoinColumns={@JoinColumn(name="user_role_tb_user_id")}) //另一张表与中间表的外键的对应关系
    @NotFound(action = NotFoundAction.IGNORE)	//NotFound : 意思是找不到引用的外键数据时忽略,NotFound默认是exception
    private Set<User>  userSet = new HashSet<User>();//拥有该角色的所有用户集合

  //----------------------------- 以下是构造方法 ------------------------

  //----------------------------- 以下是Getter和setter方法 ------------------------
    public Long getRoleId() {
		return roleId;
	}
	public void setRoleId(Long roleId) {
		this.roleId = roleId;
	}
	public String getRolePost() {
		return rolePost;
	}
	public void setRolePost(String rolePost) {
		this.rolePost = rolePost;
	}
	public int getRolePay() {
		return rolePay;
	}
	public void setRolePay(int rolePay) {
		this.rolePay = rolePay;
	}
	public Set<User> getUserSet() {
		return userSet;
	}
	public void setUserSet(Set<User> userSet) {
		this.userSet = userSet;
	}

  //----------------------------- 以下是重写的toString方法 ------------------------

	@Override
	public String toString() {
		return "Role [roleId=" + roleId + ", rolePost=" + rolePost + ", rolePay=" + rolePay + "]";
	}

	public String showRoleAndUserSet() {
		return "Role [roleId=" + roleId + ", rolePost=" + rolePost + ", rolePay=" + rolePay + ", userSet=" + userSet
				+ "]";
	}

}
(注:两张表在进行多对多操作时,需要借助第三张表,第三张表不需要建实体,只需要在其他两张表的实体中添 加相关注解即可,详情参考实体中的注释)
2.新建 dao类
在com.cyj.springboot.dao下,编写用户和角色的接口,代码如下:
User
package com.cyj.springboot.dao;

import org.springframework.data.jpa.repository.JpaRepository;

import com.cyj.springboot.entity.User;

public interface UserRepository extends JpaRepository<User, Long> {

}
Role
package com.cyj.springboot.dao;

import org.springframework.data.jpa.repository.JpaRepository;

import com.cyj.springboot.entity.Role;

public interface RoleRepository extends JpaRepository<Role, Long>{

}
3.新建service接口
在com.cyj.springboot.service,编写业务逻辑,代码如下:
User
package com.cyj.springboot.service;

import com.cyj.springboot.entity.User;

public interface UserService {

	public User queryById(Long id);

}
Role
package com.cyj.springboot.service;

import com.cyj.springboot.entity.Role;

public interface RoleService {

	public Role queryById(Long id);

}
4.新建service接口的实现类
在com.cyj.springboot.ServiceImpl下,编写业务逻辑接口,代码如下:
User
package com.cyj.springboot.ServiceImpl;

import org.springframework.beans.factory.annotation.Autowired;
import org.springframework.stereotype.Service;

import com.cyj.springboot.dao.UserRepository;
import com.cyj.springboot.entity.User;
import com.cyj.springboot.service.UserService;

@Service
public class UserServiceImpl implements UserService {

	@Autowired
	private UserRepository repository;

	@Override
	public User queryById(Long id) {
		return repository.findOne(id);
	}

}
Role
package com.cyj.springboot.ServiceImpl;

import org.springframework.beans.factory.annotation.Autowired;
import org.springframework.stereotype.Service;

import com.cyj.springboot.dao.RoleRepository;
import com.cyj.springboot.entity.Role;
import com.cyj.springboot.service.RoleService;

@Service
public class RoleServiceImpl implements RoleService {

	@Autowired
	private RoleRepository repository;

	@Override
	public Role queryById(Long id) {
		return repository.findOne(id);
	}

}
5.新建控制器类
在com.cyj.springboot.controller,编写控制器类,代码如下:
User
package com.cyj.springboot.controller;
import org.springframework.beans.factory.annotation.Autowired;
import org.springframework.web.bind.annotation.RequestMapping;
import org.springframework.web.bind.annotation.RestController;
import com.cyj.springboot.entity.User;
import com.cyj.springboot.service.UserService;
/**
* SpringMVC控制器
*
* @Description: 子模块
* @ClassName: CityRestController.java
* @author ChenYongJia
* @Date 2017-10-4 下午8:04:34
* @Email 867647213@qq.com
*/
@RestController
@RequestMapping("/user")
public class UserController {
@Autowired
private UserService service;
/**
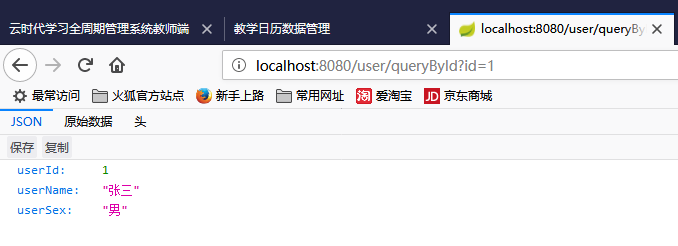
* http://localhost:8080/user/queryById?id=1
*
* @param id
* @return User
*/
@RequestMapping("/queryById")
public User queryById(Long id) {
User user = service.queryById(id);
System.out.println("queryById user=>" + user.showUserAndRoleSet());
return user;
}
}
Role
package com.cyj.springboot.controller;
import org.springframework.beans.factory.annotation.Autowired;
import org.springframework.web.bind.annotation.RequestMapping;
import org.springframework.web.bind.annotation.RestController;
import com.cyj.springboot.entity.Role;
import com.cyj.springboot.service.RoleService;
/**
* SpringMVC控制器
*
* @Description: 子模块
* @ClassName: CityRestController.java
* @author ChenYongJia
* @Date 2017-10-4 下午8:04:34
* @Email 867647213@qq.com
*/
@RestController
@RequestMapping("/role")
public class RoleController {
@Autowired
private RoleService service;
/**
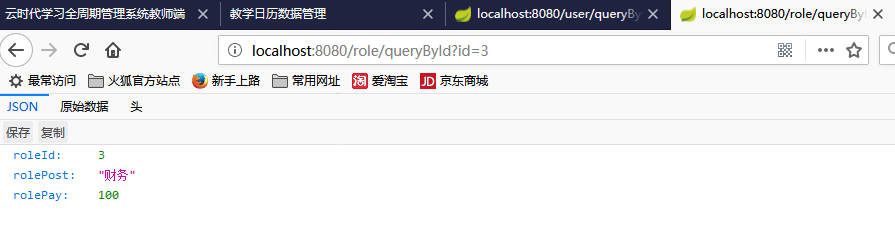
* http://localhost:8080/role/queryById?id=4
*
* @param id
* @return Role
*/
@RequestMapping("/queryById")
public Role queryById(Long id) {
Role role = service.queryById(id);
System.out.println("queryById role=>" + role.showRoleAndUserSet());
return role;
}
}
6.数据库设计(sql文件在static文件夹下面)

7.项目测试
启动项目,自行测试
用戶信息运行如下
角色信息运行如下
好了到这里也该结束了,各位要自己多动手才能学到真正的东西。加油各位
最后
-
更多参考精彩博文请看这里:《陈永佳的博客》
-
喜欢博主的小伙伴可以加个关注、点个赞哦,持续更新嘿嘿!
版权声明:本文内容由互联网用户自发贡献,该文观点仅代表作者本人。本站仅提供信息存储空间服务,不拥有所有权,不承担相关法律责任。如发现本站有涉嫌侵权/违法违规的内容, 请发送邮件至 举报,一经查实,本站将立刻删除。
文章由极客之家整理,本文链接:https://www.bmabk.com/index.php/post/97629.html

