
springboot经典问题总结
1.什么是springboot?
springboot是spring开源组织下的一个子项目,是spring的一站式解决方案,主要是简化了spring的配置,提供了各种启动器,使开发者更容易上手。
2.springboot的四大核心组件
1、自动配置
2、启动依赖
3、Actuator
4、命令行界面
3.springboot的核心注解
@SpringApplication是springboot的核心注解,它主要有以下几个注解组成:
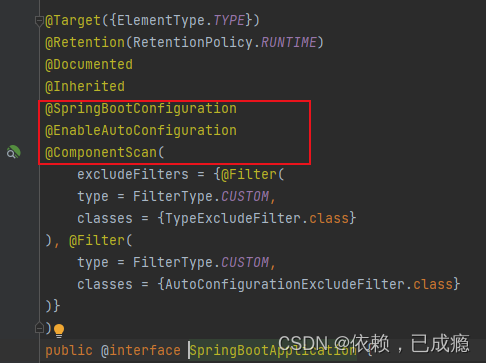

- @SpringbootConfiguration:组合了Configuration注解,实现配置文件功能。
- @EnableAutoConfiguration:打开自动配置功能,也可以关闭某个自动配置的选项
- ComponentScan:spring组件扫描
4.Springboot的starter工作原理
跟踪EnableAutoConfiguration注解,@EnableAutoConfiguration注解引入了 @Import 这个注解。

Import: 导入需要自动配置的组件,此处为AutoConfigurationImportSelector这个类
找到这个类中的getCandidateConfigurations方法
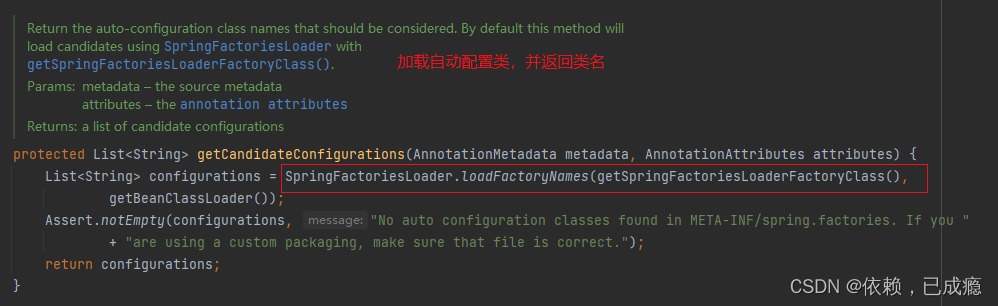
AutoConfigurationImportSelector类的getCandidateConfigurations方法中的调用了SpringFactoriesLoader类的loadFactoryNames方法


SpringFactoriesLoader中的静态方法loadFactoryNames从所有的jar中读取META-INF/spring.factories文件,自动配置的类就定义在这个文件中,这样spring boot就加载到这个自动配置类了。
总结:
1、Spring Boot启动时会去依赖的starter中寻找META-INF/spring.factories文件,然后根据文件中配置的jar包去扫描项目中所依赖的jar包

2、根据Spring Factories配置加载Auto Congifure类
3、根据@Conditional注解的条件,进行自动配置并将bean注入spring

5.Async异步调用方法
在springboot中异步调用方法,只需在方法上加@Async注解即可实现异步方法的调用了,注意,需要在启动类上加@EnableAsync注解
6.springboot配置加载顺序
1、properties文件
2、YAML文件
3、系统环境变量
4、命令行参数等
7.springboot配置多数据源
1、在properties文件中配置多个数据源
2、创建分包mapper,使用@ConfigurationProperties读取properties中的配置,使用@MapperScan注册到对应的mapper中

8.如何使用springboot的全局异常捕获器
Spring 提供了一种使用 ControllerAdvice 处理异常的非常有用的方法。 我们通过实现一个
ControlerAdvice 类,来处理控制器类抛出的所有异常。

9.springboot的监视器
springboot能提供各个服务组件的度量,Spring Boot Actuator,它提供
了一个 Web UI,使我们能够可视化多个应用程序的度量。
10.springboot如何热部署
引入devtools,只需重新编译即可实现热部署
<dependency>
	<groupId>org.springframework.boot</groupId>
	<artifactId>spring-boot-devtools</artifactId>
</dependency>
11.springboot启动流程
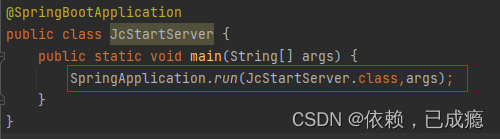
1、启动入口SpringApplication.run(JcStartServer.class,args);
第一步:new了一个SpringApplication对象
第二步:调用了run方法

接下来看看new SpringApplication做了什么
public SpringApplication(ResourceLoader resourceLoader, Class<?>... primarySources) {
        this.sources = new LinkedHashSet();
        this.bannerMode = Mode.CONSOLE;
        this.logStartupInfo = true;
        this.addCommandLineProperties = true;
        this.addConversionService = true;
        this.headless = true;
        this.registerShutdownHook = true;
        this.additionalProfiles = new HashSet();
        this.isCustomEnvironment = false;
        this.lazyInitialization = false;
        this.resourceLoader = resourceLoader;
        Assert.notNull(primarySources, "PrimarySources must not be null");
        // 先把主类保存起来
        this.primarySources = new LinkedHashSet(Arrays.asList(primarySources));
        // 判断运行项目的类型
        this.webApplicationType = WebApplicationType.deduceFromClasspath();
        // 扫描当前路径下META-INF/spring.factories文件,加载ApplicationContextInitializer接口实例
        this.setInitializers(this.getSpringFactoriesInstances(ApplicationContextInitializer.class));
        // 扫描当前路径下META-INF/spring.factories文件的,加载ApplicationListener接口实例
        this.setListeners(this.getSpringFactoriesInstances(ApplicationListener.class));
        this.mainApplicationClass = this.deduceMainApplicationClass();
    }
利用SPI机制扫描 META-INF/spring.factories 这个文件,并且加载 ApplicationContextInitializer、ApplicationListener 接口实例。
1、ApplicationContextInitializer 这个类当springboot上下文Context初始化完成后会调用
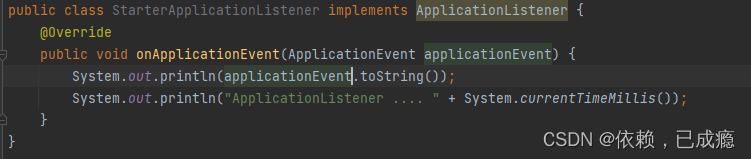
2、ApplicationListener 当springboot启动时事件change后都会触发
下面我们来自定义ApplicationContextInitializer、ApplicationListener 接口实现类,然后Debug来看下效果。

然后在META-INF/spring.factories 文件配置那两个类


总结:上面就是SpringApplication初始化的代码,new SpringApplication()没做啥事情 ,利用SPI机制主要加载了META-INF/spring.factories 下面定义的事件监听器接口实现类
2、执行run()方法
public ConfigurableApplicationContext run(String... args) {
		// 1、这是一个计时器
        StopWatch stopWatch = new StopWatch();
        stopWatch.start();
        // 2、设置一些环境
        ConfigurableApplicationContext context = null;
        Collection<SpringBootExceptionReporter> exceptionReporters = new ArrayList();
        this.configureHeadlessProperty();
        // 3、获取事件监听器SpringApplicationRunListeners类型,并执行starting()方法
        SpringApplicationRunListeners listeners = this.getRunListeners(args);
        listeners.starting();

        Collection exceptionReporters;
        try {
        	// 4、把参数args封装成DefaultApplicationArguments
            ApplicationArguments applicationArguments = new DefaultApplicationArguments(args);
            // 5、准备环境,把环境跟spring上下文绑定好,并且执行environmentPrepared方法
            ConfigurableEnvironment environment = this.prepareEnvironment(listeners, applicationArguments);
            // 6、判断一些环境的值,并设置一些环境的值
            this.configureIgnoreBeanInfo(environment);
            // 7、打印branner
            Banner printedBanner = this.printBanner(environment);
            // 8、根据项目类型创建上下文
            context = this.createApplicationContext();
            // 9、获取异常报告事件监听
            exceptionReporters = this.getSpringFactoriesInstances(SpringBootExceptionReporter.class, new Class[]{ConfigurableApplicationContext.class}, context);
            // 10、准备上下文,执行完成后调用contextPrepared方法
            this.prepareContext(context, environment, listeners, applicationArguments, printedBanner);
            // 11、这个是spring启动的代码,这里就要回去扫描并初始化单例bean了
            this.refreshContext(context);
            // 12、啥也没做
            this.afterRefresh(context, applicationArguments);
            stopWatch.stop();
            if (this.logStartupInfo) {
                (new StartupInfoLogger(this.mainApplicationClass)).logStarted(this.getApplicationLog(), stopWatch);
            }

			// 13、执行ApplicationListeners中的started()方法
            listeners.started(context);
            // 执行Runner
            this.callRunners(context, applicationArguments);
        } catch (Throwable var10) {
            this.handleRunFailure(context, var10, exceptionReporters, listeners);
            throw new IllegalStateException(var10);
        }

        try {
            listeners.running(context);
            return context;
        } catch (Throwable var9) {
            this.handleRunFailure(context, var9, exceptionReporters, (SpringApplicationRunListeners)null);
            throw new IllegalStateException(var9);
        }
    }
2.1、createApplicationContext()
一起来看下context = createApplicationContext(); 这段代码,主要是根据项目类型创建上下文,并且注入几个核心组件类

注入一些spring的核心组件

Web类型项目创建上下文对象 AnnotationConfigServletWebServerApplicationContext 。这里会把 ConfigurationClassPostProcessor 、AutowiredAnnotationBeanPostProcessor 等一些核心组件加入到Spring容器
2.2、refreshContext()
下面一起来看下this.refreshContext(context);这段代码,这个方法启动spring的代码加载了bean,还启动了内置的tomcat

这边可以看到最后调用的是AbstractApplicationContext的refresh()方法,点进去发现是spring容器启动代码

spring启动源码之前写过了,这里就不看了,主要看onfresh()这个方法

因为我们启动的是web容器,所以就看ServletWebServerApplicationContext这子类
ServletWebServerApplicationContext的关系图,它继承了AbstractApplicationContext

我们就去看ServletWebServerApplicationContext中的onfresh()方法,可以看createWebServer()方法,这就是启动内置web容器的入口。

this.getWebServerFactory()方法获取webServer工厂
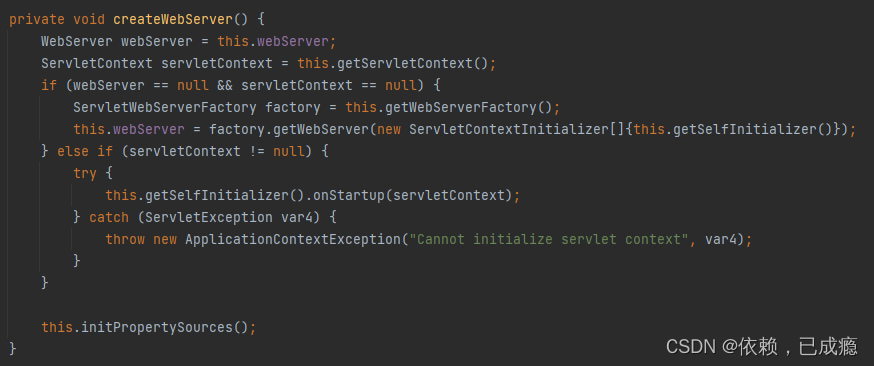
这里会根据web容器类型获取bean

我们再回去看this.webServer = factory.getWebServer(new ServletContextInitializer[]{this.getSelfInitializer()});代码
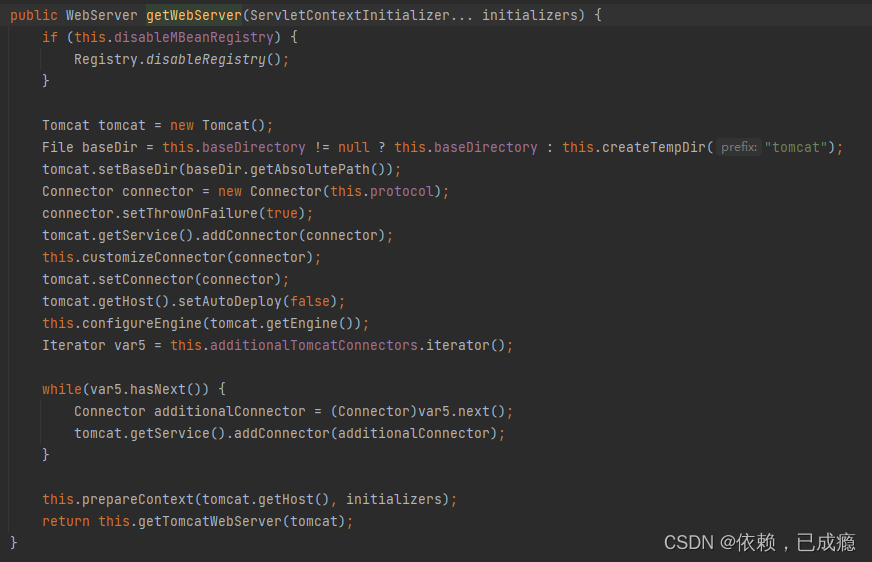
点进去就能看到一个很熟悉的名字tomcat
总结:
1、new了一个SpringApplication对象,使用SPI技术加载加载 ApplicationContextInitializer、ApplicationListener 接口实例
2、调用SpringApplication.run() 方法
3、调用createApplicationContext()方法创建上下文对象,创建上下文对象同时会注册spring的核心组件类(ConfigurationClassPostProcessor 、AutowiredAnnotationBeanPostProcessor 等)。
4、调用refreshContext() 方法启动Spring容器和内置的Servlet容器
版权声明:本文内容由互联网用户自发贡献,该文观点仅代表作者本人。本站仅提供信息存储空间服务,不拥有所有权,不承担相关法律责任。如发现本站有涉嫌侵权/违法违规的内容, 请发送邮件至 举报,一经查实,本站将立刻删除。
文章由极客之音整理,本文链接:https://www.bmabk.com/index.php/post/90983.html

