
1.概述
1.1OpenFeign是什么
官网
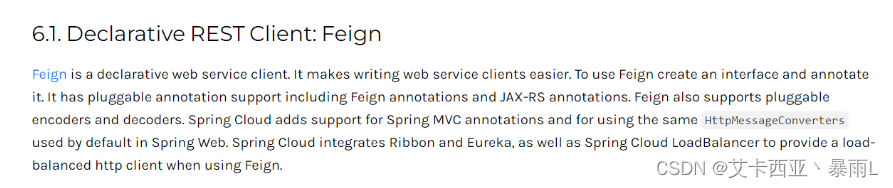
Feign是一个声明式WebService客户端,使用Feign能让编写Web Service客户端更加简单。
它的使用方法是定义一个服务接口然后在上面添加注解,Feign也支持可拔插式的编码器和解码器,Spring Cloud对Feign进行了封装,使其支持了Spring MVC标准注解和HttpMessageConverters,Feign可以与Eureka和Ribbon组合使用以支持负载均衡


Feign是一个声明式的Web服务客户端,让编写Web服务客户端变得非常容易,只需创建一个接口并在接口上添加注解即可
1.2作用
Feign能干什么
Feign旨在使编写Java Http客户端变得更容易。
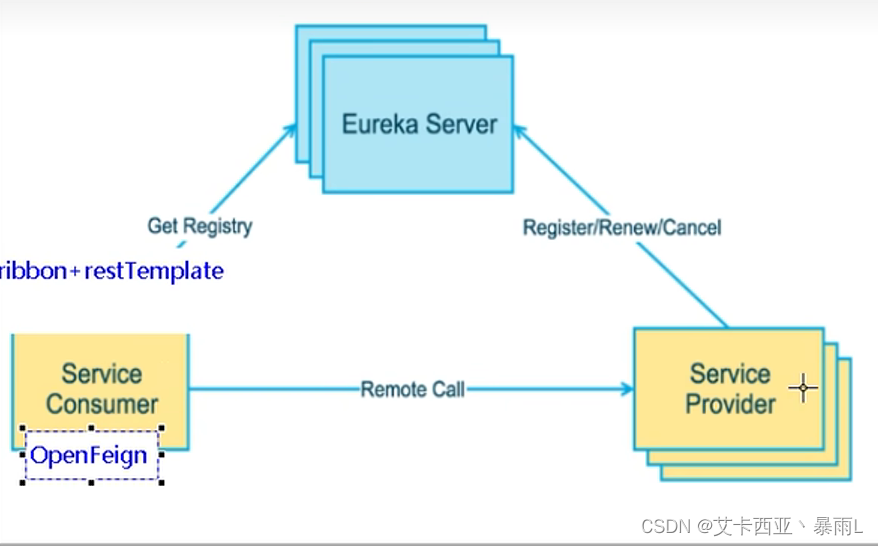
前面在使用Ribbon+RestTemplate时,利用RestTemplate对http请求的封装处理,形成了一套模版化的调用方法。但是在实际开发中,由于对服务依赖的调用可能不止一处,往往一个接口会被多处调用。所以通常都会针对每个微服务自行封装一些客户端类来包装这些依赖服务的调用。所以,Feign在此基础上做了进一步封装,由他来帮助我们定义和实现依赖服务接口的定义。在Feign的实现下,我们只需创建一个接口并使用注解的方式来配置它(以前是Dao接口上面标注Mapper注解,现在是一个微服务接口上面标注一个Feign注解即可),即可完成对服务提供方的接口绑定,简化了使用Spring cloud Ribbon时,自动封装服务调用客户端的开发量。

以前主要用的是RestTemplate,每个人都要去写一遍
尽量的面向接口编程,分层解耦以后,8001服务肯定要对外暴露服务接口,order和payment就用接口沟通,8001所要提供的服务在8001中肯定是已经定义好的,那8001中定义了哪些方法,order与之相对应的也创造一个接口规定为Feign接口,8001中有什么方法,我这个Feign就调哪些方法,实现Feign接口到业务提供方的服务接口的一一配对,这样就可以更好的面向微服务接口编程
Feign集成了Ribbon
Feign集成了Ribbon,利用Ribbon维护了Payment的服务列表信息,并且通过轮询实现了客户端的负载均衡。而与Ribbon不同的是,通过feign只需要定义服务绑定接口且以声明式的方法,优雅而简单的实现了服务调用
1.3Feign和OpenFeign两者区别
Feign:
- Feign是Spring Cloud组件中的一个轻量级RESTful的HTTP服务客户端
- Feign内置了Ribbon,用来做客户端负载均衡,去调用服务注册中心的服务
- Feign的使用方式是:使用Feign的注解定义接口,调用这个接口,就可以调用服务注册中心的服务
<dependency>
    <groupId>org.springframework.cloud</groupId>
    <artifactId>spring-cloud-starter-feign</artifactId>
</dependency>
OpenFeign(选择这个):
- OpenFeign是Spring Cloud 在Feign的基础上支持了SpringMVC的注解,如@RequesMapping等等
- OpenFeign的@FeignClient可以解析SpringMVC的@RequestMapping注解下的接口,并通过动态代理的方式产生实现类,实现类中做负载均衡并调用其他服务
<dependency>
    <groupId>org.springframework.cloud</groupId>
    <artifactId>spring-cloud-starter-openfeign</artifactId>
</dependency>
2.OpenFeign使用步骤
1.接口+注解
微服务调用接口+@FeignClient
2.新建cloud-consumer-feign-order80
Feign是用在消费端
3.POM
<?xml version="1.0" encoding="UTF-8"?>
<project xmlns="http://maven.apache.org/POM/4.0.0"
         xmlns:xsi="http://www.w3.org/2001/XMLSchema-instance"
         xsi:schemaLocation="http://maven.apache.org/POM/4.0.0 http://maven.apache.org/xsd/maven-4.0.0.xsd">
    <modelVersion>4.0.0</modelVersion>
    <parent>
        <groupId>com.atguigu.springcloud</groupId>
        <artifactId>cloud2022</artifactId>
        <version>1.0-SNAPSHOT</version>
    </parent>

    <artifactId>cloud-consumer-feign-order80</artifactId>

    <properties>
        <maven.compiler.source>8</maven.compiler.source>
        <maven.compiler.target>8</maven.compiler.target>
        <project.build.sourceEncoding>UTF-8</project.build.sourceEncoding>
    </properties>

    <dependencies>
        <!--openfeign-->
        <dependency>
            <groupId>org.springframework.cloud</groupId>
            <artifactId>spring-cloud-starter-openfeign</artifactId>
        </dependency>
        <!--eureka client-->
        <dependency>
            <groupId>org.springframework.cloud</groupId>
            <artifactId>spring-cloud-starter-netflix-eureka-client</artifactId>
        </dependency>
        <!-- 引入自己定义的api通用包,可以使用Payment支付Entity -->
        <dependency>
            <groupId>com.atguigu.springcloud</groupId>
            <artifactId>cloud-api-common</artifactId>
            <version>${project.version}</version>
        </dependency>
        <!--web-->
        <dependency>
            <groupId>org.springframework.boot</groupId>
            <artifactId>spring-boot-starter-web</artifactId>
        </dependency>
        <dependency>
            <groupId>org.springframework.boot</groupId>
            <artifactId>spring-boot-starter-actuator</artifactId>
        </dependency>
        <!--一般基础通用配置-->
        <dependency>
            <groupId>org.springframework.boot</groupId>
            <artifactId>spring-boot-devtools</artifactId>
            <scope>runtime</scope>
            <optional>true</optional>
        </dependency>
        <dependency>
            <groupId>org.projectlombok</groupId>
            <artifactId>lombok</artifactId>
            <optional>true</optional>
        </dependency>
        <dependency>
            <groupId>org.springframework.boot</groupId>
            <artifactId>spring-boot-starter-test</artifactId>
            <scope>test</scope>
        </dependency>
    </dependencies>
</project>

天生具有Ribbon
4.YML
server:
  port: 80

eureka:
  client:
    register-with-eureka: false
    service-url:
      defaultZone: http://eureka7001.com:7001/eureka/,http://eureka7002.com:7002/eureka
5.主启动
添加注解激活并开启Feign
@EnableFeignClients
package com.atguigu.springcloud;

import org.springframework.boot.SpringApplication;
import org.springframework.boot.autoconfigure.SpringBootApplication;
import org.springframework.cloud.openfeign.EnableFeignClients;

/**
 * 简要描述
 *
 * @Author: ASuLe
 * @Date: 2023/1/13 17:42
 * @Version: 1.0
 * @Description: 文件作用详细描述....
 */
@SpringBootApplication
//激活并开启Feign
@EnableFeignClients
public class OrderFeignMain80 {
    public static void main(String[] args) {
        SpringApplication.run(OrderFeignMain80.class, args);
    }
}
6.业务类
-
业务逻辑接口+
@FeignClient配置provider配置 -
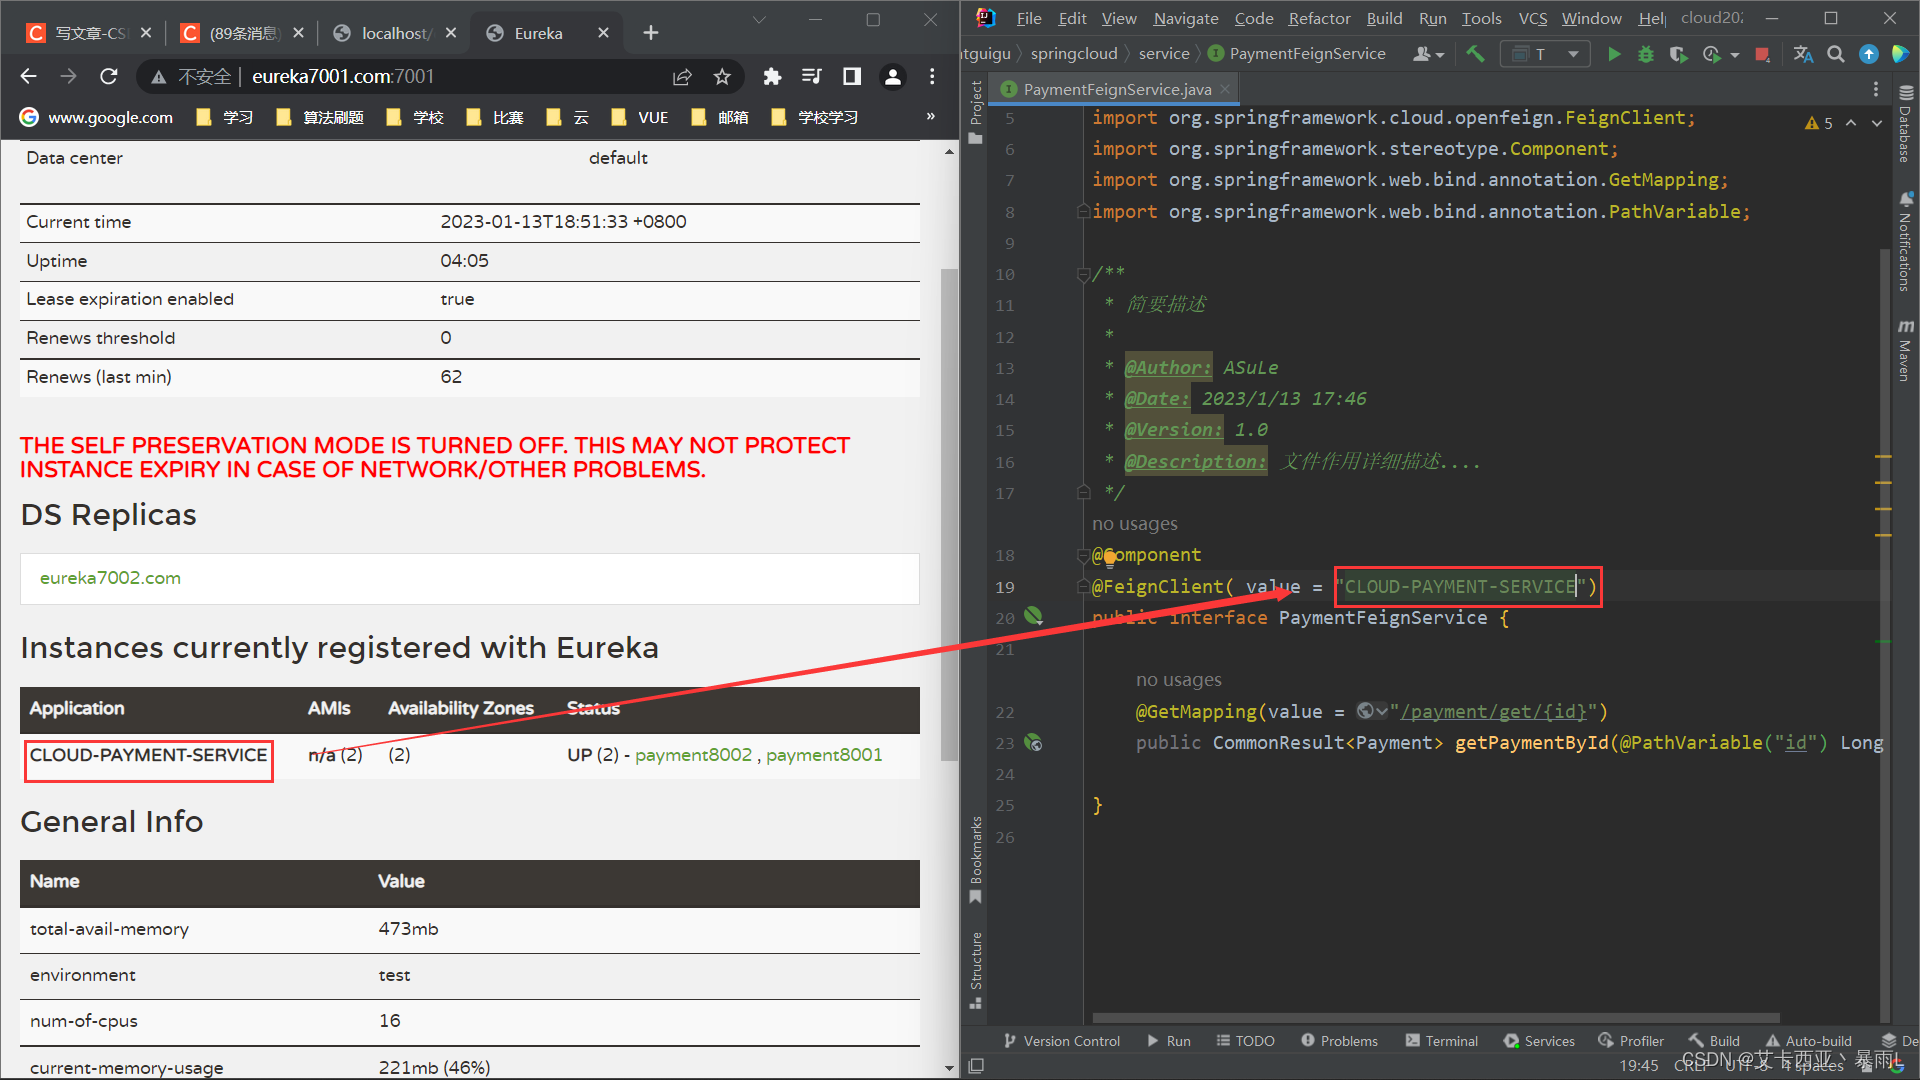
新建PaymentFeignService接口并新增注解@FeignClient
将Payment8001控制层的方法复制到PaymentFeginService接口

将所要调用接口的微服务的服务名添加到@FeignClient中
-
控制层Controller
package com.atguigu.springcloud.controller;

import com.atguigu.springcloud.entities.CommonResult;
import com.atguigu.springcloud.entities.Payment;
import com.atguigu.springcloud.service.PaymentFeignService;
import lombok.extern.slf4j.Slf4j;
import org.springframework.web.bind.annotation.GetMapping;
import org.springframework.web.bind.annotation.PathVariable;
import org.springframework.web.bind.annotation.RestController;

import javax.annotation.Resource;

/**
 * 简要描述
 *
 * @Author: ASuLe
 * @Date: 2023/1/13 18:53
 * @Version: 1.0
 * @Description: 文件作用详细描述....
 */
@RestController
@Slf4j
public class OrderFeignController {

    @Resource
    private PaymentFeignService paymentFeignService;

    @GetMapping("/consumer/payment/get/{id}")
    public CommonResult<Payment> getPaymentById(@PathVariable("id") Long id){
        return paymentFeignService.getPaymentById(id);
    }

}
7.测试
- 先启动2个eureka集群7001/7002
- 再启动2个微服务8001/8002
- 启动FeignOrder80
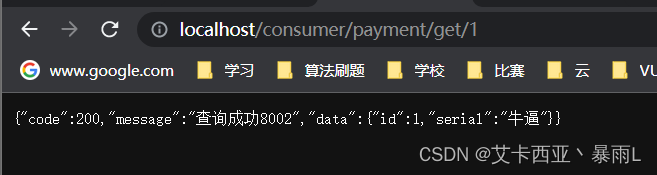
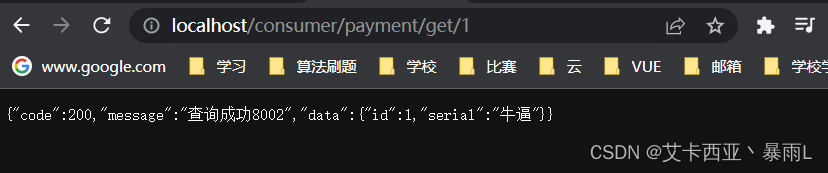
- 访问
http://localhost/consumer/payment/get/1 - 重点:
Feign自带负载均衡配置项
第一次查询

第二次查询
8.小总结

3.OpenFeign超时控制
对于服务提供者支付微服务,这个业务处理完成需要3s对支付微服务而言是正常的,但是对于消费者而言只能等待2s,那这样就会导致时间差,就会导致超时调用报错
超时设置,故意设置超时演示出错情况
-
服务提供方8001故意写暂停程序
服务提供方8001控制层添加@GetMapping(value = "/payment/feign/timeout") public String paymentFeignTimeOut() { System.out.println("*****paymentFeignTimeOut from port: " + serverPort); //暂停几秒钟线程 try { TimeUnit.SECONDS.sleep(3); } catch (InterruptedException e) { e.printStackTrace(); } return serverPort; }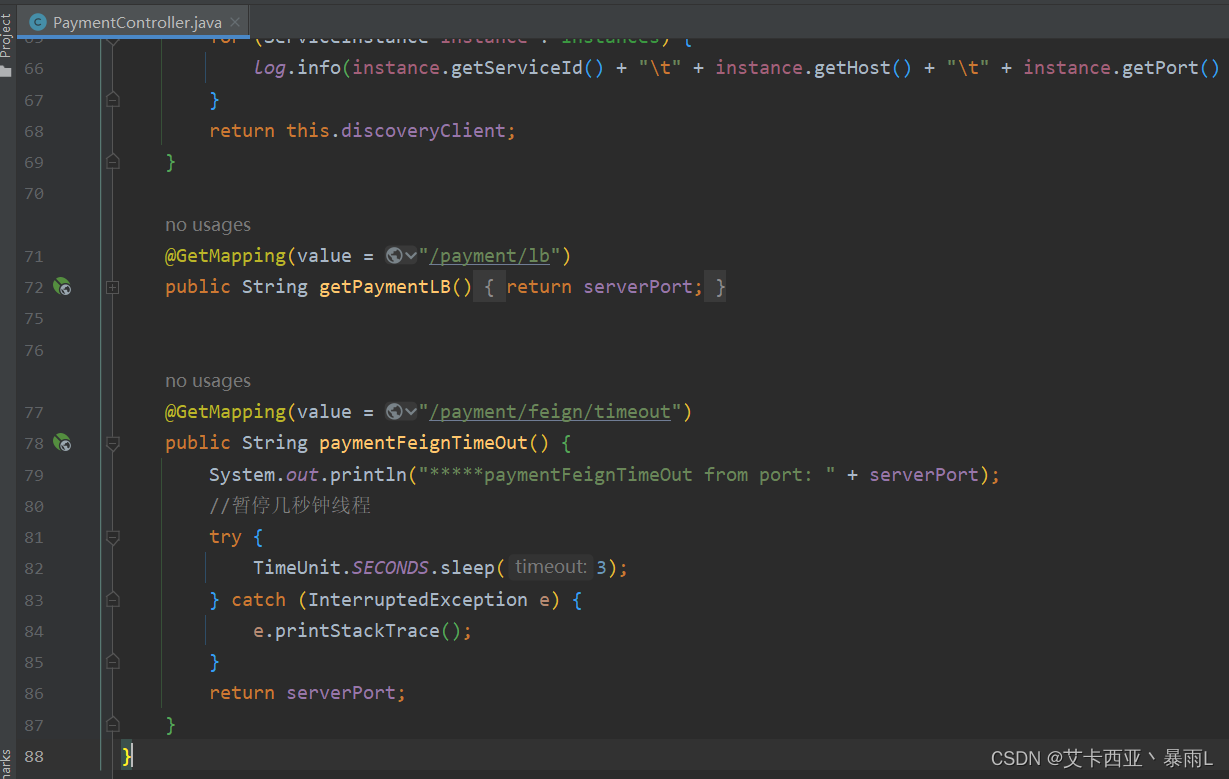
-
服务消费方80添加超时方法PaymentFeignService
@GetMapping(value = "/payment/feign/timeout")
public String paymentFeignTimeOut();
-
服务消费方80添加超时方法OrderFeignController
@GetMapping(value = "/consumer/payment/feign/timeout")
public String paymentFeignTimeOut(){
    //OpenFeign底层有Ribbon,客户端一般默认等待1s
    return paymentFeignService.paymentFeignTimeOut();
}
-
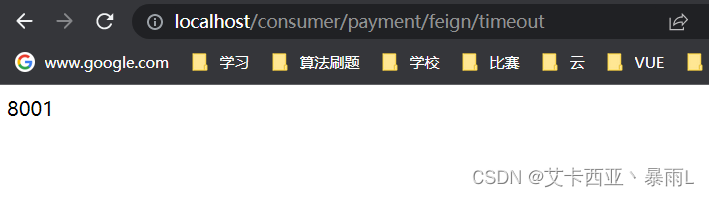
测试
访问8001

访问80

OpenFeign默认等待1秒钟,超过后报错
默认Feign客户端只等待一秒钟,但是服务端处理需要超过1秒钟,导致Feign客户端不想等待了,直接返回报错。为了避免这样的情况,有时候我们需要设置Feign客户端的超时控制
OpenFeign默认支持Ribbon

天生支持负载均衡,它的超时控制也由Ribbon来进行限制
YML文件里需要开启OpenFeign客户端超时控制
#设置feign客户端超时时间(OpenFeign默认支持ribbon)
ribbon:
  #指的是建立连接后从服务器读取到可用资源所用的时间
  ReadTimeout: 5000
  #指的是建立连接所用的时间,适用于网络状况正常的情况下,两端连接所用的时间
  ConnectTimeout: 5000

重新测试
但是此时如果Payment8002没有配置超时接口,那刷新一次就是8001的方法调用,再刷新一次就是8002的方法调用,但由于8002没有这个方法所以会报错
4.OpenFeign日志打印功能

4.1日志打印功能
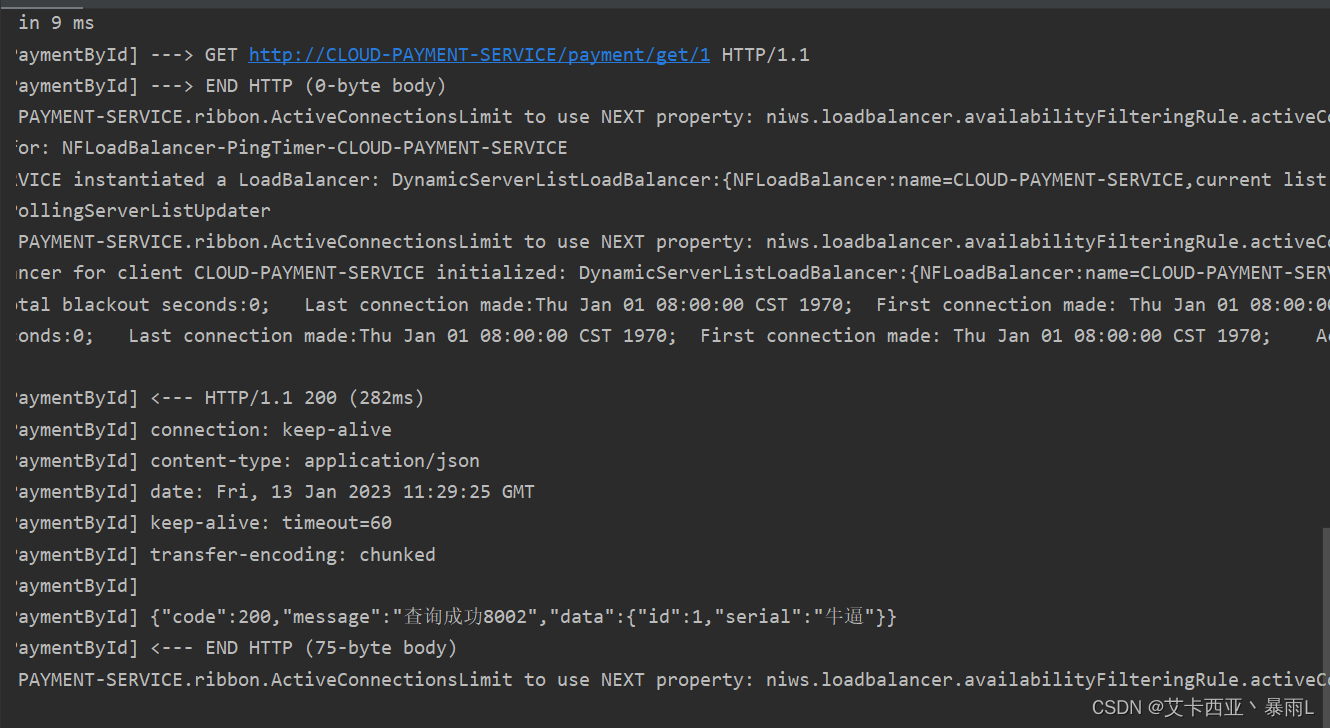
我们现在通过OpenFeign80端口去调用8001支付,我们可能需要用到头,状态码,时间,接口,需要更加明细的了解Feign的调用,OpenFeign自身就提供了日志打印功能,方便调整。
4.2是什么
- Feign 提供了日志打印功能,我们可以通过配置来调整日志级别,从而了解 Feign 中 Http 请求的细节。
- 说白了就是
对Feign接口的调用情况进行监控和输出
4.3日志级别
-
NONE:默认的,不显示任何日志
-
BASIC:仅记录请求方法、URL、响应状态码及执行时间
-
HEADERS:除了 BASIC 中定义的信息之外,还有请求和响应的头信息
-
FULL:除了 HEADERS 中定义的信息之外,还有请求和响应的正文及元数据
4.4配置日志bean
package com.atguigu.springcloud.config;

import feign.Logger;
import org.springframework.context.annotation.Bean;
import org.springframework.context.annotation.Configuration;


/**
 * 简要描述
 *
 * @Author: ASuLe
 * @Date: 2023/1/13 19:26
 * @Version: 1.0
 * @Description: 文件作用详细描述....
 */
@Configuration
public class FeignConfig {

    @Bean
    Logger.Level feignLoggerLevel(){
        return Logger.Level.FULL;
    }
}
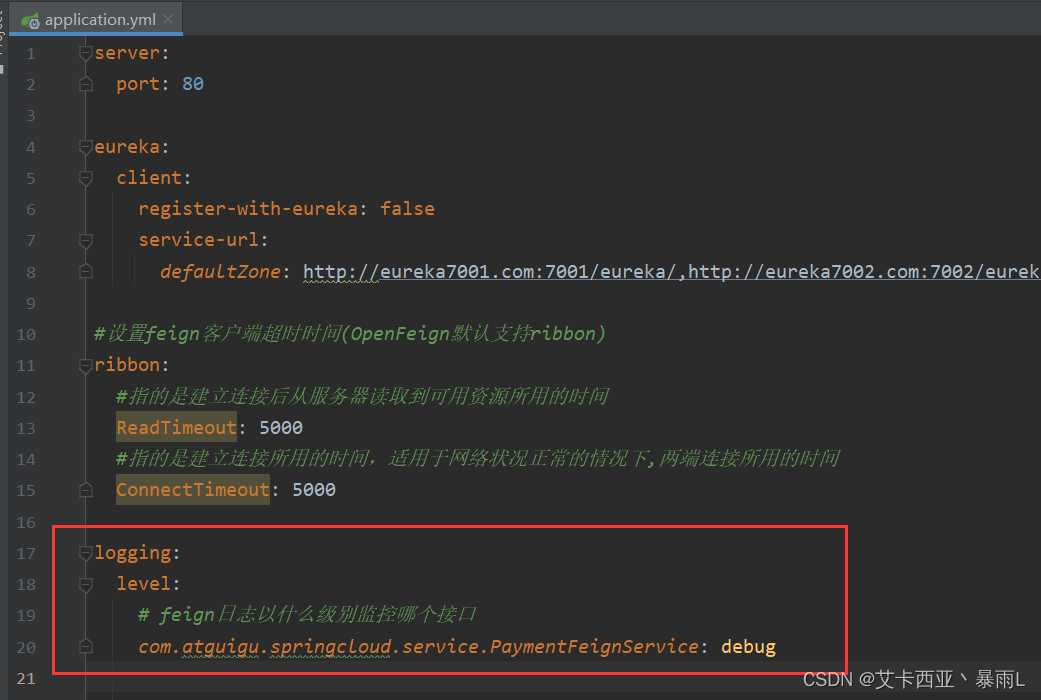
4.5YML文件里需要开启日志的Feign客户端
logging:
  level:
    # feign日志以什么级别监控哪个接口
    com.atguigu.springcloud.service.PaymentFeignService: debug
4.6后台日志查看
测试
日志非常详细
版权声明:本文内容由互联网用户自发贡献,该文观点仅代表作者本人。本站仅提供信息存储空间服务,不拥有所有权,不承担相关法律责任。如发现本站有涉嫌侵权/违法违规的内容, 请发送邮件至 举报,一经查实,本站将立刻删除。
文章由极客之音整理,本文链接:https://www.bmabk.com/index.php/post/81878.html

