
环境:RocketMQ4.8.0 + rocketmq-console2.0.0
简介
rocketmq-console是RocketMQ项目的扩展插件,是一个图形化管理控制台,提供Broker集群状态查看,Topic管理,Producer、Consumer状态展示,消息查询等常用功能,这个功能在安装好RocketMQ后需要额外单独安装、运行。
下载并安装
- 通过如下地址下载


- 修改相关配置
进入src\main\resources修改application.properties文件,修改端口、上下文访问路径、服务地址。该版本的springboot的版本使用的是2.2.2。
server.address=0.0.0.0
#修改端口
server.port=8088
#设置上下文路径
server.servlet.contextPath=/rocketmq

### SSL setting
#server.ssl.key-store=classpath:rmqcngkeystore.jks
#server.ssl.key-store-password=rocketmq
#server.ssl.keyStoreType=PKCS12
#server.ssl.keyAlias=rmqcngkey

#spring.application.index=true
spring.application.name=rocketmq-console
spring.http.encoding.charset=UTF-8
spring.http.encoding.enabled=true
spring.http.encoding.force=true
logging.level.root=INFO
logging.config=classpath:logback.xml
#if this value is empty,use env value rocketmq.config.namesrvAddr  NAMESRV_ADDR | now, you can set it in ops page.default localhost:9876
#设置NameServer地址
rocketmq.config.namesrvAddr=localhost:9876
#if you use rocketmq version < 3.5.8, rocketmq.config.isVIPChannel should be false.default true
rocketmq.config.isVIPChannel=
#rocketmq-console's data path:dashboard/monitor
rocketmq.config.dataPath=f:/rocketmq/datas
#set it false if you don't want use dashboard.default true
rocketmq.config.enableDashBoardCollect=true
#set the message track trace topic if you don't want use the default one
rocketmq.config.msgTrackTopicName=
rocketmq.config.ticketKey=ticket

#Must create userInfo file: ${rocketmq.config.dataPath}/users.properties if the login is required
rocketmq.config.loginRequired=false- 打包
mvn clean package -Dmaven.test.skip=true- 运行服务
java -jar target/rocketmq-console-ng-2.0.0.jar- 访问服务
测试
新建springboot项目
依赖
<dependency>
  <groupId>org.apache.rocketmq</groupId>
  <artifactId>rocketmq-spring-boot-starter</artifactId>
  <version>2.2.0</version>
</dependency>
配置
rocketmq:
  nameServer: localhost:9876
  producer:
    group: demo-mq
消息监听
@RocketMQMessageListener(topic = "test-topic", consumerGroup = "consumer01-group", selectorExpression = "tag1 || tag2")
@Component
public class ConsumerListener implements RocketMQListener<String> {
@Override
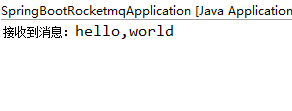
public void onMessage(String message) {
System.out.println("接收到消息:" + message) ;
}
}selectorExpression:指明能接收哪些tag的消息,这里tag1,tag2。
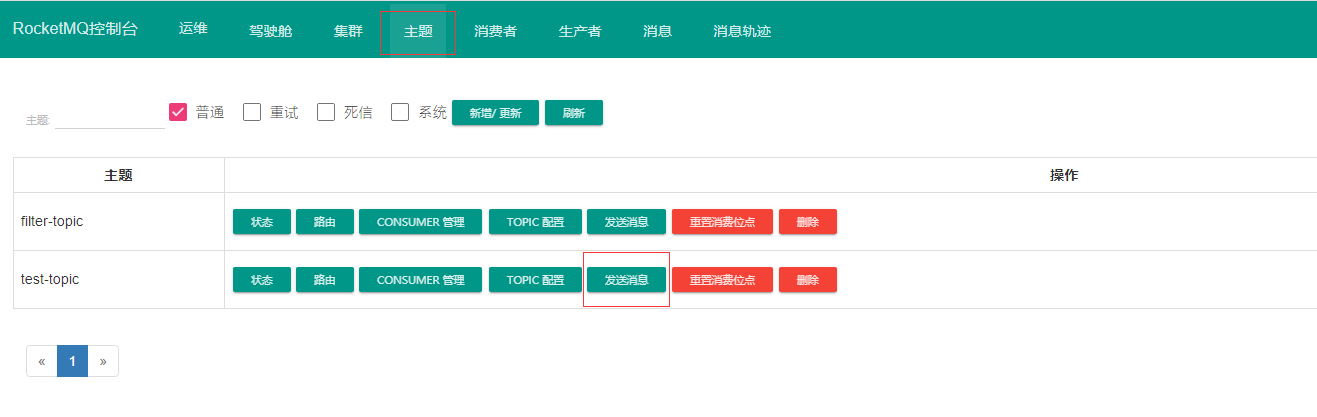
通过rocketmq-console发送消息
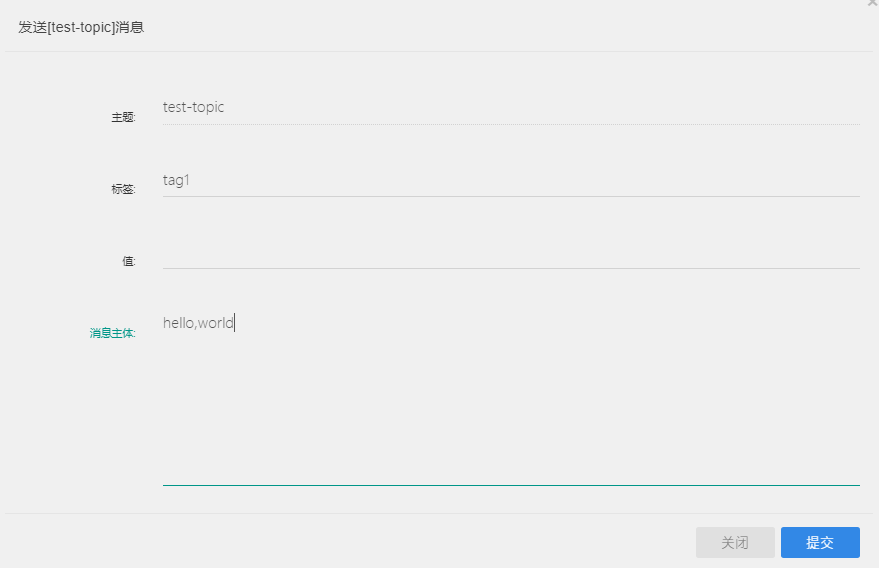
注意:这里看似测试都ok,如果你通过这个console创建主题,然后你发送消息你会发现接收不到消息或是发送消息报错(我这里是程序已经自动创建好了主题,所以才ok)。这里通过两种方式创建主题。这个console应该对应的rocketmq版本太低了吧??
1、命令行方式
mqadmin updatetopic -n localhost:9876 -c DefaultCluster -t test-topic-c xxx :集群的名称。
2、自动创建
启动服务设置autoCreateTopicEnable=true
mqbroker -n localhost:9876 autoCreateTopicEnable=true -c ../conf/broker.conf完毕!!!
给个关注呗谢谢


版权声明:本文内容由互联网用户自发贡献,该文观点仅代表作者本人。本站仅提供信息存储空间服务,不拥有所有权,不承担相关法律责任。如发现本站有涉嫌侵权/违法违规的内容, 请发送邮件至 举报,一经查实,本站将立刻删除。
文章由半码博客整理,本文链接:https://www.bmabk.com/index.php/post/80017.html

![centos7启动nginx出现nginx: [emerg] bind() to 0.0.0.0:80 failed (98: Address already in use)](https://www.bmabk.com/wp-content/uploads/2022/05/post-loading-480x300.gif)