

Nginx前提回顾
Nginx 是一个高性能的 Web 和反向代理服务器, 它具有有很多非常优越的特性:
-
Web服务器:相比 Apache,Nginx 使用更少的资源,支持更多的并发连接,体现更高的效率,这点使 Nginx 尤其受到虚拟主机提供商的欢迎。能够支持高达 50,000 个并发连接数的响应,感谢 Nginx 为我们选择了 epoll and kqueue 作为开发模型.
-
负载均衡服务器:Nginx 既可以在内部直接支持 Rails 和 PHP,也可以支持作为 HTTP代理服务器 对外进行服务。Nginx 用 C 编写, 不论是系统资源开销还是 CPU 使用效率都比 Perlbal 要好的多。
-
邮件代理服务器: Nginx 同时也是一个非常优秀的邮件代理服务器(最早开发这个产品的目的之一也是作为邮件代理服务器),Last.fm 描述了成功并且美妙的使用经验。
Nginx 安装非常的简单,且Nginx 启动特别容易,并且几乎可以做到24小时不间断运行,即使运行数个月也不需要重新启动。你还能够在不间断服务的情况下进行软件版本的升级。接下来我们要针对于安装和运维操作进行实战和分析。
Nginx安装指南
Windows 安装
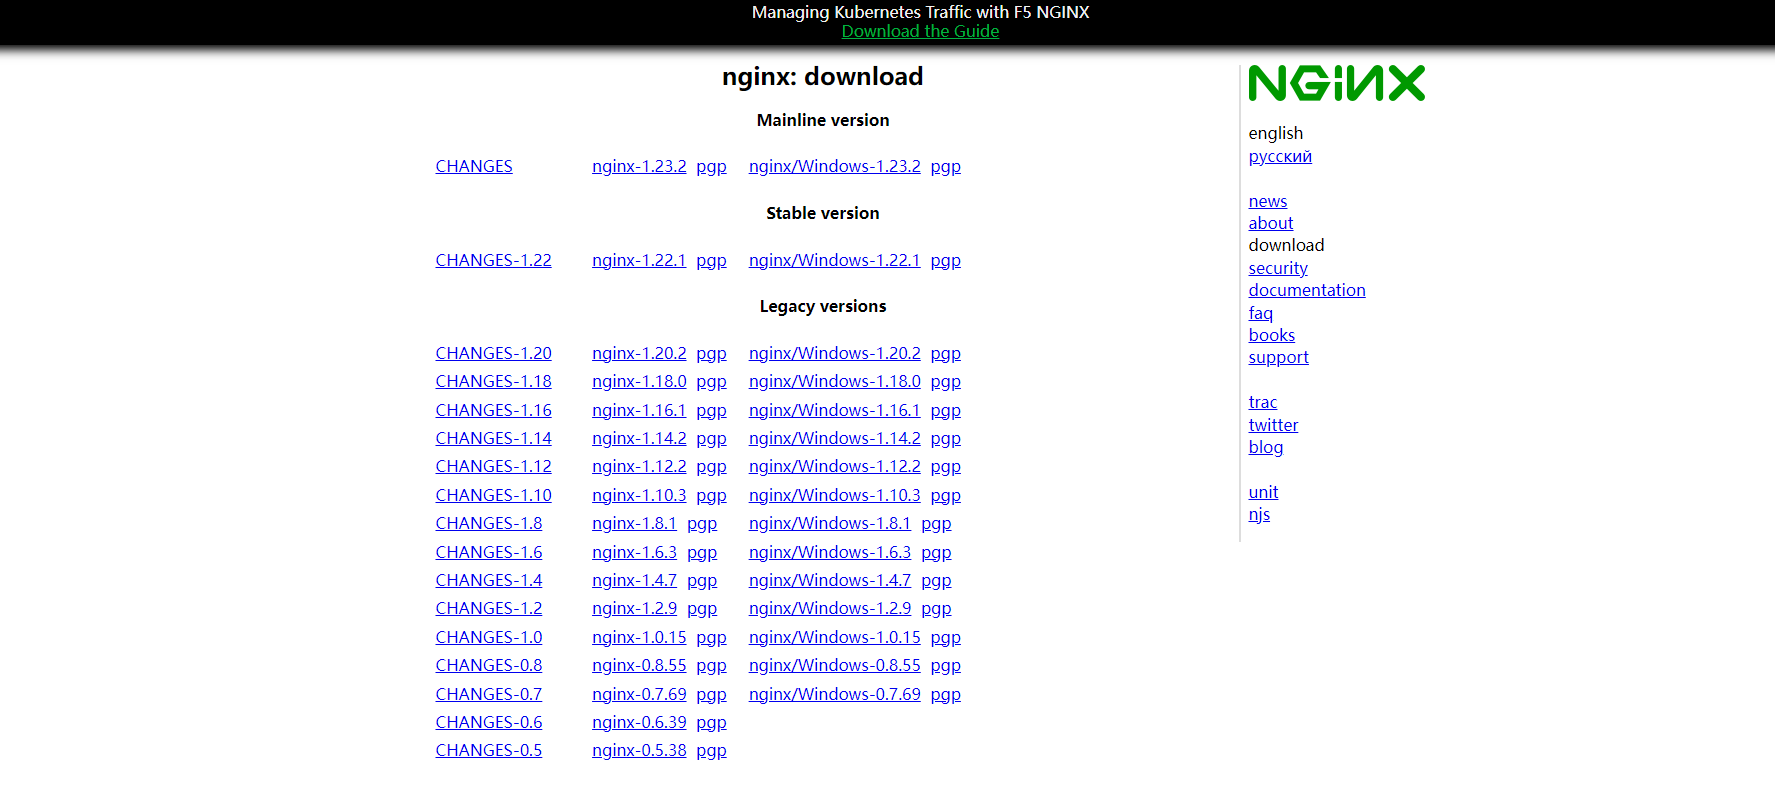
- 首先,进入官方下载地址,如下图所示,之后我们选择合适版本(nginx/Windows-xxx),进行点击下载。

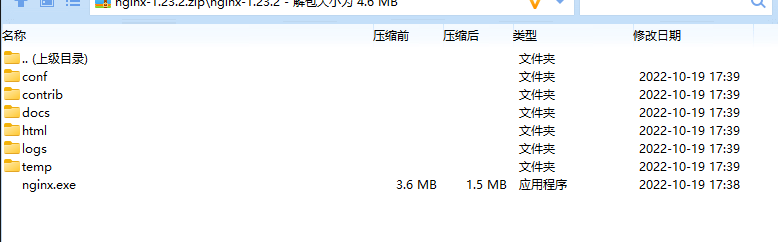
- 下载结束之后进行解压操作
- 启动Nginx服务即可
使用CMD命令start命令启动nginx,再运行nginx,到nginx所在目录,如果启动前已经启动nginx并记录下pid文件,会kill指定进程,按照指定配置去启动nginx
nginx.exe -c conf/nginx.conf
-t:代表测试配置文件语法正确性
nginx.exe -c -t conf\nginx.conf
- 启动Nginx服务即可
nginx.exe -s stop
- 显示版本信息
nginx.exe -v
- 访问测试
启动成功后,浏览器访问 localhost,即可看到Nginx 欢迎页

Windows下的Nginx命令介绍
Nginx 的使用比较简单,就是几条命令,常用到的命令如下(nginx.exe 可以等价于nginx):
- nginx -s stop 快速关闭Nginx,可能不保存相关信息,并迅速终止web服务。
- nginx -s quit 平稳关闭Nginx,保存相关信息,有安排的结束web服务。
- nginx -s reload 因改变了Nginx相关配置,需要重新加载配置而重载。
- nginx -s reopen 重新打开日志文件。
- nginx -c filename 为 Nginx 指定一个配置文件,来代替缺省的。
- nginx -t 不运行,仅仅测试配置文件。nginx 将检查配置文件的语法的正确性,并尝试打开配置文件中所引用到的文件。
- nginx -v 显示 nginx 的版本。
- nginx -V 显示 nginx 的版本,编译器版本和配置参数。
MacOSX 安装
Mac OSX 安装特别简单,首先你需要安装 Brew, 通过 brew 快速安装 nginx。
安装nginx
brew install nginx
# Updating Homebrew...
# ==> Auto-updated Homebrew!
# Updated 2 taps (homebrew/core, homebrew/cask).
# ==> Updated Formulae
# ==> Installing dependencies for nginx: openssl, pcre
# ==> Installing nginx dependency: openssl
# ==> Downloading https://homebrew.bintray.com/bottles/openssl-1.0.2o_1.high_sierra.bottle.tar.gz
# ######################################################################## 100.0%
# ==> Pouring openssl-1.0.2o_1.high_sierra.bottle.tar.gz
# ==> Caveats
# A CA file has been bootstrapped using certificates from the SystemRoots
# keychain. To add additional certificates (e.g. the certificates added in
# the System keychain), place .pem files in
#   /usr/local/etc/openssl/certs
#
# and run
#   /usr/local/opt/openssl/bin/c_rehash
#
# This formula is keg-only, which means it was not symlinked into /usr/local,
# because Apple has deprecated use of OpenSSL in favor of its own TLS and crypto libraries.
#
# If you need to have this software first in your PATH run:
#   echo 'export PATH="/usr/local/opt/openssl/bin:$PATH"' >> ~/.zshrc
#
# For compilers to find this software you may need to set:
#     LDFLAGS:  -L/usr/local/opt/openssl/lib
#     CPPFLAGS: -I/usr/local/opt/openssl/include
# For pkg-config to find this software you may need to set:
#     PKG_CONFIG_PATH: /usr/local/opt/openssl/lib/pkgconfig
#
# ==> Summary
# ?  /usr/local/Cellar/openssl/1.0.2o_1: 1,791 files, 12.3MB
# ==> Installing nginx dependency: pcre
# ==> Downloading https://homebrew.bintray.com/bottles/pcre-8.42.high_sierra.bottle.tar.gz
# ######################################################################## 100.0%
# ==> Pouring pcre-8.42.high_sierra.bottle.tar.gz
# ?  /usr/local/Cellar/pcre/8.42: 204 files, 5.3MB
# ==> Installing nginx
# ==> Downloading https://homebrew.bintray.com/bottles/nginx-1.13.12.high_sierra.bottle.tar.gz
# ######################################################################## 100.0%
# ==> Pouring nginx-1.13.12.high_sierra.bottle.tar.gz
# ==> Caveats
# Docroot is: /usr/local/var/www
#
# The default port has been set in /usr/local/etc/nginx/nginx.conf to 8080 so that
# nginx can run without sudo.
#
# nginx will load all files in /usr/local/etc/nginx/servers/.
#
# To have launchd start nginx now and restart at login:
#   brew services start nginx
# Or, if you don't wacd /usr/local/Cellar/nginx/1.13.12/n just run:
# cd /usr/local/Cellar/nginx/1.13.12/
启动服务
注意默认端口不是80查看确认端口是否被占用。
brew services start nginx
CentOS安装
Nginx可以使用各平台的默认包来安装,包括具体的编译参数信息。正式开始前,编译环境gcc g++ 开发库之类的需要提前装好,这里默认你已经装好。CentOS6.5左右默认这两个包都没安装全,所以这两个都运行安装即可。
yum -y install gcc make gcc-c++ wget
yum -y install openssl openssl-devel
安装依赖
prce(重定向支持)和openssl(https支持,如果不需要https可以不安装。)
yum install -y pcre-devel
其他版本也可以采用一下指令执行
安装make:
yum -y install gcc automake autoconf libtool make
安装g++:
yum -y install gcc make gcc-c++ openssl-devel
如果不安装会出现安装报错误的话比如:“C compiler cc is not found”,这个就是缺少编译环境,安装一下就可以了。
下载
下载Linux版本的地址根页面:http://nginx.org/download/,如下图所示。
如果没有安装wget
下载已编译版本
yum install wget
wget http://nginx.org/download/nginx-1.X.X.tar.gz
解压压缩包
tar -zxvf nginx-X.X.X.tar.gz
编译安装
然后进入目录编译安装,configure参数说明
cd nginx-1.xx
./configure --sbin-path=/usr/local/nginx/nginx \
--conf-path=/usr/local/nginx/nginx.conf \
--pid-path=/usr/local/nginx/nginx.pid \
--with-http_ssl_module \
--with-pcre=/usr/local/src/pcre-8.34 \
--with-zlib=/usr/local/src/zlib-1.2.8 \
--with-openssl=/usr/local/src/openssl-1.0.1c
configure参数配置介绍
./configure –prefix=/你的安装目录 –add-module=/第三方模块目录
- —prefix=path 定义一个目录,存放服务器上的文件 ,也就是nginx的安装目录。默认使用 /usr/local/nginx。
- —sbin-path=path 设置nginx的可执行文件的路径,默认为 prefix/sbin/nginx.
- —conf-path=path 设置在nginx.conf配置文件的路径。nginx允许使用不同的配置文件启动,通过命令行中的-c选项。默认为prefix/conf/nginx.conf.
- —pid-path=path 设置nginx.pid文件,将存储的主进程的进程号。安装完成后,可以随时改变的文件名 , 在nginx.conf配置文件中使用 PID指令。默认情况下,文件名 为prefix/logs/nginx.pid.
- —error-log-path=path 设置主错误,警告,和诊断文件的名称。安装完成后,可以随时改变的文件名 ,在nginx.conf配置文件中 使用 的error_log指令。默认情况下,文件名 为prefix/logs/error.log.
- —http-log-path=path 设置主请求的HTTP服务器的日志文件的名称。安装完成后,可以随时改变的文件名 ,在nginx.conf配置文件中 使用 的access_log指令。默认情况下,文件名 为prefix/logs/access.log.
- —user=name 设置nginx工作进程的用户。安装完成后,可以随时更改的名称在nginx.conf配置文件中 使用的 user指令。默认的用户名是nobody。
- —group=name 设置nginx工作进程的用户组。安装完成后,可以随时更改的名称在nginx.conf配置文件中 使用的 user指令。默认的为非特权用户。
- —with-select_module“—without-select_module 启用或禁用构建一个模块来允许服务器使用select()方法。该模块将自动建立,如果平台不支持的kqueue,epoll,rtsig或/dev/poll。
- —with-poll_module“—without-poll_module 启用或禁用构建一个模块来允许服务器使用poll()方法。该模块将自动建立,如果平台不支持的kqueue,epoll,rtsig或/dev/poll。
- —without-http_gzip_module — 不编译压缩的HTTP服务器的响应模块。编译并运行此模块需要zlib库。
- —without-http_rewrite_module 不编译重写模块。编译并运行此模块需要PCRE库支持。
- —without-http_proxy_module — 不编译http_proxy模块。
- —with-http_ssl_module — 使用https协议模块。默认情况下,该模块没有被构建。建立并运行此模块的OpenSSL库是必需的。
- —with-pcre=path — 设置PCRE库的源码路径。PCRE库的源码(版本4.4 – 8.30)需要从PCRE网站下载并解压。其余的工作是Nginx的./ configure和make来完成。正则表达式使用在location指令和 ngx_http_rewrite_module 模块中。
- —with-pcre-jit —编译PCRE包含“just-in-time compilation”(1.1.12中, pcre_jit指令)。
- —with-zlib=path —设置的zlib库的源码路径。要下载从 zlib(版本1.1.3 – 1.2.5)的并解压。其余的工作是Nginx的./ configure和make完成。ngx_http_gzip_module模块需要使用zlib 。
- —with-cc-opt=parameters — 设置额外的参数将被添加到CFLAGS变量。例如,当你在FreeBSD上使用PCRE库时需要使用:—with-cc-opt=”-I /usr/local/include。.如需要需要增加 select()支持的文件数量:—with-cc-opt=”-D FD_SETSIZE=2048″.
- —with-ld-opt=parameters —设置附加的参数,将用于在链接期间。例如,当在FreeBSD下使用该系统的PCRE库,应指定:—with-ld-opt=”-L /usr/local/lib”.
kqueue(sun os),epoll (linux kenel 2.6+), rtsig(- 实时信号)或者/dev/poll(一种类似select的模式,底层实现与SELECT基本相 同,都是采用轮训方法) SELECT模式将是默认安装模式
启动后会进行打印对应的配置信息
....
Configuration summary
  + using system PCRE library
  + OpenSSL library is not used
  + using system zlib library
  nginx path prefix: "/usr/local/nginx"
  nginx binary file: "/usr/local/nginx/sbin/nginx"
  nginx modules path: "/usr/local/nginx/modules"
  nginx configuration prefix: "/usr/local/nginx/conf"
  nginx configuration file: "/usr/local/nginx/conf/nginx.conf"
  nginx pid file: "/usr/local/nginx/logs/nginx.pid"
  nginx error log file: "/usr/local/nginx/logs/error.log"
  nginx http access log file: "/usr/local/nginx/logs/access.log"
  nginx http client request body temporary files: "client_body_temp"
  nginx http proxy temporary files: "proxy_temp"
  nginx http fastcgi temporary files: "fastcgi_temp"
  nginx http uwsgi temporary files: "uwsgi_temp"
  nginx http scgi temporary files: "scgi_temp"
Requires OpenSSL. On Debian, this is libssl-dev. 开启HTTP SSL模块,使NGINX可以支持HTTPS请求。这个模块需要已经安装了OPENSSL,在DEBIAN上是libssl
编译源码
配置完成之后,使用 make 和 make install 编译和安装 nginx。
rpm 包方式(推荐)
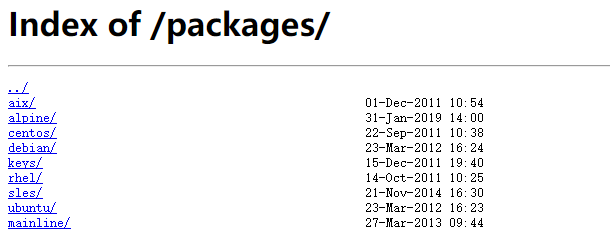
- 进入下载页面:http://nginx.org/packages/

$ wget http://nginx.org/packages/centos/7/noarch/RPMS/nginx-release-centos-7-0.el7.ngx.noarch.rpm
- 安装 nginx rpm 包
nginx rpm 包实际上安装的是 nginx 的 yum 源。
$ rpm -ivh nginx-*.rpm
- 正式安装 rpm 包
$ yum install nginx
- 关闭防火墙
$ firewall-cmd --zone=public --add-port=80/tcp --permanent
$ firewall-cmd --reload
make
make install
CentOS7 环境安装脚本
安装说明
-
采用编译方式安装 Nginx, 并将其注册为 systemd 服务
-
安装路径为:/usr/local/nginx
-
默认下载安装 1.16.0 版本
使用方法
默认安装 – 执行以下任意命令即可:
curl -o- https://gitee.com/turnon/linux-tutorial/raw/master/codes/linux/soft/nginx-install.sh | bash
wget -qO- https://gitee.com/turnon/linux-tutorial/raw/master/codes/linux/soft/nginx-install.sh | bash
自定义安装 – 下载脚本到本地,并按照以下格式执行:
sh nginx-install.sh [version]
服务管理(1)
启动
/usr/local/nginx/sbin/nginx
重启
/usr/local/nginx/sbin/nginx -s reload
关闭进程
/usr/local/nginx/sbin/nginx -s stop
平滑关闭nginx
/usr/local/nginx/sbin/nginx -s quit
查看nginx的安装状态,
/usr/local/nginx/sbin/nginx -V
服务管理(2)
启动nginx服务
systemctl start nginx.service
停止开机自启动
systemctl disable nginx.service
查看服务当前状态
systemctl status nginx.service
查看所有已启动的服务
systemctl list-units --type=service
重新启动服务
systemctl restart nginx.service
设置开机自启动
systemctl enable nginx.service
检查服务状态
systemctl is-enabled servicename.service # 查询服务是否开机启动
systemctl enable *.service # 开机运行服务
systemctl disable *.service # 取消开机运行
systemctl start *.service # 启动服务
systemctl stop *.service # 停止服务
systemctl restart *.service # 重启服务
systemctl reload *.service # 重新加载服务配置文件
systemctl status *.service # 查询服务运行状态
systemctl --failed # 显示启动失败的服务
Nginx卸载指南
如果通过yum安装,使用下面命令安装。
yum remove nginx
编译安装,删除/usr/local/nginx目录即可,如果配置了自启动脚本,也需要删除。
防火墙管理
CentOS 7或RHEL 7或Fedora中防火墙由 firewalld 来管理
假如采用传统请执行一下命令:
传统命令
systemctl stop firewalld
systemctl mask firewalld
或者设置防火墙过滤规则
Iptables 是用来设置、维护和检查 Linux内核 的IP包过滤规则的。
安装命令
yum install iptables-services
systemctl enable iptables
service iptables restart
本文来自博客园,作者:洛神灬殇,转载请注明原文链接:https://www.cnblogs.com/liboware/p/16944218.html,任何足够先进的科技,都与魔法无异。
版权声明:本文内容由互联网用户自发贡献,该文观点仅代表作者本人。本站仅提供信息存储空间服务,不拥有所有权,不承担相关法律责任。如发现本站有涉嫌侵权/违法违规的内容, 请发送邮件至 举报,一经查实,本站将立刻删除。
文章由半码博客整理,本文链接:https://www.bmabk.com/index.php/post/70053.html

