
1.MyBatis中的Sql映射器Mapper
上次我们讲了一些关于MyBaties的入门知识,这次我们来讲一讲MyBatis的进阶知识。
1.1 引入
MyBatis基于动态代理机制,让我们无需再编写Dao的实现类,就可以直接使用。
传统Dao接口,现在名称统一以Mapper结尾,还有我们映射器配置文件要和映射器在同一个包中。
1.2 使用映射器的步骤
使用映射器的步骤:
(1)根据需求,创建模型相关的Mapper接口。(我这里写的是StudentMapper)
具体代码如下:
public interface StudentMapper {

    List<Student> findAll();

}
(2)编写映射的配置文件。这里需要注意的是:Mapper.xml的命名空间必须和接口的“全限定名”一致;定义sql标签的id,需要和“接口的方法”一致。(只为了书写规范,到时候方法多了排错比较好找)
StudentMapper.xml 具体代码如下:
<mapper namespace="cn.itsource._01_mapper.StudentMapper">
    <select id="findAll" resultType="Student">
        select * from student
    </select>
</mapper>
(3)写测试类进行测试,看是否能够完成功能。
具体代码如下:
 @Test
    public void findAll() {
        //通过工具类拿到sqlSession
        SqlSession sqlSession = MyBatisUtils.INSTANCE.getSqlSession();
        //通过sqlSession拿到mapper
        StudentMapper mapper = sqlSession.getMapper(StudentMapper.class);
        //可以使用mapper直接调用Mapper层的方法
        List<Student> list = mapper.findAll();
        //打印查询结果
        list.forEach(e-> System.out.println(e));
    }
2.使用映射器来完成高级查询
这里主要是根据学生名称和最大最小年龄来完成高级查询。话不多说,直接上代码:
StudentMapper.xml:
<mapper namespace="cn.itsource._02_query.StudentMapper">
<select id="findByQuery" resultType="Student">
select * from student
<where>
<if test="name!=null">
and name LIKE concat("%",#{name},"%")
</if>
<if test="minAge!=null">
and age > #{minAge}
</if>
<if test="maxAge!=null">
and age < #{maxAge}
</if>
</where>
</select>
</mapper>
这里和之前一样,只是有一个需要注意的地方,在这里小于符号“<”会被认为是一个标签的开始,如果你这样写就会报错,所以我这里的小于符号“<”用的是“<;”,同样的大于可以用”>;”,大于等于用”&ge;”,小于等于用”&le;”,当然也可以用cdata的方式,在cdata中所有的数据不会被xml解析器进行解析,使用如下:
<if test="maxAge != null">
          <![CDATA[
                  and age < #{maxAge}
          ]]>
 </if>
还有就是拼接字符串,这里用的是concat()方法,也推荐使用这种方式。
接下来就是StudentMapper:
public interface StudentMapper {

    List<Student> findByQuery(StudentQuery query);

}
因为是高级查询,因此这里需要一个Query类,笔者此处用的是StudentQuery。
代码如下:
public class StudentQuery {

    private String name;

    private Integer minAge;

    private Integer maxAge;

    public String getName() {
        return name;
    }

    public void setName(String name) {
        this.name = name;
    }

    public Integer getMinAge() {
        return minAge;
    }

    public void setMinAge(Integer minAge) {
        this.minAge = minAge;
    }

    public Integer getMaxAge() {
        return maxAge;
    }

    public void setMaxAge(Integer maxAge) {
        this.maxAge = maxAge;
    }
}
测试类如下,StudentMapperTest:
@Test
    public void findAll() {
    	//new一个query对象
        StudentQuery studentQuery = new StudentQuery();
        //查询名字中有“明”的学生
        studentQuery.setName("明");
        //查询年龄大于19岁的学生
        studentQuery.setMinAge(19);
        //查询年龄小于60岁的学生
        studentQuery.setMaxAge(60);
        //通过工具类拿到sqlSession对象
        SqlSession sqlSession = MyBatisUtils.INSTANCE.getSqlSession();
        //通过sqlSession拿到对应的mapper
        StudentMapper mapper = sqlSession.getMapper(StudentMapper.class);
        //通过mapper直接调用Mapper接口中的方法
        List<Student> list = mapper.findByQuery(studentQuery);
        //打印输出结果
        list.forEach(e-> System.out.println(e));
    }
3.ResultMap结果映射
3.1 为什么要使用结果映射
结果映射可以解决数据库中表的字段名和对象属性名不一样的情况;还可以解决关联对象查询问题,在MyBatis中不会默认查询出关联对象,需要自己查询结果并通过resultMap来配置。
3.2 关联映射分类
(1)一对一:比如说一个人只有一个身份证号。随意一方设计一个字段。
(2)多对一:比如说多个员工对应一个部门,多个学生都被一个老师教等,一般在多方设计一个一方属性,这里就是在员工中设置部门字段,在学生中设置老师字段。
(3)一对多:比如说一个部门拥有多个员工,一个老师教多个学生。一般也会在多方维护关联关系。
(4)多对多:一个员工有多个角色,一个角色又属于多个员工。一般用中间表来表示。
本质上多对一,一对一是一样的,都只是处理一个(association),而一对多、多对多也是一样处理的都是集合(collection)。
3.3 关联映射处理方式
MyBatis提供两种方式处理我们关联对象,分别是嵌套查询和嵌套结果。
(1)嵌套查询:发送一条SQL,查询所有的信息(本身+关联对象)
例子(查询员工时要查询到关联对象部门信息)
SELECT
	e.id,e.name,e.password,e.age, d.id did,d.name dname
FROM
	t_employee e
LEFT JOIN t_dept d ON e.dept_id = d.id
WHERE
	e.id = 1
(2)嵌套结果:发送1+N条SQL
如:
SELECT * from t_employee
 SELECT * from t_dept where id = 1
 ..............
3.4 多对一、一对一
3.4.1 嵌套结果
<mapper namespace="cn.itsource._03_manytoone.StudentMapper">
    <resultMap id="studentMap" type="Student">
        <id property="id" column="id"></id>
        <result property="name" column="name"></result>
        <result property="age" column="age"></result>
        <association property="teacher" javaType="Teacher">
            <id property="id" column="tid"></id>
            <result property="name" column="tname"></result>
            <result property="age" column="tage"></result>
        </association>
    </resultMap>

    <select id="findAll" resultMap="studentMap">
        SELECT s.id,s.name,s.age,t.id tid,t.name tname,t.age tage FROM student s JOIN teacher t ON s.teacher_id=t.id
    </select></mapper>
3.4.2 嵌套查询
<mapper namespace="cn.itsource._03_manytoone.StudentMapper">
<resultMap id="studentMap" type="Student">
        <id property="id" column="id"></id>
        <result property="name" column="name"></result>
        <result property="age" column="age"></result>
        <association property="teacher" column="teacher_id" javaType="Teacher" select="queryTeacherByTid"></association>
    </resultMap>
    <select id="findAll" resultMap="studentMap">
        SELECT * FROM student
    </select>
    <select id="queryTeacherByTid" parameterType="long" resultType="Teacher">
        SELECT * FROM teacher WHERE id=#{id}
    </select>
</mapper>
3.5 一对多、多对多
3.5.1 嵌套结果
<mapper namespace="cn.itsource._04_onetomany.TeacherMapper">
    <resultMap id="teacherMap" type="Teacher">
    <id property="id" column="id"></id>
    <result property="name" column="name"></result>
    <result property="age" column="age"></result>
    <collection property="students" javaType="arraylist" ofType="student">
        <id property="id" column="sid"></id>
        <result property="name" column="sname"></result>
        <result property="age" column="sage"></result>
    </collection>
</resultMap>

    <select id="findAll" resultMap="teacherMap">
        SELECT
        t.id,
        t. NAME,
        t.age ,
        s.id sid,
        s. NAME sname,
        s.age sage
        FROM
        teacher t
        JOIN student s ON t.id = s.teacher_id
    </select>
</mapper>
3.5.2 嵌套查询
<mapper namespace="cn.itsource._04_onetomany.TeacherMapper">
    <resultMap id="teacherMap" type="Teacher">
        <id property="id" column="id"></id>
        <result property="name" column="name"></result>
        <result property="age" column="age"></result>
        <collection property="students" column="id" javaType="arraylist" ofType="student" select="queryStudentByTid"></collection>
    </resultMap>
    <select id="findAll" resultMap="teacherMap">
        SELECT t.id,t.name,t.age FROM teacher t
    </select>
    <select id="queryStudentByTid" parameterType="long" resultType="student">
        SELECT * FROM student WHERE teacher_id=#{id}
    </select>
</mapper>
4.延迟加载
延迟加载也称为懒加载,延迟加载机制是为了避免一些无谓的性能开销而提出来的,所谓延迟加载就是当在真正需要数据的时候,才真正执行数据加载操作。那么,MyBatis的延迟加载 应该如何做呢?


只需要在主配置文件加上这段代码即可。前后端分离的系统,一般不用延时加载,而且目前的行情正在往前后端分离的方向发展,所以笔者在这里不做过多介绍。
5.缓存
5.1 什么是缓存
缓存是一种典型的“以空间换时间”的策略。
5.2 MyBatis中的缓存
MyBatis的缓存与JPA的缓存相似。JPA自带一级缓存,属于entityManager缓存,命中条件:同一个EntityManagerFactory,同一个EntityManager、同一个OID。
二级缓存则需要配置才能实现,它属于entityManagerFactory,命中条件:同一个EntityManagerFactory,不同EntityManager,同一个OID。
而MyBatis则相似,也自带一级缓存,属于sqlSession级别,命中条件:同一个SqlSessionFactory,同一个SqlSession,同一个id。
二级缓存也需要配置才能实现,只需要在Mapper.xml中配置
<cache></cache>
同时在主配置文件中配置
<setting name="cacheEnabled" value="true"/>
即可使用,注意,这里需要将你要缓存的对象去实现java.io.Serializable序列化接口。
6.SSM集成
SSM也就是国内比较主流的三大框架:Spring+SpringMVC+MyBatis。开发项目都需要将框架整合起来,
而且你项目中只要用到了Spring框架,那么其他框架主要就是来和Spring集成。
那么如何集成SSM呢?
6.1 单独集成Spring
(1)创建javaweb项目
(2)需要导入jar包(这里创建的是javaweb项目,需要手动导包)
将包拷贝到webapp/WEB-INF/lib文件夹下,具体jar包如图:
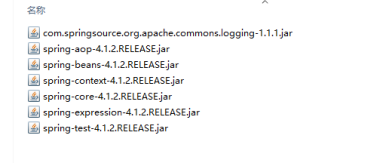
这主要是一些spring的包
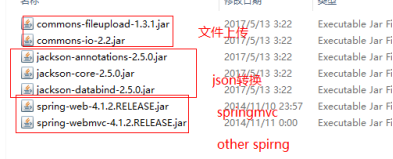
这些主要是springmvc的jar包

这就是mybatis的一些jar包

这些主要是spring+mybatis+事务需要用到的jar包
还有一些其他jar包:

(3)准备配置文件applicationContext.xml,并且配置对象
applicationContext.xml:
<?xml version="1.0" encoding="UTF-8"?>
<beans xmlns="http://www.springframework.org/schema/beans"
       xmlns:context="http://www.springframework.org/schema/context"
       xmlns:tx="http://www.springframework.org/schema/tx"
       xmlns:xsi="http://www.w3.org/2001/XMLSchema-instance"
       xsi:schemaLocation="http://www.springframework.org/schema/beans http://www.springframework.org/schema/beans/spring-beans.xsd
        http://www.springframework.org/schema/context http://www.springframework.org/schema/context/spring-context.xsd
        http://www.springframework.org/schema/tx http://www.springframework.org/schema/tx/spring-tx.xsd
">
    <bean class=”java.util.Date”></bean>
</beans>
(4)测试,看能不能从Spring中拿到bean,能拿到代表配置成功。
6.2 Spring+SpringMVC
(1)导包,上面说过,这里就不说了
(2)配置applicationContext-mvc.xml
<?xml version="1.0" encoding="UTF-8"?>
<beans xmlns="http://www.springframework.org/schema/beans"
       xmlns:context="http://www.springframework.org/schema/context"
       xmlns:mvc="http://www.springframework.org/schema/mvc"
       xmlns:xsi="http://www.w3.org/2001/XMLSchema-instance"
       xsi:schemaLocation="http://www.springframework.org/schema/beans http://www.springframework.org/schema/beans/spring-beans.xsd
        http://www.springframework.org/schema/context http://www.springframework.org/schema/context/spring-context.xsd
        http://www.springframework.org/schema/mvc http://www.springframework.org/schema/mvc/spring-mvc.xsd
">
        <!--扫描包-->
        <context:component-scan base-package="cn.itsource.ssm.controller"/>
        <!--静态资源放行-->
        <mvc:default-servlet-handler/>
        <!--支持注解-->
        <mvc:annotation-driven/>
        <!--配置视图解析器-->
        <bean  class="org.springframework.web.servlet.view.InternalResourceViewResolver">
            <property name="prefix" value="/WEB-INF/views/"/>
            <property name="suffix" value=".jsp"/>
        </bean>
</beans>
(3)配置web.xml
<?xml version="1.0" encoding="UTF-8"?>
<web-app xmlns="http://xmlns.jcp.org/xml/ns/javaee"
         xmlns:xsi="http://www.w3.org/2001/XMLSchema-instance"
         xsi:schemaLocation="http://xmlns.jcp.org/xml/ns/javaee http://xmlns.jcp.org/xml/ns/javaee/web-app_3_1.xsd"
         version="3.1">
    <!-- 读取spring配置文件-->
    <context-param>
        <param-name>contextConfigLocation</param-name>
        <param-value>classpath:applicationContext.xml</param-value>
    </context-param>
    <!--监听器-->
    <listener>
        <listener-class>org.springframework.web.context.ContextLoaderListener</listener-class>
    </listener>
    <!-- 核心控制器-->
    <servlet>
        <servlet-name>dispatchServlet</servlet-name>
        <servlet-class>org.springframework.web.servlet.DispatcherServlet</servlet-class>
        <init-param>
            <param-name>contextConfigLocation</param-name>
            <param-value>classpath:applicationContext-mvc.xml</param-value>
        </init-param>
        <load-on-startup>1</load-on-startup>
    </servlet>
    <servlet-mapping>
        <servlet-name>dispatchServlet</servlet-name>
        <url-pattern>/</url-pattern>
    </servlet-mapping>
    <!-- 编码过滤器-->
    <filter>
        <filter-name>EncodingFilter</filter-name>
        <filter-class>org.springframework.web.filter.CharacterEncodingFilter</filter-class>
        <init-param>
            <param-name>encoding</param-name>
            <param-value>utf-8</param-value>
        </init-param>
    </filter>
    <filter-mapping>
        <filter-name>EncodingFilter</filter-name>
        <url-pattern>/*</url-pattern>
    </filter-mapping>
</web-app>
6.3 Spring集成到MyBatis
applicationContext.xml:
<?xml version="1.0" encoding="UTF-8"?>
<beans xmlns="http://www.springframework.org/schema/beans"
       xmlns:context="http://www.springframework.org/schema/context"
       xmlns:tx="http://www.springframework.org/schema/tx"
       xmlns:xsi="http://www.w3.org/2001/XMLSchema-instance"
       xsi:schemaLocation="http://www.springframework.org/schema/beans http://www.springframework.org/schema/beans/spring-beans.xsd
        http://www.springframework.org/schema/context http://www.springframework.org/schema/context/spring-context.xsd
        http://www.springframework.org/schema/tx http://www.springframework.org/schema/tx/spring-tx.xsd
">
    <!--引入jdbc.properties配置文件-->
    <context:property-placeholder location="classpath:jdbc.properties"/>
    <!--扫描包-->
    <context:component-scan base-package="cn.itsource.ssm.service"/>
    <!--配置连接池-->
    <bean id="dataSource" class="org.apache.commons.dbcp.BasicDataSource" destroy-method="close">
        <property name="driverClassName" value="${jdbc.driverClassName}" />
        <property name="url" value="${jdbc.url}" />
        <property name="username" value="${jdbc.username}" />
        <property name="password" value="${jdbc.password}" />
    </bean>
    <!--配置sqlSessionFactory-->
    <bean id="sqlSessionFactory" class="org.mybatis.spring.SqlSessionFactoryBean">
        <!--连接池配置-->
        <property name="dataSource" ref="dataSource"/>
        <!--mapper.xml的位置-->
        <property name="mapperLocations" value="classpath:cn/itsource/ssm/mapper/*Mapper.xml"/>
        <!--别名-->
        <property name="typeAliasesPackage">
            <value>
                cn.itsource.ssm.domain
                cn.itsource.ssm.query
            </value>
        </property>
    </bean>
    <!--配置事务-->
    <bean class="org.mybatis.spring.mapper.MapperScannerConfigurer">
        <property name="basePackage" value="cn.itsource.ssm.mapper"/>
    </bean>
    <bean id="transactionManager" class="org.springframework.jdbc.datasource.DataSourceTransactionManager">
        <property name="dataSource" ref="dataSource"/>
    </bean>
    <!--注解支持-->
    <tx:annotation-driven transaction-manager="transactionManager"></tx:annotation-driven>
</beans>
到这里SSM基本的配置就已经完成了。可以创建包和类来进行测试。包结构为:

版权声明:本文内容由互联网用户自发贡献,该文观点仅代表作者本人。本站仅提供信息存储空间服务,不拥有所有权,不承担相关法律责任。如发现本站有涉嫌侵权/违法违规的内容, 请发送邮件至 举报,一经查实,本站将立刻删除。
文章由半码博客整理,本文链接:https://www.bmabk.com/index.php/post/67294.html

