
OAuth2应用搭建
添加依赖
<?xml version="1.0" encoding="UTF-8"?>
<project xmlns="http://maven.apache.org/POM/4.0.0" xmlns:xsi="http://www.w3.org/2001/XMLSchema-instance"
         xsi:schemaLocation="http://maven.apache.org/POM/4.0.0 https://maven.apache.org/xsd/maven-4.0.0.xsd">
    <modelVersion>4.0.0</modelVersion>
    <parent>
        <groupId>org.springframework.boot</groupId>
        <artifactId>spring-boot-starter-parent</artifactId>
        <version>2.3.0.RELEASE</version>
        <relativePath/> <!-- lookup parent from repository -->
    </parent>
    <groupId>com.example</groupId>
    <artifactId>client-app</artifactId>
    <version>0.0.1-SNAPSHOT</version>
    <name>client-app</name>
    <description>Demo project for Spring Boot</description>

    <properties>
        <java.version>1.8</java.version>
    </properties>

    <dependencies>
        <dependency>
            <groupId>org.springframework.boot</groupId>
            <artifactId>spring-boot-starter-thymeleaf</artifactId>
        </dependency>
        <dependency>
            <groupId>org.springframework.boot</groupId>
            <artifactId>spring-boot-starter-web</artifactId>
        </dependency>

        <dependency>
            <groupId>org.springframework.boot</groupId>
            <artifactId>spring-boot-starter-test</artifactId>
            <scope>test</scope>
            <exclusions>
                <exclusion>
                    <groupId>org.junit.vintage</groupId>
                    <artifactId>junit-vintage-engine</artifactId>
                </exclusion>
            </exclusions>
        </dependency>
    </dependencies>

    <build>
        <plugins>
            <plugin>
                <groupId>org.springframework.boot</groupId>
                <artifactId>spring-boot-maven-plugin</artifactId>
            </plugin>
        </plugins>
    </build>

</project>
在 resources/templates 目录下,创建 index.html ,内容如下:
<!DOCTYPE html>
<html lang="en" xmlns:th="http://www.thymeleaf.org">
<head>
    <meta charset="UTF-8">
    <title>授权登陆页</title>
</head>
<body>
<a href="http://localhost:8080/oauth/authorize?client_id=admin&response_type=code&scope=all&redirect_url=http://localhost:8082/index.html">第三方授权登陆</a>
<h1 th:text="${msg}"></h1>
</body>
</html>
这是一段 Thymeleaf 模版,点击超链接就可以实现第三方登录,超链接的参数如下:
- client_id 客户端 ID,根据我们在授权服务器中的实际配置填写。
- response_type 表示响应类型,这里是 code 表示响应一个授权码。
- redirect_uri 表示授权成功后的重定向地址,这里表示回到第三方应用的首页。
- scope 表示授权范围。
h1 标签中的数据是来自资源服务器的,当授权服务器通过后,我们拿着 access_token 去资源服务器加载数据,加载到的数据就在 h1 标签中显示出来。
接下来我们来定义一个 HelloController:
package com.example.clientapp.controller;

import org.apache.commons.logging.Log;
import org.apache.commons.logging.LogFactory;
import org.springframework.beans.factory.annotation.Autowired;
import org.springframework.http.HttpEntity;
import org.springframework.http.HttpHeaders;
import org.springframework.http.HttpMethod;
import org.springframework.http.ResponseEntity;
import org.springframework.stereotype.Controller;
import org.springframework.ui.Model;
import org.springframework.util.LinkedMultiValueMap;
import org.springframework.util.MultiValueMap;
import org.springframework.util.StringUtils;
import org.springframework.web.bind.annotation.GetMapping;
import org.springframework.web.client.RestTemplate;

import java.util.Map;

@Controller
public class HelloController
{
    private static final Log log= LogFactory.getLog(HelloController.class);

    @Autowired
    RestTemplate restTemplate;

    @GetMapping("/index.html")
    public String index(String code, Model model)
    {
        if(!StringUtils.isEmpty(code)){
            MultiValueMap<String, String> map = new LinkedMultiValueMap<>();
            map.add("code",code);
            map.add("client_id","admin");
            map.add("client_secret","123");
            map.add("redirect_url","http://localhost:8082/index.html");
            map.add("grant_type","authorization_code");
            Map<String,String> resp = restTemplate.postForObject("http://localhost:8080/oauth/token", map, Map.class);
            log.info(resp);
            HttpHeaders headers = new HttpHeaders();
            headers.add("authorization","Bearer"+resp.get("access_token"));
            HttpEntity<?> httpEntity = new HttpEntity<>(headers);
            ResponseEntity<String> exchange = restTemplate.exchange("http://localhost:8081/hello", HttpMethod.GET, httpEntity, String.class);
            model.addAttribute("msg",exchange.getBody());
        }
        return "index";
    }
}
根据拿到的 code,去请求 http://localhost:8080/oauth/token 地址去获取 Token,返回的数据结构如下:
{
    "access_token": "e7f223c4-7543-43c0-b5a6-5011743b5af4",
    "token_type": "bearer",
    "refresh_token": "aafc167b-a112-456e-bbd8-58cb56d915dd",
    "expires_in": 7199,
    "scope": "all"
}
access_token 就是我们请求数据所需要的令牌,refresh_token 则是我们刷新 token 所需要的令牌,expires_in 表示 token 有效期还剩多久。
接下来,根据我们拿到的 access_token,去请求资源服务器,注意 access_token 通过请求头传递,最后将资源服务器返回的数据放到 model 中。
测试
- 首先我们去访问 http://localhost:8082/index.html 页面
- 然后我们点击 第三方登录 这个超链接,点完之后,会进入到授权服务器的默认登录页面:
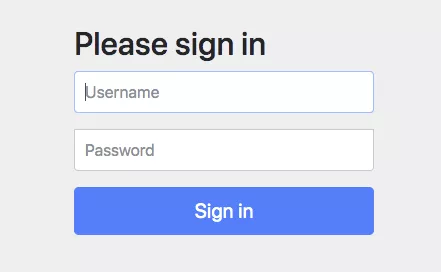

- 接下来我们输入在授权服务器中配置的用户信息来登录,登录成功后,会看到如下页面:

4.授权成功之后:

版权声明:本文内容由互联网用户自发贡献,该文观点仅代表作者本人。本站仅提供信息存储空间服务,不拥有所有权,不承担相关法律责任。如发现本站有涉嫌侵权/违法违规的内容, 请发送邮件至 举报,一经查实,本站将立刻删除。
文章由极客之家整理,本文链接:https://www.bmabk.com/index.php/post/16404.html

