
一、QQ登录工具AgentLogin
1、AgentLogin介绍
⽬前只⽀持 腾讯QQ,微信,微博的第三⽅登录
该⼯具封装了QQ登录时对接QQ互联接⼝的请求操作。可⽤于快速实现QQ登录功能。
2、AgentLogin安装
pip install AgentLogin
3、AgentLogin使⽤说明
from AgentLogin import AgentLogin
获取扫码⻚⾯地址
qq_url = AgentLogin.qq_url(client_id, redirect_uri)
<a href="{{ qq_url }}">QQ登录<a>
client_id:QQ互联上应⽤的APPID
redirect_uri: QQ互联上应⽤的⽹站回调域
获取⽤户名和openid
AgentLogin.qq(client_id, client_secret, url, code)
获取⽤户所有信息
AgentLogin.all_qq(client_id, client_secret, url, code)
client_id:QQ互联上应⽤的 APPID
client_secret: QQ互联上应⽤的APP Key
url: QQ互联上应⽤的⽹站回调域
code: 从QQ服务器得到code
注意此code会在10分钟内过期。
二、通过OAuth2.0认证获取openid
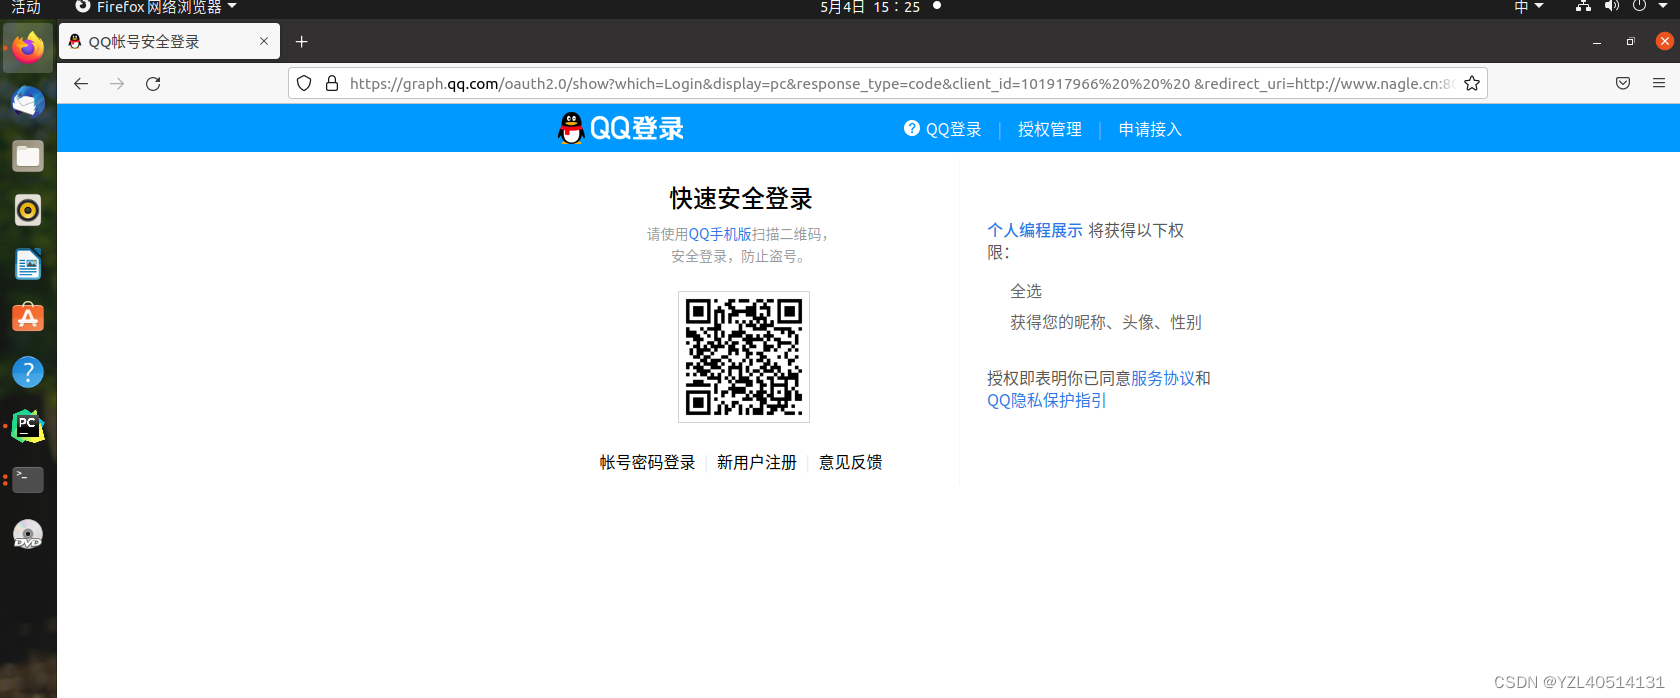
1、获取QQ登录扫码⻚⾯


4.后端逻辑实现
路由:
from django.urls import re_path,path
from .import views

urlpatterns=[
    re_path('^qq/login/$',views.QQLoginURLView.as_view()),
]
class QQLoginView(View):
	def get(self,request):
		'''
		获取QQ扫码登录链接
		'''
		qq_url=AgentLogin.qq_url(client_id=settings.QQ_CLIENT_ID,redirect_url=settings.QQ_REDIRECT_URI)
		return JsonResponse({'code':200,'errormsg':'ok','login_url':qq_url})
https://graph.qq.com/oauth2.0/show?which=Login&display=pc&response_type=code&client_id=xxxxxxxxx%20%20%20%20&redirect_uri=http://www.nagle.cn:8083/about&scope=get_user_info
5、QQ登录参数
# QQ登录的配置参数
QQ_CLIENT_ID = '101917966'          #app id
QQ_REDIRECT_URI = 'http://www.nagle.cn:8083/about'  #回调地址
QQ_APP_KEY = '20fcc768255829c08fa4efbe8acf0001'     #app key
三、接收Authorization Code和OAuth2.0认证获取openid
扫码成功后展示的页面
http://www.nagle.cn:8083/about/?code=34C1002C560320F5B2FFCE850B38A666
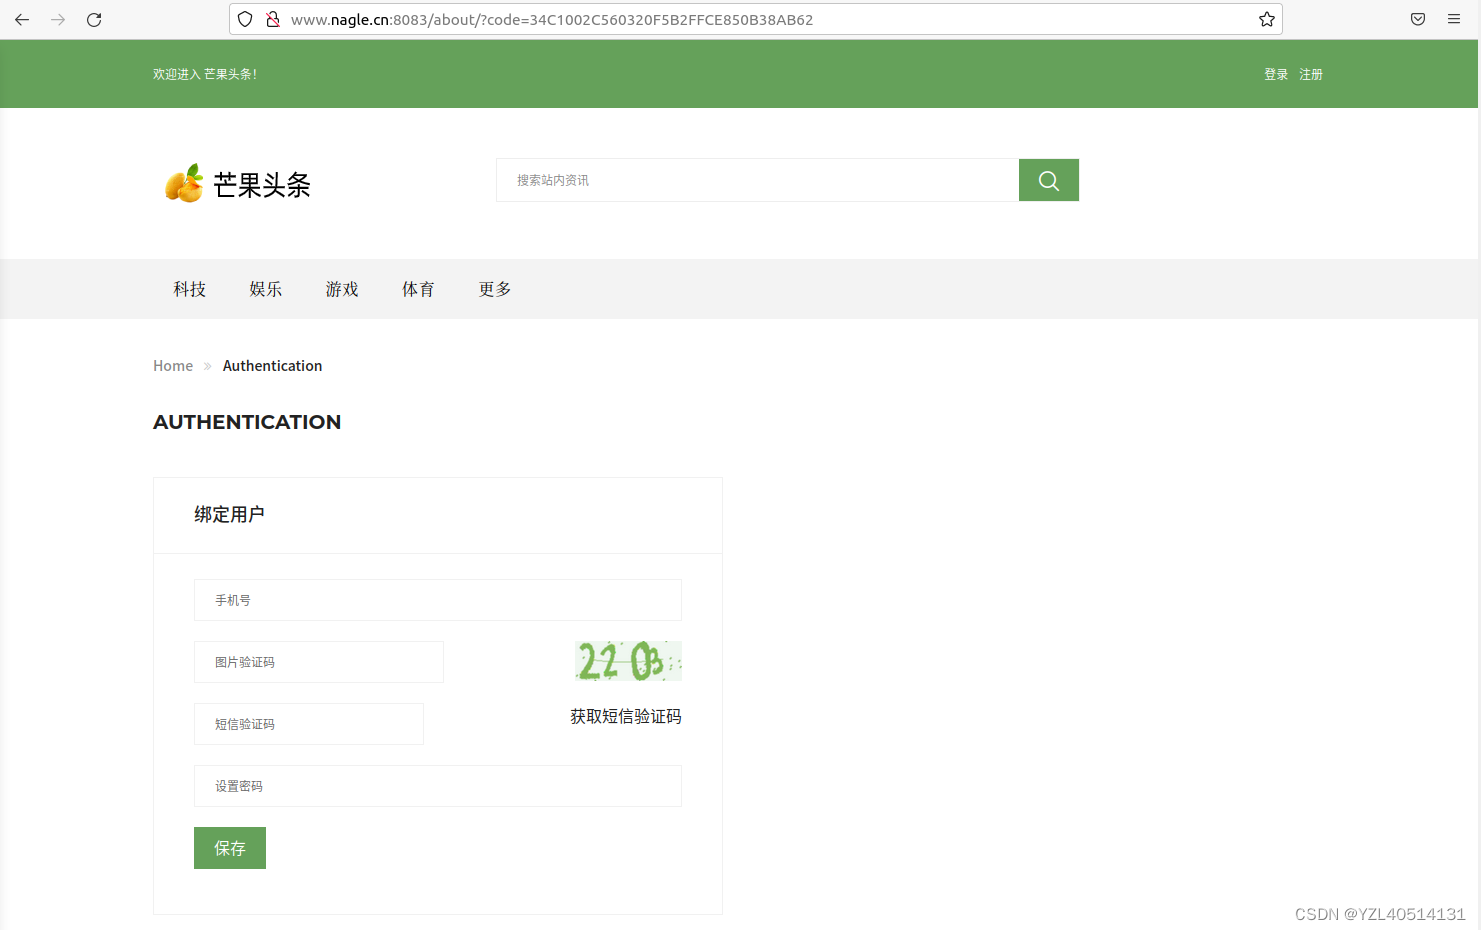
提示:
- ⽤户在QQ登录成功后,QQ会将⽤户重定向到我们配置的回调⽹址。
- 在QQ重定向到回调⽹址时,会传给我们⼀个Authorization Code。
- 我们需要拿到Authorization Code并完成OAuth2.0认证获取openid。
- 在本项⽬中,我们申请QQ登录开发资质时配置的回调⽹址为:
http://www.nagle.cn:8083/about QQ互联重定向的完整⽹址为http://www.nagle.cn:8083/about/?code=34C1002C560320F5B2FFCE850B38A666
配置回调地址路由
from django.urls import re_path,path
from .import views

urlpatterns=[
    re_path('^qq/login/$',views.QQLoginURLView.as_view()),
    re_path('^about/$',views.QQAuthUserView.as_view()),
]
视图:
class QQAuthUserView(View):
	def get(self,request):
		'''
		获取openid
		'''
		#1、获取Authorization code参数
		code=request.GET.get('code','')
		#2、校验参数
		if not code:
			return http.HttpResponseForbidden('缺少code参数')
		#3、调用接口方法获取openid
		nickname,openid=AgentLogin.qq(client_id=settings.QQ_CLIENT_ID,
                                      client_secret=settings.QQ_APP_KEY,
                                      url=settings.QQ_REDIRECT_URI,
                                      code=code)
		#4、通过openid判断用户是否绑定项目用户
		try:
			qq_user=QQAuthUser.objects.get(openid=openid)
		except QQAuthUser.DoesNotExist:
			#QQ用户没有绑定项目用户

			#加密openid数据
			sec_openid=generate_escret_openid(openid)
			#传递加密数据到用户绑定页面
			return render(request,'oauth/oauth_user.html',{'sec_openid':sec_openid})
		else:
			#QQ用户绑定了项目用户
			#获得关联的项目用户对象
			user=qq_user.user
			#状态保持
			login(request,user)
			#响应结果
			return redirect(reverse('newsapp:index'))
四、本机绑定www.nagle.cn域名
http://www.nagle.cn:8083/about/?code=34C1002C560320F5B2FFCE850B38A666
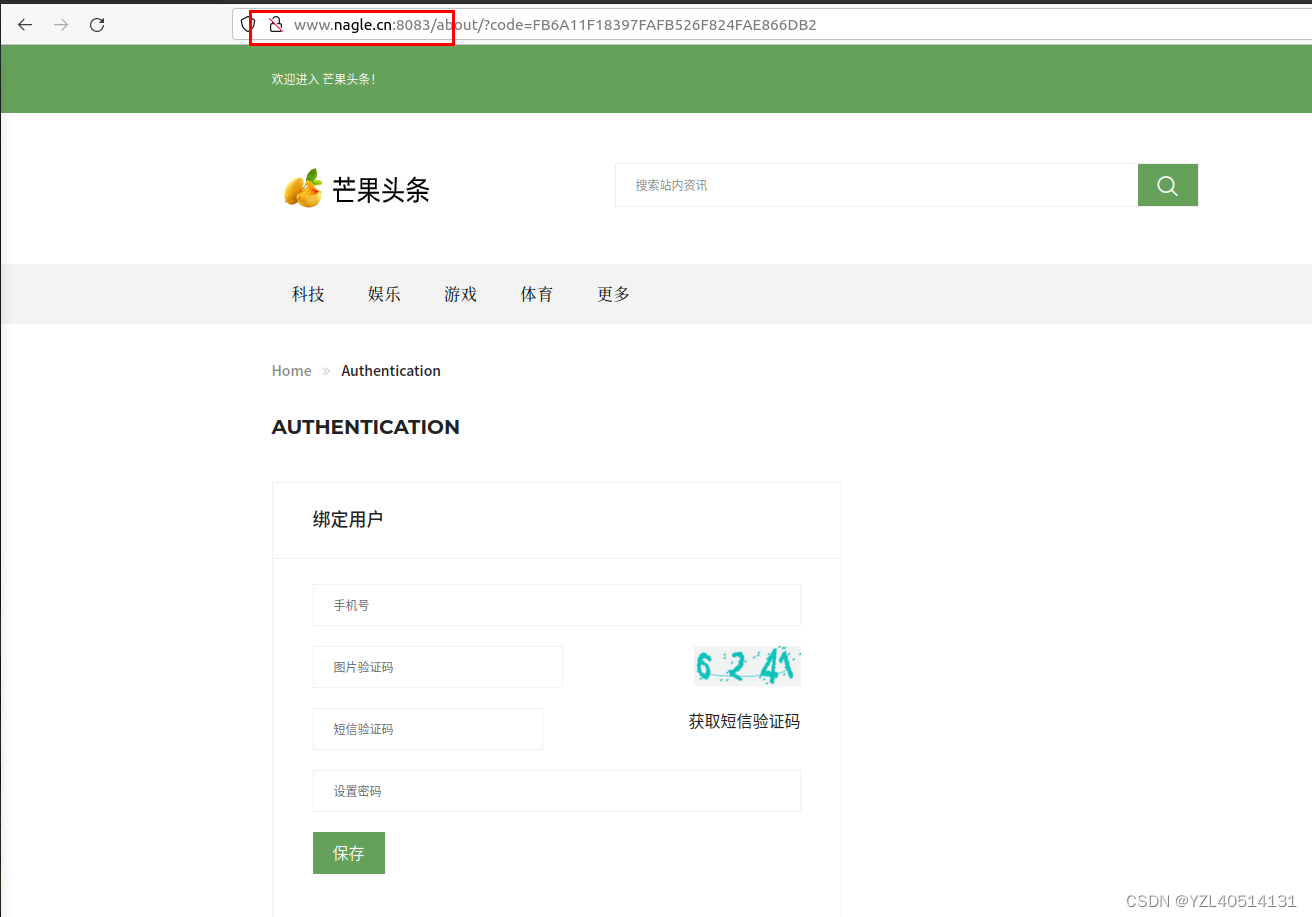
1、ubuntu系统或者Mac系统
sudo vi /etc/hosts

127.0.0.1	 www.nagle.cn
2、修改dev.py配置⽂件
ALLOWED_HOSTS = ['www.nagle.cn','127.0.0.1']
3、修改服务器端⼝号

版权声明:本文内容由互联网用户自发贡献,该文观点仅代表作者本人。本站仅提供信息存储空间服务,不拥有所有权,不承担相关法律责任。如发现本站有涉嫌侵权/违法违规的内容, 请发送邮件至 举报,一经查实,本站将立刻删除。
文章由半码博客整理,本文链接:https://www.bmabk.com/index.php/post/123294.html

