
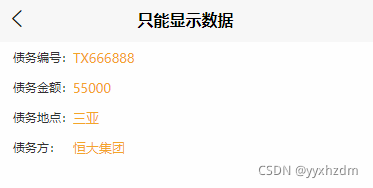
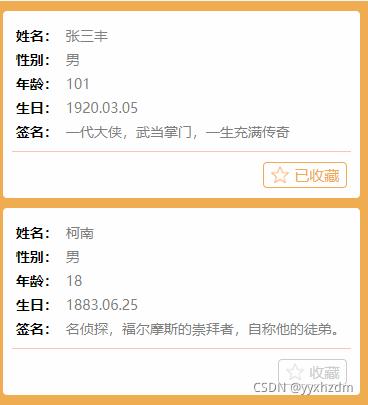
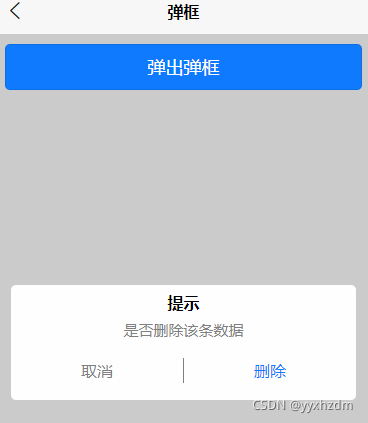
效果图:

自定义组建的步骤:
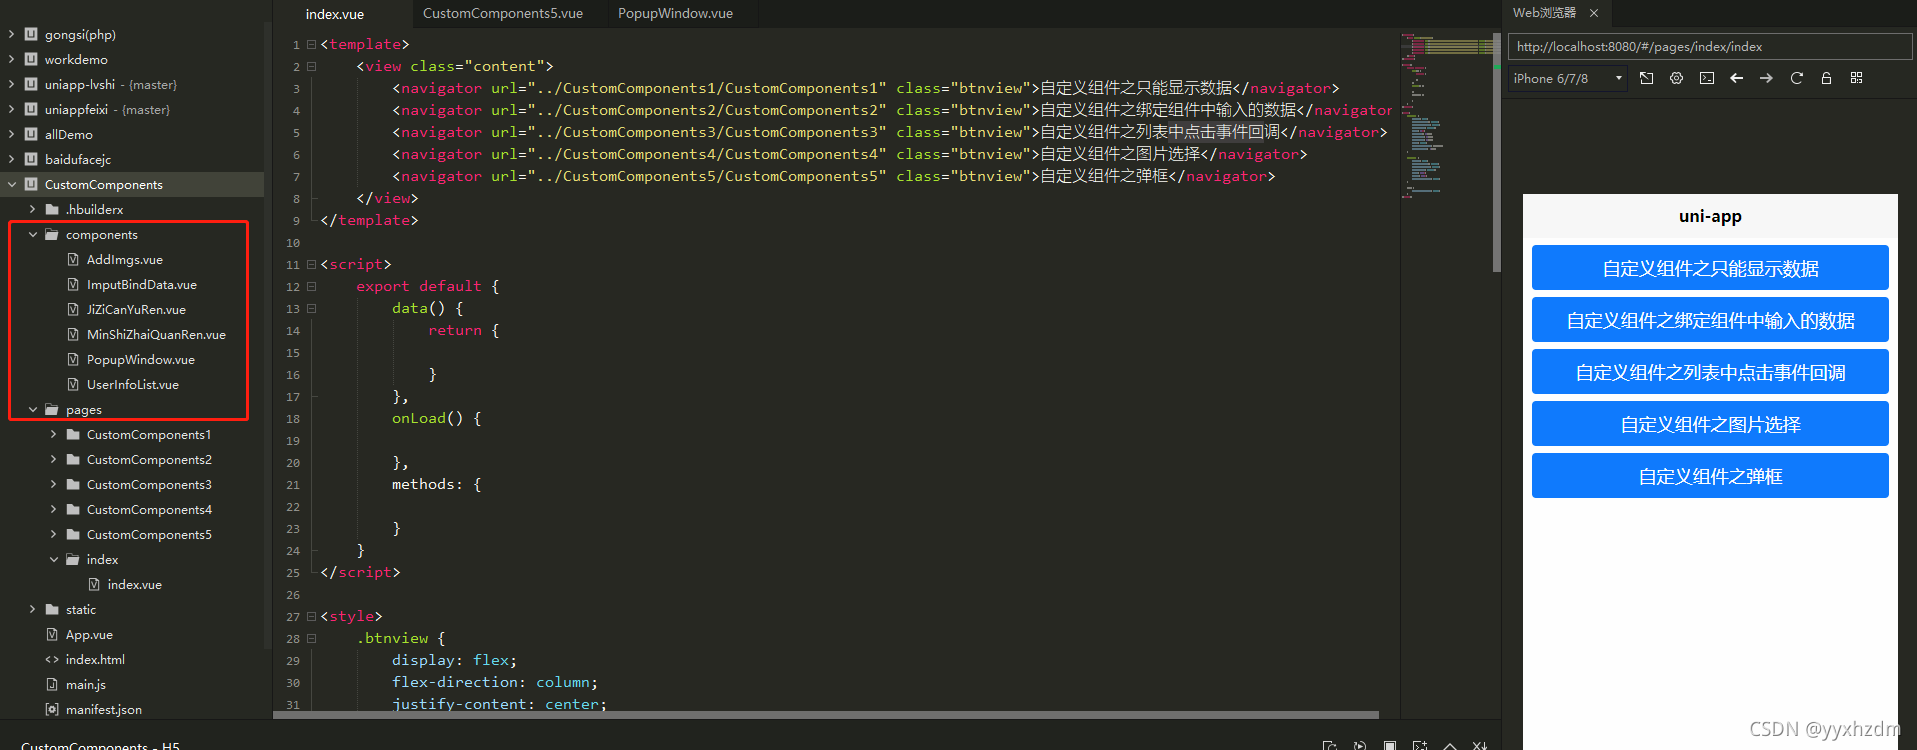
1.在项目中创建目录:components
2.新建组件.vue 文件 例如:AddImgs.vue
3.组件文档结构
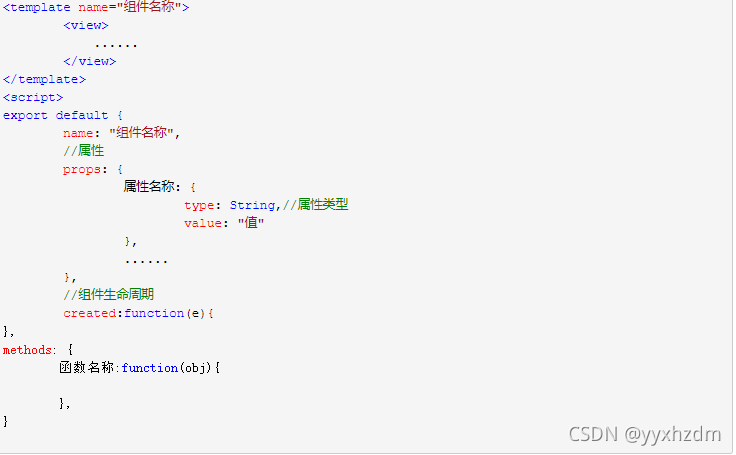
实例:
4.使用组件
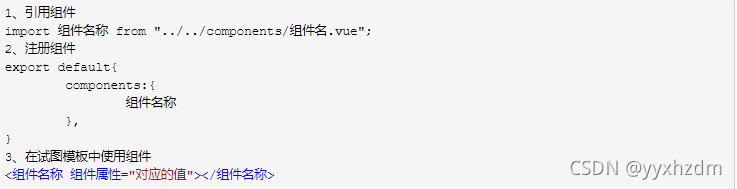
实例:
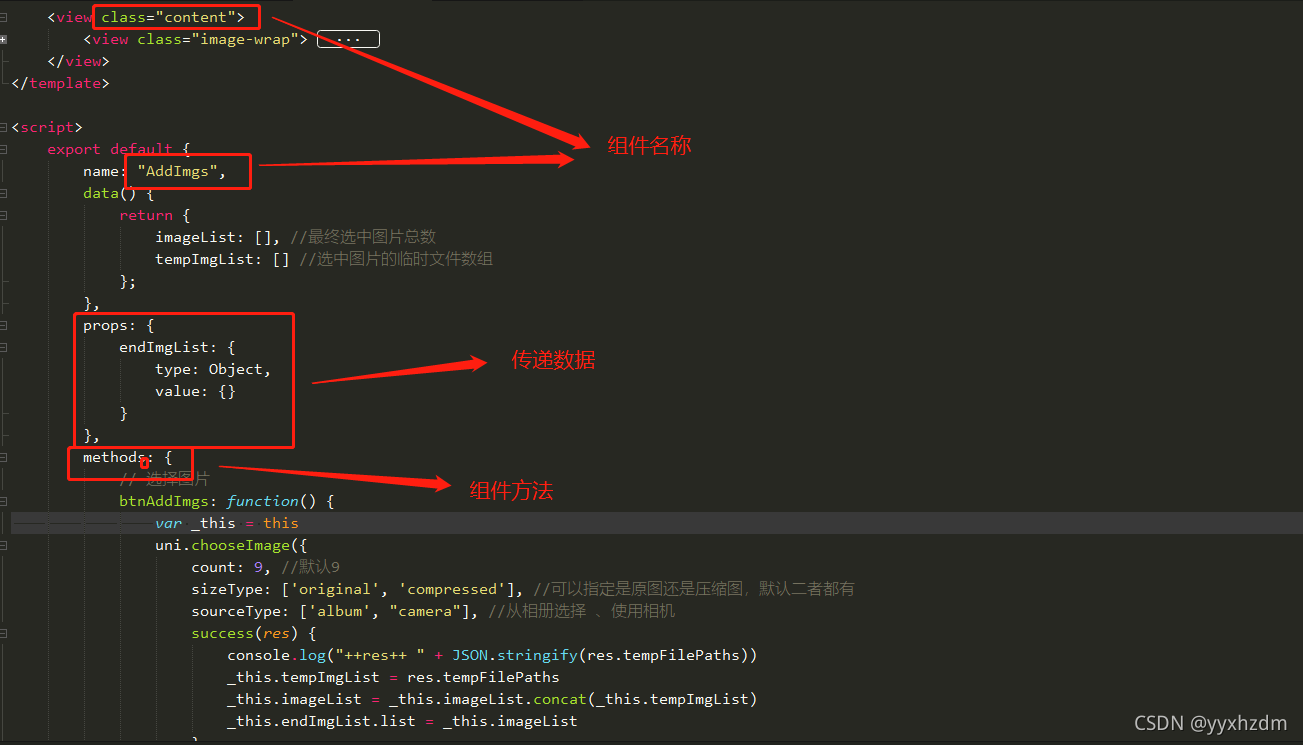
 5.接下来,我将其中图片选择的自定义组件代码粘贴出来
(1).子组件:
<template name=”AddImgs”>
<view class=”content”>
<view class=”image-wrap”>
<block v-for=”(itemImg ,index) in imageList”>
<view class=”item”>
<image class=”q-image” :src=”itemImg” mode=”scaleToFill” @click=”previewImage(index)”>
</image>
<!– 移除图片的按钮 –>
<view class=”q-image-remover”>
<image class=”deldete” src=”../static/img_exit.png” @click=”btnDeleteImg(index)”
mode=”widthFix”></image>
</view>
</view>
</block>
<!– 添加图片图标 –>
<view class=”item” @click=”btnAddImgs”>
<image class=”q-image” src=”../static/add_img1.png” mode=”scaleToFill”>
</image>
</view>
</view>
</view>
</template>
<script>
export default {
name: “AddImgs”,
data() {
return {
imageList: [], //最终选中图片总数
tempImgList: [] //选中图片的临时文件数组
};
},
props: {
endImgList: {
type: Object,
value: {}
}
},
methods: {
// 选择图片
btnAddImgs: function() {
var _this = this
uni.chooseImage({
count: 9, //默认9
sizeType: [‘original’, ‘compressed’], //可以指定是原图还是压缩图,默认二者都有
sourceType: [‘album’, “camera”], //从相册选择 、使用相机
success(res) {
console.log(“++res++ ” + JSON.stringify(res.tempFilePaths))
_this.tempImgList = res.tempFilePaths
_this.imageList = _this.imageList.concat(_this.tempImgList)
_this.endImgList.list = _this.imageList
}
})
},
// 删除图片
btnDeleteImg: function(index) {
var _this = this
uni.showModal({
title: “删除”,
content: “是否删除该选中的图片!”,
confirmText: “删除”,
success(res) {
if (res.confirm) { //删除
_this.imageList.splice(index, 1)
_this.endImgList.list = _this.imageList
}
}
})
},
// 图片预览
previewImage: function(index) {
var _this = this
uni.previewImage({
current: index,
urls: _this.imageList,
indicator: “number”
})
}
}
}
</script>
<style>
.deldete {
width: 28rpx;
position: absolute;
top: -56rpx;
right: 4rpx;
}
.q-image-remover {
width: 0;
height: 0;
border-top: 66rpx solid #bfde85;
border-left: 66rpx solid transparent;
position: absolute;
top: 0;
right: 0;
}
.q-image {
height: 220rpx;
width: 100%;
}
.item {
position: relative;
height: 220rpx;
width: 30%;
margin-left: 2.5%;
margin-top: 20rpx;
}
.image-wrap {
display: flex;
flex-direction: row;
flex-wrap: wrap;
width: 95%;
}
.content {
display: flex;
flex-direction: column;
justify-content: center;
align-items: center;
width: 100%;
height: 100%;
background-color: #FFFFFF;
}
</style>
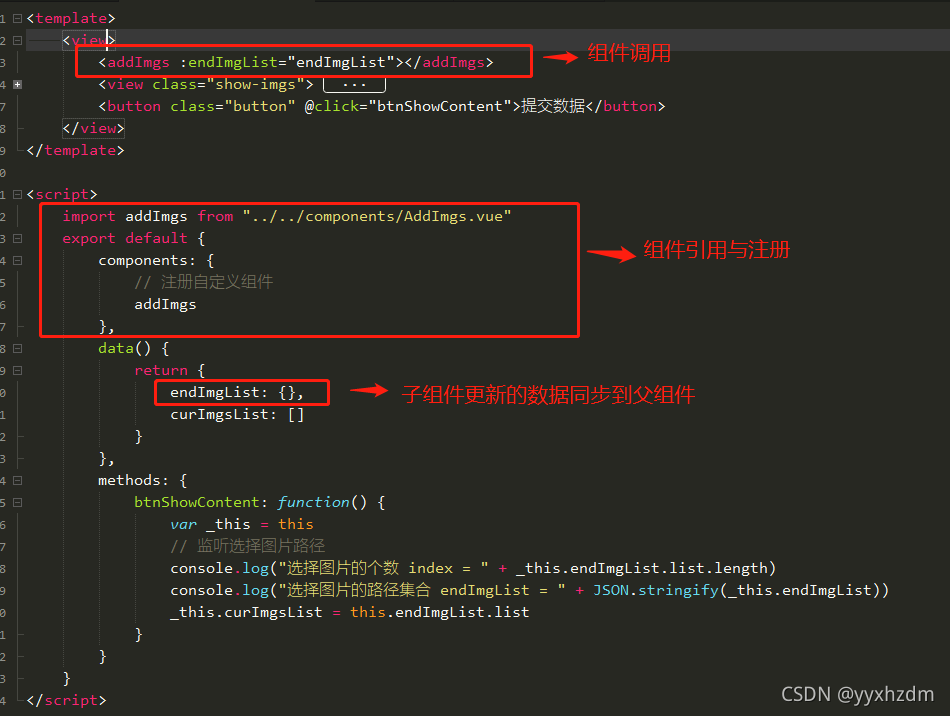
(2).父组件:
<template>
<view>
<addImgs :endImgList=”endImgList”></addImgs>
<view class=”show-imgs”>
<image class=”img” v-for=”imgurl in curImgsList” :src=”imgurl” mode=”scaleToFill”></image>
</view>
<button class=”button” @click=”btnShowContent”>提交数据</button>
</view>
</template>
<script>
import addImgs from “../../components/AddImgs.vue”
export default {
components: {
// 注册自定义组件
addImgs
},
data() {
return {
endImgList: {},
curImgsList: []
}
},
methods: {
btnShowContent: function() {
var _this = this
// 监听选择图片路径
console.log(“选择图片的个数 index = ” + _this.endImgList.list.length)
console.log(“选择图片的路径集合 endImgList = ” + JSON.stringify(_this.endImgList))
_this.curImgsList = this.endImgList.list
}
}
}
</script>
<style>
.img {
width: 30%;
margin-left: 2.5%;
height: 220rpx;
margin-top: 20rpx;
}
.show-imgs {
display: flex;
flex-direction: row;
flex-wrap: wrap;
margin-top: 20rpx;
}
.button {
width: 94%;
margin-left: 3%;
margin-top: 20rpx;
background-color: #007AFF;
color: white;
font-size: 36rpx;
position: fixed;
bottom: 30rpx;
}
.content {
display: flex;
flex-direction: column;
justify-content: center;
align-items: center;
width: 100%;
height: 100%;
background-color: #FFFFFF;
}
page {
background-color: #FFFFFF;
}
</style>
最后两Demo下载地址贴出来,用得到的伙伴可以去下载,直接运行看效果
版权声明:本文内容由互联网用户自发贡献,该文观点仅代表作者本人。本站仅提供信息存储空间服务,不拥有所有权,不承担相关法律责任。如发现本站有涉嫌侵权/违法违规的内容, 请发送邮件至 举报,一经查实,本站将立刻删除。
文章由极客之音整理,本文链接:https://www.bmabk.com/index.php/post/119143.html

