
JMH
JMH全称是Java Microbenchmark Harness(Java微基准测试),简单讲其实就是测一个方法的性能好坏。这个测试的框架是2013年发出来的,由JLT的开发人员开发,后来归到了OpenJDK下面,官网地址:https://openjdk.org/projects/code-tools/jmh/。
创建Maven项目,引入相关依赖
<dependency>
    <groupId>org.openjdk.jmh</groupId>
    <artifactId>jmh-core</artifactId>
    <version>1.21</version>
</dependency>
<dependency>
    <groupId>org.openjdk.jmh</groupId>
    <artifactId>jmh-generator-annprocess</artifactId>
    <version>1.21</version>
    <scope>test</scope>
</dependency>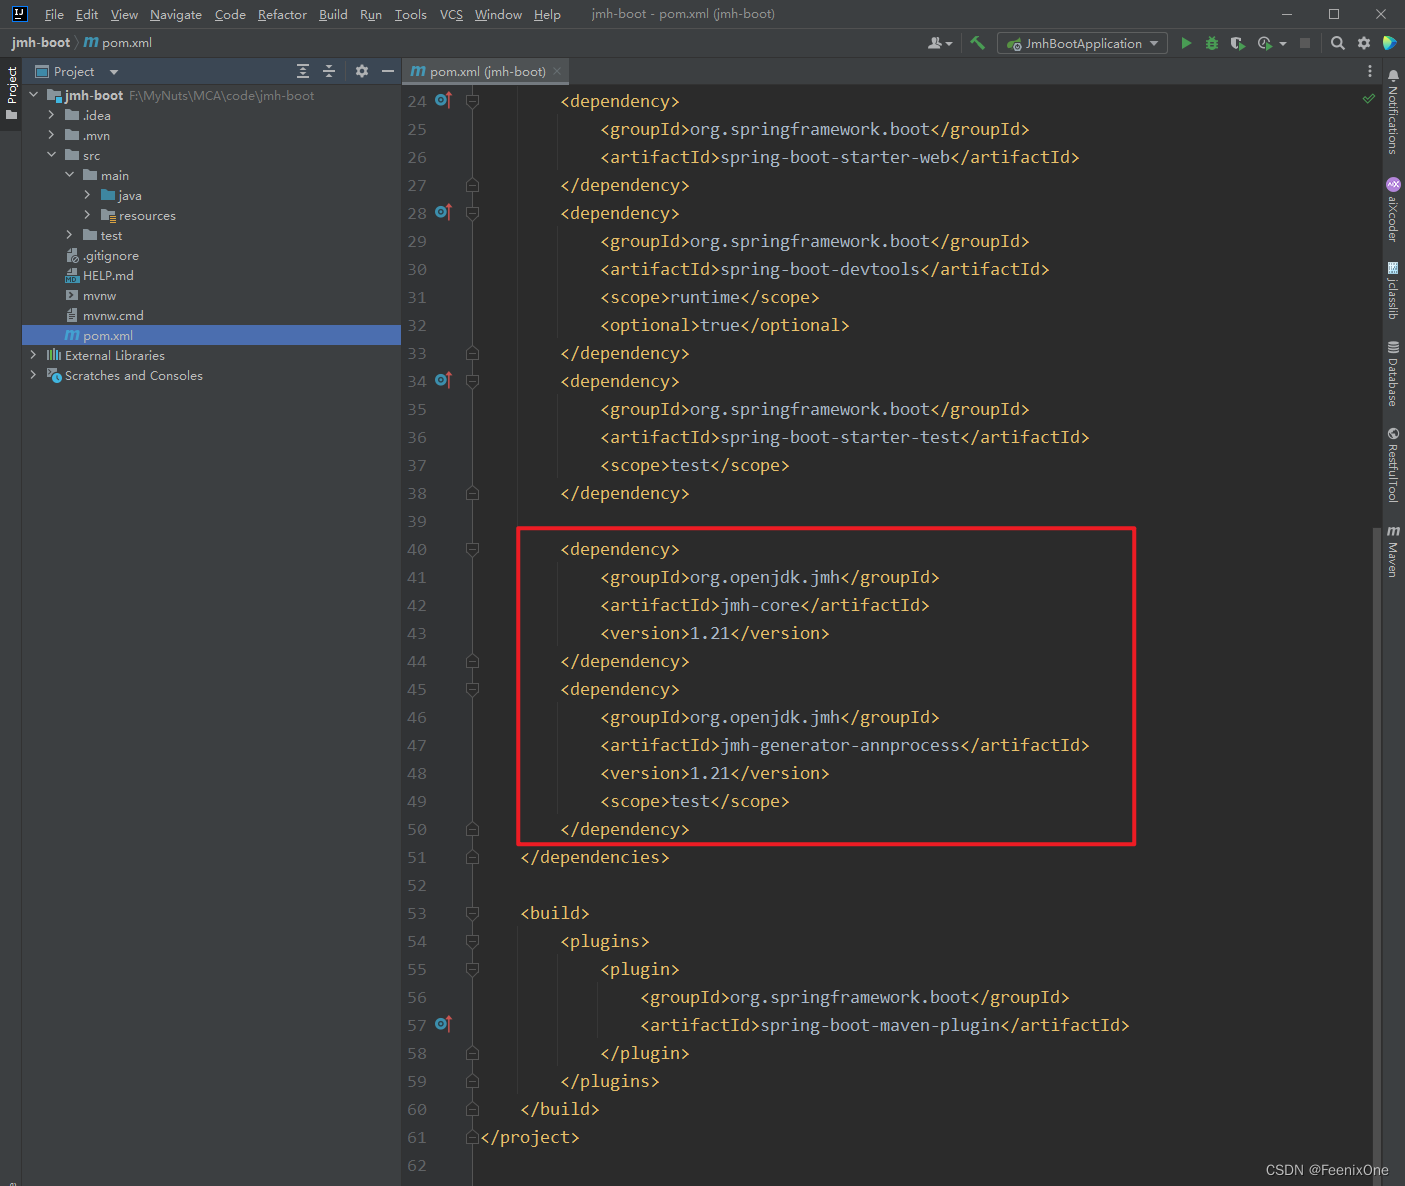

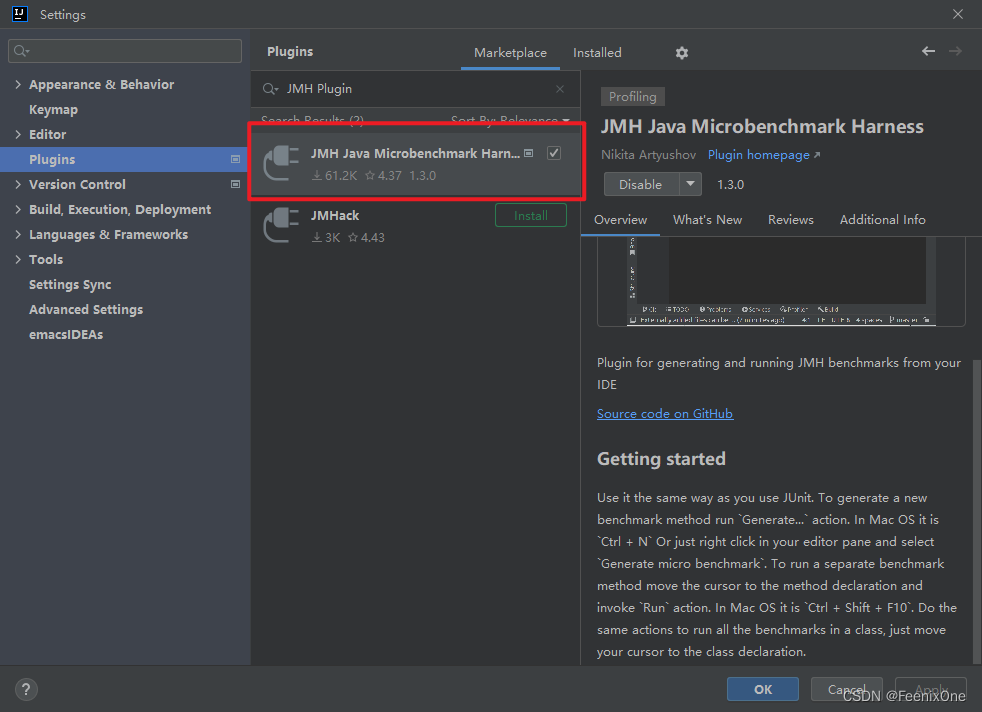
IDEA安装JMH测试运行插件,并打开运行程序注解配置
定义需要测试的类
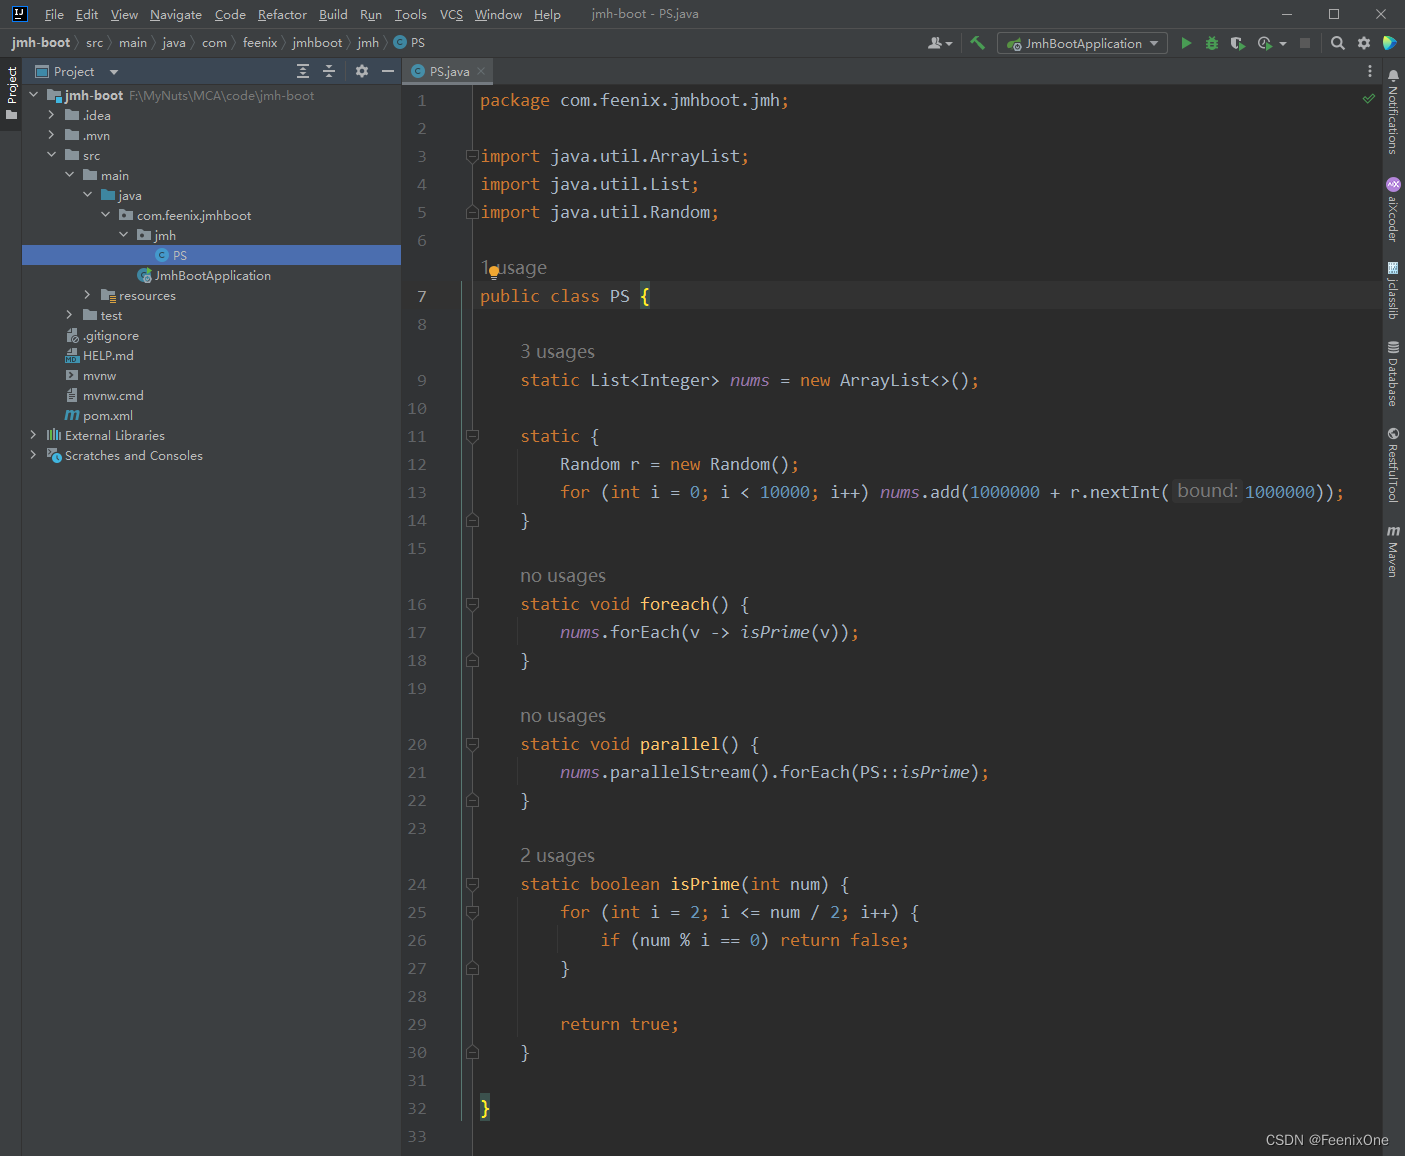
在test目录下定义测试类
只要在测试目录下写个方法调用被测试的方法,使用@Benchmark注解即可直接对方法进行测试,并生成详细的测试报告打印在控制台上。
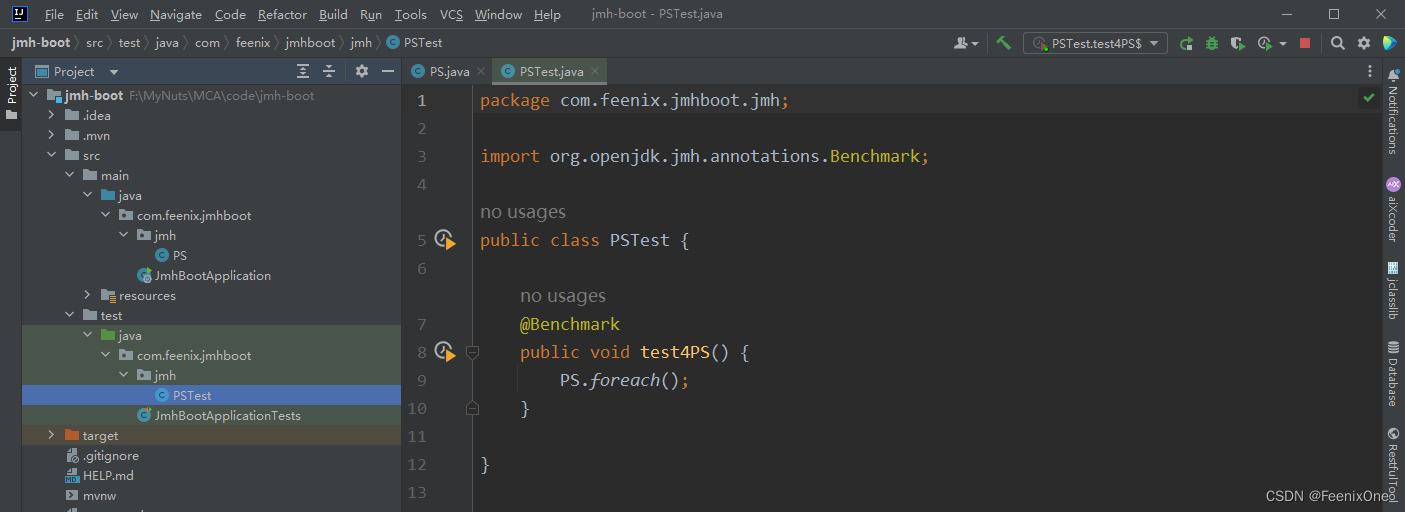
这就是针对PS.foreach();这个方法测试之后生成的详细测试报告:
WARNING: An illegal reflective access operation has occurred
WARNING: Illegal reflective access by org.openjdk.jmh.util.Utils (file:/E:/apache-maven-repository/org/openjdk/jmh/jmh-core/1.21/jmh-core-1.21.jar) to field java.io.PrintStream.charOut
WARNING: Please consider reporting this to the maintainers of org.openjdk.jmh.util.Utils
WARNING: Use --illegal-access=warn to enable warnings of further illegal reflective access operations
WARNING: All illegal access operations will be denied in a future release
# JMH version: 1.21
# VM version: JDK 11.0.16.1, Java HotSpot(TM) 64-Bit Server VM, 11.0.16.1+1-LTS-1
# VM invoker: E:\Java11\JDK\bin\java.exe
# VM options: -javaagent:E:\IntelliJ IDEA\lib\idea_rt.jar=11612:E:\IntelliJ IDEA\bin -Dfile.encoding=UTF-8
# Warmup: 5 iterations, 10 s each
# Measurement: 5 iterations, 10 s each
# Timeout: 10 min per iteration
# Threads: 1 thread, will synchronize iterations
# Benchmark mode: Throughput, ops/time
# Benchmark: com.feenix.jmhboot.jmh.PSTest.test4PS

# Run progress: 0.00% complete, ETA 00:08:20
# Fork: 1 of 5
# Warmup Iteration   1: 0.779 ops/s
# Warmup Iteration   2: 0.763 ops/s
# Warmup Iteration   3: 0.772 ops/s
# Warmup Iteration   4: 0.743 ops/s
# Warmup Iteration   5: 0.746 ops/s
Iteration   1: 0.771 ops/s
Iteration   2: 0.745 ops/s
Iteration   3: 0.749 ops/s
Iteration   4: 0.770 ops/s
Iteration   5: 0.757 ops/s

# Run progress: 20.00% complete, ETA 00:07:05
# Fork: 2 of 5
# Warmup Iteration   1: 0.831 ops/s
# Warmup Iteration   2: 0.842 ops/s
# Warmup Iteration   3: 0.799 ops/s
# Warmup Iteration   4: 0.851 ops/s
# Warmup Iteration   5: 0.843 ops/s
Iteration   1: 0.849 ops/s
Iteration   2: 0.858 ops/s
Iteration   3: 0.866 ops/s
Iteration   4: 0.844 ops/s
Iteration   5: 0.853 ops/s

# Run progress: 40.00% complete, ETA 00:05:19
# Fork: 3 of 5
# Warmup Iteration   1: 0.731 ops/s
# Warmup Iteration   2: 0.769 ops/s
# Warmup Iteration   3: 0.750 ops/s
# Warmup Iteration   4: 0.761 ops/s
# Warmup Iteration   5: 0.774 ops/s
Iteration   1: 0.766 ops/s
Iteration   2: 0.759 ops/s
Iteration   3: 0.752 ops/s
Iteration   4: 0.771 ops/s
Iteration   5: 0.778 ops/s

# Run progress: 60.00% complete, ETA 00:03:32
# Fork: 4 of 5
# Warmup Iteration   1: 0.759 ops/s
# Warmup Iteration   2: 0.775 ops/s
# Warmup Iteration   3: 0.770 ops/s
# Warmup Iteration   4: 0.794 ops/s
# Warmup Iteration   5: 0.806 ops/s
Iteration   1: 0.800 ops/s
Iteration   2: 0.794 ops/s
Iteration   3: 0.796 ops/s
Iteration   4: 0.799 ops/s
Iteration   5: 0.794 ops/s

# Run progress: 80.00% complete, ETA 00:01:46
# Fork: 5 of 5
# Warmup Iteration   1: 0.726 ops/s
# Warmup Iteration   2: 0.751 ops/s
# Warmup Iteration   3: 0.716 ops/s
# Warmup Iteration   4: 0.751 ops/s
# Warmup Iteration   5: 0.740 ops/s
Iteration   1: 0.757 ops/s
Iteration   2: 0.753 ops/s
Iteration   3: 0.741 ops/s
Iteration   4: 0.688 ops/s
Iteration   5: 0.742 ops/s


Result "com.feenix.jmhboot.jmh.PSTest.test4PS":
  0.782 ±(99.9%) 0.033 ops/s [Average]
  (min, avg, max) = (0.688, 0.782, 0.866), stdev = 0.044
  CI (99.9%): [0.749, 0.815] (assumes normal distribution)


# Run complete. Total time: 00:08:53

REMEMBER: The numbers below are just data. To gain reusable insights, you need to follow up on
why the numbers are the way they are. Use profilers (see -prof, -lprof), design factorial
experiments, perform baseline and negative tests that provide experimental control, make sure
the benchmarking environment is safe on JVM/OS/HW level, ask for reviews from the domain experts.
Do not assume the numbers tell you what you want them to tell.

Benchmark        Mode  Cnt  Score   Error  Units
PSTest.test4PS  thrpt   25  0.782 ± 0.033  ops/s

Process finished with exit code 0
如果只使用一个@Benchmark注解,默认生成的测试非常的长,测试时间也非常久,所以一般都会加上一些其它的注解指定测试的参数。
指定测试环境参数
@Warmup(iterations = 1, time = 3)
Warmup的意思是预热。之前在介绍JVM的时候就有提到过,Java代码是混合执行模式,会将一些高频率多循环执行的代码直接编译好,从而大大增高执行的效率。预热就是干这么一件事情,有预热过跟没预热过产生的结果是截然不同的,所以预热对于测试来说非常的重要。iterations和time分别指的是预热的次数和每次预热的间隔时间(单位是秒)。
@Fork(5)
用于指定多少个线程去执行被测试方法。
@BenchmarkMode(Mode.Throughput)
基准测试模式。用的最多的就是Throughput模式,也就是吞吐量测试,指的是被测试的方法每秒钟能执行多少次。当然也会有反过来,每执行一次需要耗时多少秒的模式。
@Measurement(iterations = 1, time = 3)
执行多少次的测试。一般测试环境中会将次数设的表较多,这样得出的结果更加准确。
通过这么设置参数后再进行测试就会得到相对比较短的测试报告:
WARNING: An illegal reflective access operation has occurred
WARNING: Illegal reflective access by org.openjdk.jmh.util.Utils (file:/E:/apache-maven-repository/org/openjdk/jmh/jmh-core/1.21/jmh-core-1.21.jar) to field java.io.PrintStream.charOut
WARNING: Please consider reporting this to the maintainers of org.openjdk.jmh.util.Utils
WARNING: Use --illegal-access=warn to enable warnings of further illegal reflective access operations
WARNING: All illegal access operations will be denied in a future release
# JMH version: 1.21
# VM version: JDK 11.0.16.1, Java HotSpot(TM) 64-Bit Server VM, 11.0.16.1+1-LTS-1
# VM invoker: E:\Java11\JDK\bin\java.exe
# VM options: -javaagent:E:\IntelliJ IDEA\lib\idea_rt.jar=12528:E:\IntelliJ IDEA\bin -Dfile.encoding=UTF-8
# Warmup: 1 iterations, 3 s each
# Measurement: 1 iterations, 3 s each
# Timeout: 10 min per iteration
# Threads: 1 thread, will synchronize iterations
# Benchmark mode: Throughput, ops/time
# Benchmark: com.feenix.jmhboot.jmh.PSTest.test4PS

# Run progress: 0.00% complete, ETA 00:00:30
# Fork: 1 of 5
# Warmup Iteration   1: 0.736 ops/s
Iteration   1: 0.806 ops/s

# Run progress: 20.00% complete, ETA 00:00:35
# Fork: 2 of 5
# Warmup Iteration   1: 0.825 ops/s
Iteration   1: 0.832 ops/s

# Run progress: 40.00% complete, ETA 00:00:25
# Fork: 3 of 5
# Warmup Iteration   1: 0.745 ops/s
Iteration   1: 0.797 ops/s

# Run progress: 60.00% complete, ETA 00:00:17
# Fork: 4 of 5
# Warmup Iteration   1: 0.701 ops/s
Iteration   1: 0.745 ops/s

# Run progress: 80.00% complete, ETA 00:00:08
# Fork: 5 of 5
# Warmup Iteration   1: 0.754 ops/s
Iteration   1: 0.773 ops/s


Result "com.feenix.jmhboot.jmh.PSTest.test4PS":
  0.791 ±(99.9%) 0.128 ops/s [Average]
  (min, avg, max) = (0.745, 0.791, 0.832), stdev = 0.033
  CI (99.9%): [0.662, 0.919] (assumes normal distribution)


# Run complete. Total time: 00:00:44

REMEMBER: The numbers below are just data. To gain reusable insights, you need to follow up on
why the numbers are the way they are. Use profilers (see -prof, -lprof), design factorial
experiments, perform baseline and negative tests that provide experimental control, make sure
the benchmarking environment is safe on JVM/OS/HW level, ask for reviews from the domain experts.
Do not assume the numbers tell you what you want them to tell.

Benchmark        Mode  Cnt  Score   Error  Units
PSTest.test4PS  thrpt    5  0.791 ± 0.128  ops/s

Process finished with exit code 0
在相同的参数下对另一个方法PS.parallel();进行测试,得出的报告:
WARNING: An illegal reflective access operation has occurred
WARNING: Illegal reflective access by org.openjdk.jmh.util.Utils (file:/E:/apache-maven-repository/org/openjdk/jmh/jmh-core/1.21/jmh-core-1.21.jar) to field java.io.PrintStream.charOut
WARNING: Please consider reporting this to the maintainers of org.openjdk.jmh.util.Utils
WARNING: Use --illegal-access=warn to enable warnings of further illegal reflective access operations
WARNING: All illegal access operations will be denied in a future release
# JMH version: 1.21
# VM version: JDK 11.0.16.1, Java HotSpot(TM) 64-Bit Server VM, 11.0.16.1+1-LTS-1
# VM invoker: E:\Java11\JDK\bin\java.exe
# VM options: -javaagent:E:\IntelliJ IDEA\lib\idea_rt.jar=12686:E:\IntelliJ IDEA\bin -Dfile.encoding=UTF-8
# Warmup: 1 iterations, 3 s each
# Measurement: 1 iterations, 3 s each
# Timeout: 10 min per iteration
# Threads: 1 thread, will synchronize iterations
# Benchmark mode: Throughput, ops/time
# Benchmark: com.feenix.jmhboot.jmh.PSTest.test4PS

# Run progress: 0.00% complete, ETA 00:00:30
# Fork: 1 of 5
# Warmup Iteration   1: 3.166 ops/s
Iteration   1: 3.100 ops/s

# Run progress: 20.00% complete, ETA 00:00:30
# Fork: 2 of 5
# Warmup Iteration   1: 3.371 ops/s
Iteration   1: 3.293 ops/s

# Run progress: 40.00% complete, ETA 00:00:22
# Fork: 3 of 5
# Warmup Iteration   1: 3.654 ops/s
Iteration   1: 3.601 ops/s

# Run progress: 60.00% complete, ETA 00:00:14
# Fork: 4 of 5
# Warmup Iteration   1: 3.457 ops/s
Iteration   1: 3.450 ops/s

# Run progress: 80.00% complete, ETA 00:00:07
# Fork: 5 of 5
# Warmup Iteration   1: 3.414 ops/s
Iteration   1: 3.440 ops/s


Result "com.feenix.jmhboot.jmh.PSTest.test4PS":
  3.377 ±(99.9%) 0.729 ops/s [Average]
  (min, avg, max) = (3.100, 3.377, 3.601), stdev = 0.189
  CI (99.9%): [2.648, 4.105] (assumes normal distribution)


# Run complete. Total time: 00:00:36

REMEMBER: The numbers below are just data. To gain reusable insights, you need to follow up on
why the numbers are the way they are. Use profilers (see -prof, -lprof), design factorial
experiments, perform baseline and negative tests that provide experimental control, make sure
the benchmarking environment is safe on JVM/OS/HW level, ask for reviews from the domain experts.
Do not assume the numbers tell you what you want them to tell.

Benchmark        Mode  Cnt  Score   Error  Units
PSTest.test4PS  thrpt    5  3.377 ± 0.729  ops/s

Process finished with exit code 0
直接看最后给出的总结,上一个方法的得分是0.791,这个方法的得分是3.377,高下立判。其实这里只是做了一个非常非常的入门粗浅讲解,毕竟这个东西开发用的不多,实际中也很少会去深究个中原委。不过项目中使用这个起码比用个end-start要更严谨真实一些,如果对这个感兴趣可以去官网看看详细的案例讲解:http://hg.openjdk.java.net/code-tools/jmh/file/tip/jmh-samples/src/main/java/org/openjdk/jmh/samples/。
Disruptor
Disruptor是英国外汇交易公司LMAX开发的一个高性能队列,研发的初衷是解决内存队列的延迟问题。与Kafka、RabbitMQ用于服务间的消息队列不同,Disruptor一般用于线程间消息的传递。作为一个开源的并发框架,曾与2011年获得Duke’s程序框架创新奖。能够在无锁的情况下实现网络的Queue并发操作,基于Disruptor开发的系统单线程能支撑每秒600万订单。目前,包括Apache Storm、Camel、Log4j2等等知名的框架都在内部集成了Disruptor用来替代JDK的队列,以此来获得高性能。
Disruptor是用于一个JVM中多个线程之间的消息队列,作用与ArrayBlockingQueue有相似之处,但是disruptor从功能、性能都远好于ArrayBlockingQueue,当多个线程之间传递大量数据或对性能要求较高时,可以考虑使用disruptor作为ArrayBlockingQueue的替代者。官方也对Disruptor和ArrayBlockingQueue的性能在不同的应用场景下做了对比,目测性能只有有5~10倍左右的提升。
虽然Disruptor将各方面的性能应用到了极致,但是本质上它和Redis、Kafka这些还是存在着不可替代的差距。它只能用于单机环境,Redis和Kafka都可以用于集群,并且都有着序列化的机制,这些都是Disruptor本身不具备的点,简单粗暴来说,就是内存中一个用于存放元素的高效率队列。
设计原理
Disruptor的核心是一个RingBuffer,也就是一个环形队列。一般的容器,无论是用数组实现还是链表实现,都是一个普通的队列。生产者在一头使劲往里塞,消费者在另一头使劲往外拿。JDK中自带的那些容器,像BlockingQueue这种是阻塞队列。阻塞效率偏低,如果不想使用阻塞队列,还有类似于ConcurrentLinkedQueue这种,内部大量的使用了CAS操作,因此效率上相对较高。但这种提高也是有限的,因为对于遍历来说,链表的效率一定比数组低。而且链表需要维护头指针和尾指针,在并发的时候就需要加锁来保证指针的操作。但是在JDK中,却并没有提供类似于ConcurrentArrayQueue这种容器,为什么?
因为数组的大小是固定的,如果数组空间用完了想要扩展,就得先把原来的数组元素先拷贝一份到新的空间中去,再将新元素添加到数组中。一用完就要拷贝,一扩展就要拷贝,效率低不说还大大浪费系统资源在拷贝上,基于这些考虑,JDK并没有提供数组实现的容器。
但是Disruptor的作者想到,如果将数组的头尾相连形成一个圆圈,只需要引入一个sequence的概念,指的是下一个有效元素的位置。假设这个环有0~7这8个位置,第9个元素来的时候放的位置就是9%8,也就是第1个位置,直接覆盖掉该位置上的旧数据即可。当然这有些简单粗暴,实际当Buffer被填满的时候到底是覆盖还是等待,肯定是有各种7788的等待策略。环的长度一般也是设为2的n次幂,也是为了利于二进制的计算,例如:12%8 = 12 & (8 – 1) pos = num & (size -1)。
初使用
Disruptor将每一条消息看成是一个event,也就是一件件的事件。所以在环形的队列中存放的也是一个个的event,所以一定会存在事件的工厂来帮助生成时间,以及事件的消费者来消费事件。
创建项目并引入相关依赖
<dependency>
    <groupId>com.lmax</groupId>
    <artifactId>disruptor</artifactId>
    <version>3.4.2</version>
</dependency>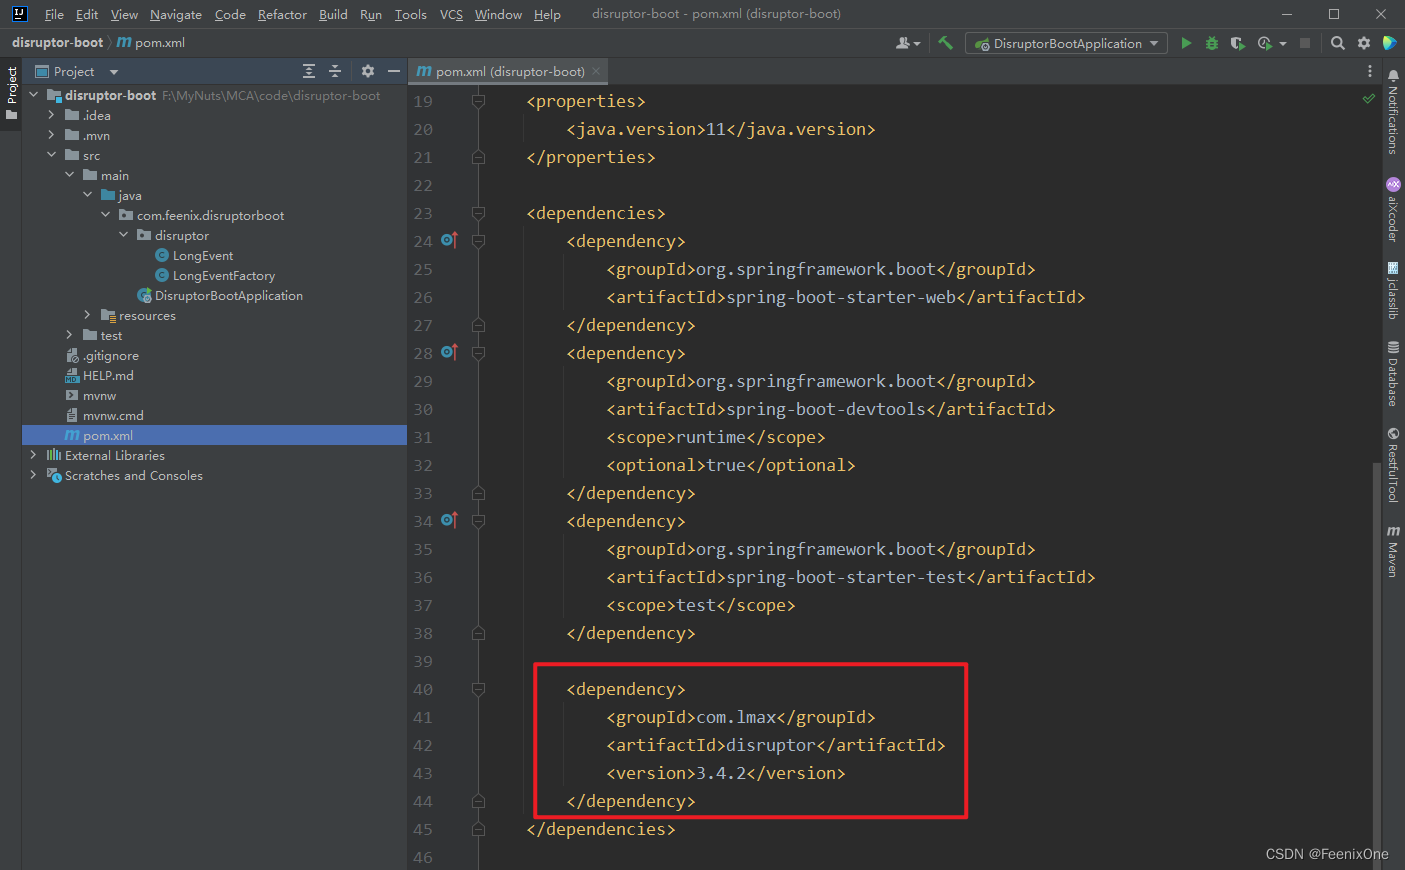
自定义事件、事件工厂、事件消费者
public class LongEvent {

    private long value;

    public long getValue() {
        return value;
    }

    public void setValue(long value) {
        this.value = value;
    }

    @Override
    public String toString() {
        return "LongEvent{" +
                "value=" + value +
                '}';
    }

}
自定义事件好理解,实际业务中不容的场景需要不同的事件满足业务处理,这图方便就给一个值。
public class LongEventFactory implements EventFactory<LongEvent> {

    @Override
    public LongEvent newInstance() {
        return new LongEvent();
    }

}
通过实现提供的EventFactory接口,重写接口中的newInstance方法来自定义生成事件。不过既然事件已经被自定义了,直接new一个自定义的事件不就好了,为啥还要通过工厂来产生呢?其实Disruptor初始化的时候会调用事件工厂,对RingBuffer进行内存的提前分配。也就是说在这个环刚创建的时候,就立马将环中的所有位置先用空白的LongEvent对象占好,等后续来数据的时候,就不需要在新创建LongEvent对象,而是直接将对应位置上的LongEvent对象的值修改一下就可以。通过节省创建对象的时间,来进一步提高执行效率,这个是其一;其二,由于每次都不需要新创建对象,内存中大大降低GC的频率。真的是为了追求极致的效率方方面面考虑得妥妥当当。
public class LongEventHandler implements EventHandler<LongEvent> {

    public static long count = 0;

    @Override
    public void onEvent(LongEvent longEvent, long sequence, boolean endOfBatch) throws Exception {
        count += 1;
        System.out.println("[" + Thread.currentThread().getName() + "] " + longEvent + " - 序号 - " + sequence);
    }

}
自定义事件消费者也比较简单,实现EventHandler接口,重写其中的onEvent方法即可。sequence指的是RingBuffer中的位置,endOfBatch指的是是否为队列中最后一个元素。
消息生产与消费
定义好了事件、事件工厂、事件消费者之后,Disruptor具体的使用非常简单
public class Main01 {
public static void main(String[] args) {
// 创建事件工厂
LongEventFactory eventFactory = new LongEventFactory();
// 定义RingBuffer的尺寸,最好设为2的n次方
int bufferSize = 1024;
// 创建Disruptor
// 第3个参数ThreadFactory,给的是Executors.defaultThreadFactory(),产生消费者线程
Disruptor<LongEvent> eventDisruptor = new Disruptor<>(eventFactory, bufferSize, Executors.defaultThreadFactory());
// 通过自定义事件消费者来处理事件
eventDisruptor.handleEventsWith(new LongEventHandler());
// 启动Disruptor
// 这一步执行完,内存中就产生了环,环上每个位置也塞进去了初始化的Event
eventDisruptor.start();
// 获取RingBuffer环
RingBuffer<LongEvent> ringBuffer = eventDisruptor.getRingBuffer();
// 获取环上的消息位置
long sequence = ringBuffer.next();
try {
// 根据消息位置获取具体的消息对象
LongEvent longEvent = ringBuffer.get(sequence);
// 对事件对象设值
longEvent.setValue(1L);
} finally {
// 发布消息
ringBuffer.publish(sequence);
}
}
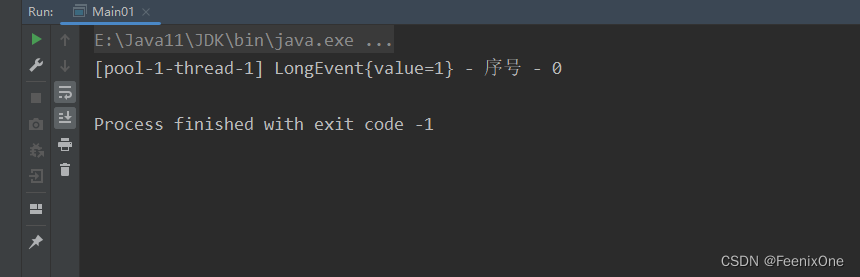
}执行Main01可以看到消费者对消息的消费日志
对Lambda表达式的支持
通过引入EventTranslator对象从而为lambda表达式的写法做准备
public class Main02 {

    public static void main(String[] args) {
        // 创建事件工厂
        LongEventFactory eventFactory = new LongEventFactory();

        // 定义RingBuffer的尺寸,最好设为2的n次方
        int bufferSize = 1024;

        // 创建Disruptor
        // 第3个参数ThreadFactory,给的是Executors.defaultThreadFactory(),产生消费者线程
        Disruptor<LongEvent> eventDisruptor = new Disruptor<>(eventFactory, bufferSize, Executors.defaultThreadFactory());

        // 通过自定义事件消费者来处理事件
        eventDisruptor.handleEventsWith(new LongEventHandler());

        // 启动Disruptor
        // 这一步执行完,内存中就产生了环,环上每个位置也塞进去了初始化的Event
        eventDisruptor.start();

        // 获取RingBuffer环
        RingBuffer<LongEvent> ringBuffer = eventDisruptor.getRingBuffer();

        // 为Lambda表达式的写法做准备 -----------------------------------------------------------------------------------
        EventTranslator<LongEvent> eventTranslator1 = new EventTranslator<LongEvent>() {
            @Override
            public void translateTo(LongEvent event, long sequence) {
                event.setValue(2L);
            }
        };

        ringBuffer.publishEvent(eventTranslator1);

        // -------------------------------------------------------------------------------------------------------------
        EventTranslatorOneArg<LongEvent, Long> eventTranslator2 = new EventTranslatorOneArg<LongEvent, Long>() {
            @Override
            public void translateTo(LongEvent event, long sequence, Long l) {
                event.setValue(l);
            }
        };

        ringBuffer.publishEvent(eventTranslator2, 3L);

        // -------------------------------------------------------------------------------------------------------------
        EventTranslatorTwoArg<LongEvent, Long, Long> eventTranslator3 = new EventTranslatorTwoArg<LongEvent, Long, Long>() {
            @Override
            public void translateTo(LongEvent event, long sequence, Long l1, Long l2) {
                event.setValue(l1 + l2);
            }
        };

        ringBuffer.publishEvent(eventTranslator3, 4L, 5L);

        // -------------------------------------------------------------------------------------------------------------
        EventTranslatorThreeArg<LongEvent, Long, Long, Long> eventTranslator4 = new EventTranslatorThreeArg<>() {
            @Override
            public void translateTo(LongEvent event, long sequence, Long l1, Long l2, Long l3) {
                event.setValue(l1 + l2 + l3);
            }
        };

        ringBuffer.publishEvent(eventTranslator4, 6L, 7L, 8L);

        // -------------------------------------------------------------------------------------------------------------
        EventTranslatorVararg<LongEvent> eventTranslator5 = new EventTranslatorVararg<>() {
            @Override
            public void translateTo(LongEvent event, long sequence, Object... objects) {
                long result = 0;
                for (Object object : objects) {
                    long l = (Long) object;
                    result += l;
                }
                event.setValue(result);
            }
        };

        ringBuffer.publishEvent(eventTranslator5, 9L, 10L, 11L, 12L, 13L, 14L, 15L);
    }

}
换成Lambda表达式的写法为
public class Main03 {

    public static void main(String[] args) {
        // 定义RingBuffer的尺寸,最好设为2的n次方
        int bufferSize = 1024;

        // 创建Disruptor
        // 第3个参数ThreadFactory,给的是Executors.defaultThreadFactory(),产生消费者线程
        Disruptor<LongEvent> eventDisruptor = new Disruptor<>(LongEvent::new, bufferSize, Executors.defaultThreadFactory());

        // 通过自定义事件消费者来处理事件
        eventDisruptor.handleEventsWith((longEvent, sequence, endOfBatch) ->  System.out.println("[" + Thread.currentThread().getName() + "] " + longEvent + " - 序号 - " + sequence));

        // 启动Disruptor
        // 这一步执行完,内存中就产生了环,环上每个位置也塞进去了初始化的Event
        eventDisruptor.start();

        // 获取RingBuffer环
        RingBuffer<LongEvent> ringBuffer = eventDisruptor.getRingBuffer();

        // 消息发布 - new EventTranslator<LongEvent>()
        ringBuffer.publishEvent((longEvent, sequence) -> longEvent.setValue(629L));

        // 消息发布 - new EventTranslatorOneArg<LongEvent, Long>()
        ringBuffer.publishEvent((longEvent, sequence, l) -> longEvent.setValue(l), 629L);

        // 消息发布 - new EventTranslatorTwoArg<LongEvent, Long>()
        ringBuffer.publishEvent((longEvent, sequence, l1, l2) -> longEvent.setValue(l1 + l2), 629L, 629L);

        // 消息发布 - new EventTranslatorThreeArg<LongEvent, Long>()
        ringBuffer.publishEvent((longEvent, sequence, l1, l2, l3) -> longEvent.setValue(l1 + l2 + l3), 629L, 629L, 629L);
    }

}
生产者线程模式
在创建Disruptor的时候,默认生产者是多线程模式。如果可以确定生产者是单线程的话,可以通过设置生产者线程模式指定为单线程模式,这样还可以进一步提高执行效率。

在创建Disruptor这一步的时候,通过参数ProducerType.SINGLE来设置生产者为单线程模式。默认情况下,Disruptor会将生产者指定为多线程模式。在多线程场景下,势必然不开锁这个东西。当指定为单线程模式的时候,Disruptor就会去除掉锁机制,从而进一步提高效率。当然,如果手动指定了单线程模式之后,千万不要再使用多线程去生产消息,否则没有了锁机制的制约,结果必然会造成数据的不一致性。
等待策略
在上面指定生产者为单线程模式的时候,还需要同步指定等待策略(WaitStrategy)。官方已经提供了8种不同的等待策略供使用:
1、(常用)BlockingWaitStrategy:通过线程阻塞的方式,等待生产者唤醒,被唤醒后,再循环检查依赖的sequence是否已经消费;
2、BusySpinWaitStrategy:线程一直自旋等待,可能比较耗CPU资源;
3、LiteBlockingWaitStrategy:线程阻塞等待生产者唤醒,与BlockingWaitStrategy相比,区别在signalNeeded.getAndSet,如果两个线程同时访问一个访问waitfor,一个访问signalAll时,可以减少lock加锁次数;
4、LiteTimeoutBlockingWaitStrategy:与LiteBlockingWaitStrategy相比,设置了阻塞时间,超过时间后抛异常;
5、PhasedBackoffWaitStrategy:根据时间参数和传入的等待策略来决定使用哪种等待策略;
6、TimeoutBlockingWaitStrategy:相对于BlockingWaitStrategy来说,设置了等待时间,超过后抛异常;
7、(常用)YieldingWaitStrategy:尝试100次,然后Thread.yield()让出CPU资源;
8、(常用)SleepingWaitStrategy : sleep等待;
多消费者与异常处理
创建多个LongEventHandler对象,然后在eventDisruptor.handleEventsWith(eventHandler1, eventHandler2, eventHandler3);方法中将这些消费者全部设置进去即可。
public class Main05_MultiConsumer {

    public static void main(String[] args) throws InterruptedException {
        // 创建事件工厂
        LongEventFactory eventFactory = new LongEventFactory();

        // 定义RingBuffer的尺寸,最好设为2的n次方
        int bufferSize = 1024;

        // 创建Disruptor
        // 第3个参数ThreadFactory,给的是Executors.defaultThreadFactory(),产生消费者线程
        // 第4个参数ProducerType,指定生产者为单线程模式
        // 第5个参数WaitStrategy,等待策略给的是阻塞等待
        Disruptor<LongEvent> eventDisruptor = new Disruptor<>(eventFactory, bufferSize, Executors.defaultThreadFactory(),
                                                              ProducerType.MULTI, new SleepingWaitStrategy());

        // 多个消费者,位于多个不同的线程中
        LongEventHandler eventHandler1 = new LongEventHandler();
        LongEventHandler eventHandler2 = new LongEventHandler();
        LongEventHandler eventHandler3 = new LongEventHandler();
        eventDisruptor.handleEventsWith(eventHandler1, eventHandler2, eventHandler3);

        // 启动Disruptor
        // 这一步执行完,内存中就产生了环,环上每个位置也塞进去了初始化的Event
        eventDisruptor.start();

        // 获取RingBuffer环
        RingBuffer<LongEvent> ringBuffer = eventDisruptor.getRingBuffer();

        // -------------------------------------------------------------------------------------------------------------

        final int threadCount = 10;
        CyclicBarrier barrier = new CyclicBarrier(threadCount);
        ExecutorService executorService = Executors.newCachedThreadPool();

        for (int i = 0; i < threadCount; i++) {
            final long threadNum = i;
            executorService.submit(() -> {
                System.out.printf("Thread %s ready 2 start!\n", threadNum);

                try {
                    barrier.await();
                } catch (InterruptedException e) {
                    throw new RuntimeException(e);
                } catch (BrokenBarrierException e) {
                    throw new RuntimeException(e);
                }

                for (int j = 0; j < 10; j++) {
                    ringBuffer.publishEvent((event, sequence) -> {
                        event.setValue(threadNum);
                        System.out.println("生产了 " + threadNum);
                    });
                }
            });
        }

        executorService.shutdown();
        TimeUnit.SECONDS.sleep(3);
        System.out.println(LongEventHandler.count);
    }

}
对异常的处理Disruptor也是提供了相应的实现方法。通过重写ExceptionHandler中的3个方法,从而达到对事件处理中的异常(handleEventException)、启动时异常(handleOnStartException)、关闭时异常(handleOnShutdownException)的手动处理。
public class Main06_ExceptionHandler {

    public static void main(String[] args) throws InterruptedException {
        // 创建事件工厂
        LongEventFactory eventFactory = new LongEventFactory();

        // 定义RingBuffer的尺寸,最好设为2的n次方
        int bufferSize = 1024;

        // 创建Disruptor
        // 第3个参数ThreadFactory,给的是Executors.defaultThreadFactory(),产生消费者线程
        // 第4个参数ProducerType,指定生产者为单线程模式
        // 第5个参数WaitStrategy,等待策略给的是阻塞等待
        Disruptor<LongEvent> eventDisruptor = new Disruptor<>(eventFactory, bufferSize, Executors.defaultThreadFactory(),
                                                              ProducerType.MULTI, new SleepingWaitStrategy());

        // 指定消费者抛异常后的处理方法
        EventHandler eventHandler1 = (event, sequence, end) -> {
            System.out.println(event);
            throw new Exception("消费者出异常");
        };
        eventDisruptor.handleEventsWith(eventHandler1);

        eventDisruptor.handleExceptionsFor(eventHandler1).with(new ExceptionHandler<LongEvent>() {
            @Override
            public void handleEventException(Throwable throwable, long sequence, LongEvent event) {
                throwable.printStackTrace();
            }

            // 在启动的时候出异常
            @Override
            public void handleOnStartException(Throwable ex) {
                System.out.println("Exception start 2 handle");
            }

            // 在关闭的时候出异常
            @Override
            public void handleOnShutdownException(Throwable ex) {
                System.out.println("Exception end 2 handle");
            }
        });

        // 启动Disruptor
        // 这一步执行完,内存中就产生了环,环上每个位置也塞进去了初始化的Event
        eventDisruptor.start();

        // 获取RingBuffer环
        RingBuffer<LongEvent> ringBuffer = eventDisruptor.getRingBuffer();

        // -------------------------------------------------------------------------------------------------------------

        final int threadCount = 10;
        CyclicBarrier barrier = new CyclicBarrier(threadCount);
        ExecutorService executorService = Executors.newCachedThreadPool();

        for (int i = 0; i < threadCount; i++) {
            final long threadNum = i;
            executorService.submit(() -> {
                System.out.printf("Thread %s ready 2 start!\n", threadNum);

                try {
                    barrier.await();
                } catch (InterruptedException e) {
                    throw new RuntimeException(e);
                } catch (BrokenBarrierException e) {
                    throw new RuntimeException(e);
                }

                for (int j = 0; j < 10; j++) {
                    ringBuffer.publishEvent((event, sequence) -> {
                        event.setValue(threadNum);
                        System.out.println("生产了 " + threadNum);
                    });
                }
            });
        }

        executorService.shutdown();
        TimeUnit.SECONDS.sleep(3);
        System.out.println(LongEventHandler.count);
    }

}
版权声明:本文内容由互联网用户自发贡献,该文观点仅代表作者本人。本站仅提供信息存储空间服务,不拥有所有权,不承担相关法律责任。如发现本站有涉嫌侵权/违法违规的内容, 请发送邮件至 举报,一经查实,本站将立刻删除。
文章由半码博客整理,本文链接:https://www.bmabk.com/index.php/post/111881.html

