

文章目录
- ==会持续更新中!==
- 一、注解或参数使用
-
- 1、@RestController :
- 2、@PathVaribale和@RequestParam区别:
- 3、@EqualsAndHashCode(callSuper = false)
- 4、DTO和VO区别:
- 5、@RequestParam :
- 6、@RequestBody :
- 7、@InsertProvider :
- 8、@SelectKey :
- 9、@SelectProvider(type=xxxx.class,method=”xxxx”)
- 10、@ServletComponentScan :
- 11、@SpringBootApplication :
- 12、@ImportResource :
- 13、@ConfigurationProperties :
- 14、JSTL:
- 15、spring.main.allow-bean-definition-overriding=true
- 16、@Import
- 17、@interface :元注解以及自定义注解
- 18、nacos配置参数
- 19、eureka配置参数
- 20、mvn命令package和install的区别?
- 21、lombok几个基本注解的使用
- 22、@Results:
- 23、@Data注解 与 lombok
- 24、@Resource与@Autowired用法区别
- 25、测试类注解
- 26、@NotNull @NotEmpty @NotBlank 使用场景
- 27、@PostConstruct注解
- 28、@Service(“xxx”)
- 29、@Qualifier(“xxx”)
会持续更新中!
一、注解或参数使用
1、@RestController :
组合注解,Controller纳入spring容器,完成异步响应

2、@PathVaribale和@RequestParam区别:
| @PathVaribale 获取url中的数据 | |
|---|---|
| 例子: | |
| localhost:8080/hello/id | |
| @RequestMapping(value=“/hello/{id}/{name}”,method= RequestMethod.GET) | |
| public String sayHello(@PathVariable(“id”) Integer id,@PathVariable(“name”) String name) | |
| @RequestParam 获取请求参数的值 | |
| – | – |
| 例子:localhost:8080/hello?id=98&&name=wo |
@RequestMapping(value=“/hello”,method= RequestMethod.GET)
public String sayHello(@RequestParam(“id”) Integer id,@RequestParam(“name”) String name
| @Param | |
|---|---|
| 是MyBatis所提供的(org.apache.ibatis.annotations.Param),作为Dao层的注解,作用是用于传递参数,从而可以与SQL中的的字段名相对应,一般在2=<参数数<=5时使用最佳。 | |
| 帖子详情:https://blog.csdn.net/u010412719/article/details/69788227 |
3、@EqualsAndHashCode(callSuper = false)
这个注解的作用就是自动的给model bean实现equals方法和hashcode方法,且不调用父类的属性
4、DTO和VO区别:
代表服务层需要接收的数据和返回的数据,而VO代表展示层需要显示的数据。
5、@RequestParam :
用于将请求参数区数据映射到功能处理方法的参数上
6、@RequestBody :
主要用来接收前端传递给后端的json字符串中的数据的(请求体中的数据的);GET方式无请求体,所以使用@RequestBody接收数据时,前端不能使用GET方式提交数据,而是用POST方式进行提交。
@RequestBody(required=false) 表示xxx对象可以不传入
7、@InsertProvider :
@Insert和@InsertProvider都是用来在实体类的Mapper类里注解保存方法的SQL语句。不同的是,@Insert是直接配置SQL语句,而@InsertProvider则是通过SQL工厂类及对应的方法生产SQL语句,这种方法的好处在于,我们可以根据不同的需求生产出不同的SQL,适用性更好。
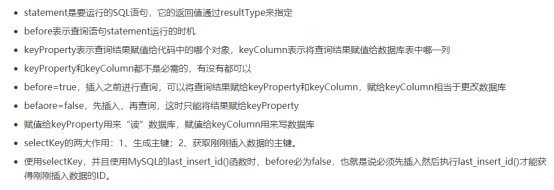
8、@SelectKey :
何获在插入后,获取自增主键id的值,自动放到pojo的id属性
@InsertProvider(type = BusinessRulesItemSqlProvider.class, method = “addBusinessRulesItem”)
@SelectKey(statement = “SELECT LAST_INSERT_ID()”, keyProperty = “id”, before = false, resultType = Long.class)
9、@SelectProvider(type=xxxx.class,method=”xxxx”)
用自定义的provider类构造SQL语句,type 属性用于指定获取sql语句的指定类,method 属性用于指定类中要执行获取sql语句的方法
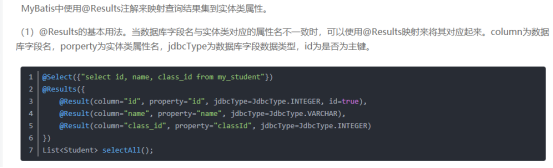
@Results注解来映射查询结果集到实体类属性。
10、@ServletComponentScan :
在SpringBootApplication上使用@ServletComponentScan注解后,Servlet、Filter、Listener可以直接通过@WebServlet、@WebFilter、@WebListener注解自动注册,无需其他代码。
11、@SpringBootApplication :
springboot启动类中@SpringBootApplication = @Configuration + @EnableAutoConfiguration + @ComponentScan
@Configuration的注解类标识这个类可以使用SpringIoC容器作为bean定义的来源。@Bean注解告诉Spring,一个带有@Bean的注解方法将返回一个对象,该对象应该被注册为在Spring应用程序上下文中的bean。
	@EnableAutoConfiguration:能够自动配置spring的上下文,试图猜测和配置你想要的bean类,通常会自动根据你的类路径和你的bean定义自动配置。

	@ComponentScan:会自动扫描指定包下的全部标有@Component的类,并注册成bean,当然包括@Component下的子注解@Service,@Repository,@Controller。
12、@ImportResource :
springboot启动类中@ImportResource用于加载其他的配置文件。Eg:yml或xml文件,不然只默认加载application的配置文件。
13、@ConfigurationProperties :
spring boot 使用 -》@ConfigurationProperties : 把配置文件的信息,读取并自动封装成实体类
@EnableConfigurationProperties注解的作用是:使得使用 @ConfigurationProperties 注解的类生效。
14、JSTL:
(Java server pages standarded tag library,即JSP标准标签库)
15、spring.main.allow-bean-definition-overriding=true
表示后发现的bean会覆盖之前相同名称的bean。
16、@Import
有时没有把某个类注入到IOC容器中,但在运用的时候需要获取该类对应的bean
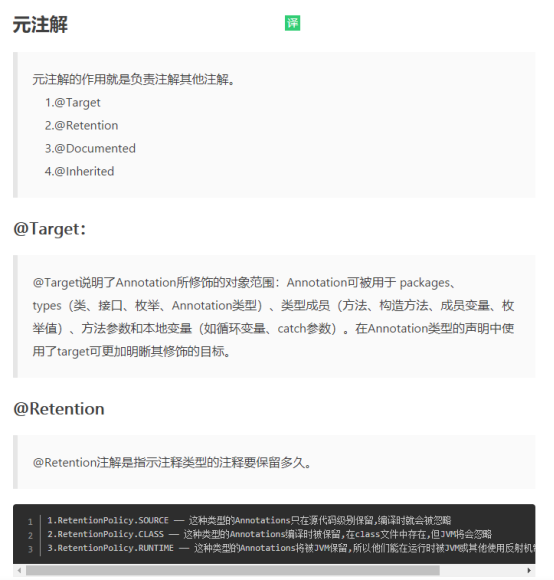
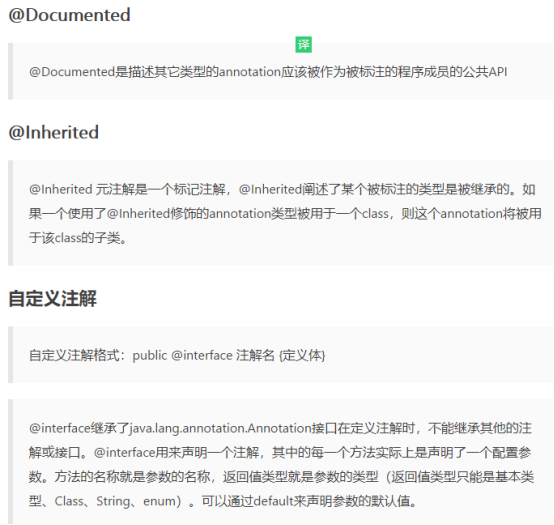
17、@interface :元注解以及自定义注解
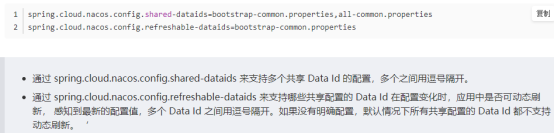
18、nacos配置参数
spring.cloud.nacos.config.shared-dataids=
geespace-eureka-${spring.profiles.active}.properties,geespace-zipkin-{spring.profiles.active}.properties
spring.cloud.nacos.config.refreshable-dataids={spring.cloud.nacos.config.shared-dataids}
19、eureka配置参数
e
u
r
e
k
a
.
c
l
i
e
n
t
.
r
e
g
i
s
t
e
r
W
i
t
h
E
u
r
e
k
a
=
t
r
u
e
\color{#0000ff}{eureka.client.registerWithEureka=true}
eureka.client.registerWithEureka=true
e
u
r
e
k
a
.
c
l
i
e
n
t
.
f
e
t
c
h
R
e
g
i
s
t
r
y
=
t
r
u
e
\color{#0000ff}{eureka.client.fetchRegistry=true}
eureka.client.fetchRegistry=true

20、mvn命令package和install的区别?
package是把jar打到本项目的target下,而install时把target下的jar安装到本地仓库,供其他项目使用。 当其他项目需要依靠该项目编译是,使用install。
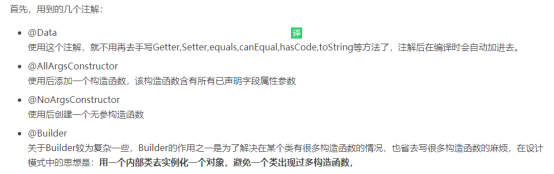
21、lombok几个基本注解的使用
22、@Results:
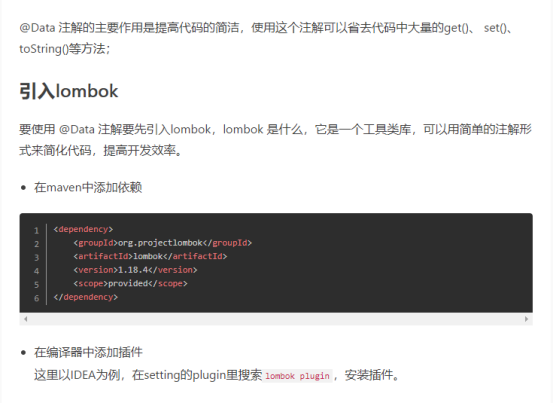
23、@Data注解 与 lombok
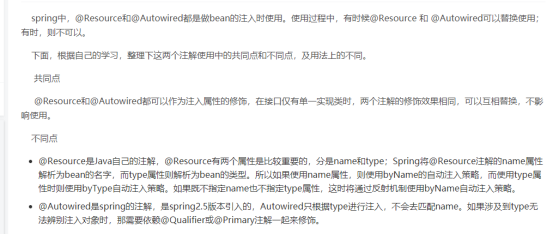
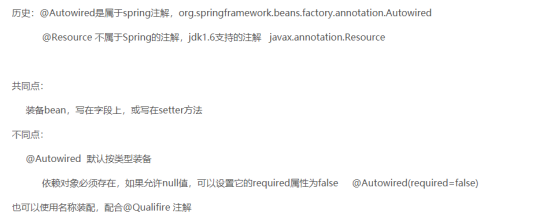
24、@Resource与@Autowired用法区别
详情: https://blog.csdn.net/magi1201/article/details/82590106?depth_1-utm_source=distribute.pc_relevant.none-task-blog-BlogCommendFromBaidu-2&utm_source=distribute.pc_relevant.none-task-blog-BlogCommendFromBaidu-2
详情:https://blog.csdn.net/modelsetget/article/details/82285568
25、测试类注解
1.@RunWith(SpringRunner.class)
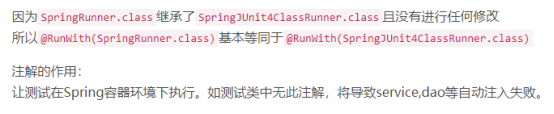
2.@SpringBootTest(classes = CalculateExecuteEngineApplication.class, webEnvironment = SpringBootTest.WebEnvironment.RANDOM_PORT)

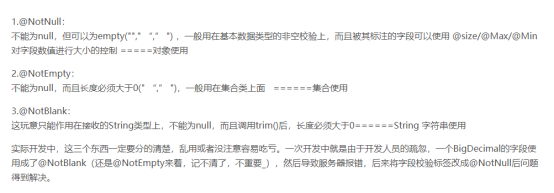
26、@NotNull @NotEmpty @NotBlank 使用场景
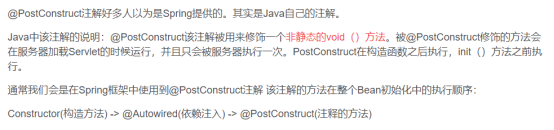
27、@PostConstruct注解
28、@Service(“xxx”)
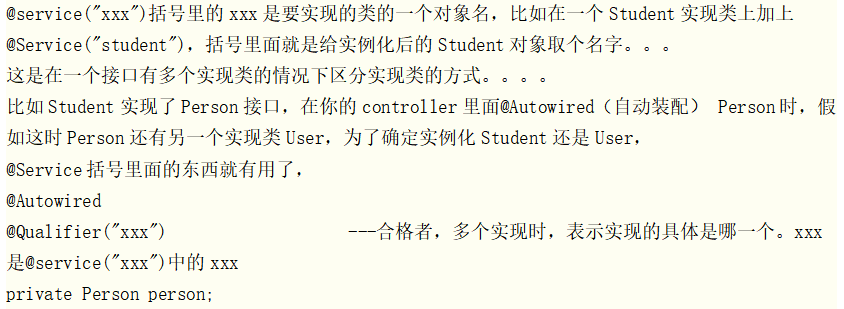
29、@Qualifier(“xxx”)
Qualifier的意思是合格者,通过这个标示,表明了哪个实现类才是我们所需要的;
@Autowired默认按照类型匹配注入bean,如果有多个实现类,搭配@Qualifier(“实现类名称”)表明注入的是哪一个实现类的bean:
比如:
@Autowired
@Qualifier(“TestServiceImpl1”)
private TestService testService; //注入的就是TestServiceImpl1这个实现类,注意如果该实现类使用了诸如@Service(“beanName”)这种注解,那么TestServiceImpl1就是beanName;
而@Resource默认按照名称匹配注入bean,而且可以使用name作为属性来确定实际注入的bean
比如:
@Resource(name = “TestServiceImpl1”)
private TestService testService;
版权声明:本文内容由互联网用户自发贡献,该文观点仅代表作者本人。本站仅提供信息存储空间服务,不拥有所有权,不承担相关法律责任。如发现本站有涉嫌侵权/违法违规的内容, 请发送邮件至 举报,一经查实,本站将立刻删除。
文章由极客之家整理,本文链接:https://www.bmabk.com/index.php/post/106313.html

