
文章目录
Django
安装Django
安装Python
# 安装依赖
yum -y install zlib-devel bzip2-devel openssl-devel ncurses-devel sqlite-devel readline-devel tk-devel gdbm-devel db4-devel libpcap-devel xz-devel libffi-devel gcc


wget https://www.python.org/ftp/python/3.8.15/Python-3.8.15.tgz
tar xf Python-3.8.15.tar.xz
cd Python-3.8.15
./configure --prefix=/usr/local/python3
make && make install

# 删除旧软链接
rm -rf /usr/bin/python3
rm -rf /usr/bin/pip3

# 新添加软链接
ln -s /usr/local/python3/bin/python3.8 /usr/bin/python3
ln -s /usr/local/python3/bin/pip3.8 /usr/bin/pip3
pip加速
cd ~
mkdir .pip
vi .pip/pip.conf
# 增加如下内容
[global]
index-url = https://pypi.tuna.tsinghua.edu.cn/simple
[install]
trusted-host = pypi.tuna.tsinghua.edu.cn
安装Django
pip3 install django
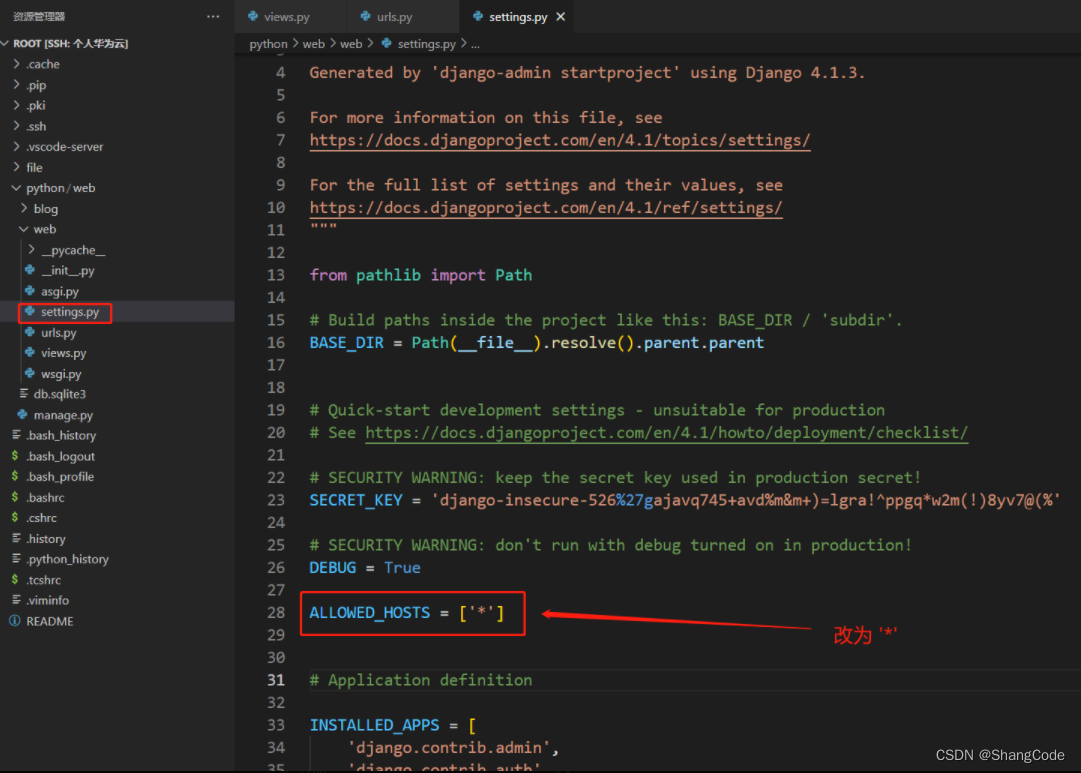
# 新版跟老版不太一样,需要自己设置软链接
ln -s /usr/local/python3/bin/django-admin /usr/bin/django-admin
创建项目
django-admin startproject web
报错
Watching for file changes with StatReloader
Performing system checks...

System check identified no issues (0 silenced).
Exception in thread django-main-thread:
Traceback (most recent call last):
  File "/usr/local/python3/lib/python3.8/site-packages/django/db/backends/base/base.py", line 282, in ensure_connection

  ...

  File "/usr/local/python3/lib/python3.8/site-packages/django/db/backends/sqlite3/_functions.py", line 45, in register
    create_deterministic_function("django_date_extract", 2, _sqlite_datetime_extract)
pysqlite3.dbapi2.NotSupportedError: deterministic=True requires SQLite 3.8.3 or higher

The above exception was the direct cause of the following exception:

Traceback (most recent call last):
  File "/usr/local/python3/lib/python3.8/threading.py", line 932, in _bootstrap_inner

    ...

  File "/usr/local/python3/lib/python3.8/site-packages/django/db/backends/sqlite3/_functions.py", line 45, in register
    create_deterministic_function("django_date_extract", 2, _sqlite_datetime_extract)
django.db.utils.NotSupportedError: deterministic=True requires SQLite 3.8.3 or higher
解决办法
pip3 install pysqlite3
pip3 install pysqlite3-binary

vim /usr/local/python3/lib/python3.8/site-packages/django/db/backends/sqlite3/base.py
# 修改内容
# from sqlite3 import dbapi2 as Database (注释掉这段)
from pysqlite3 import dbapi2 as Database # 启用pysqlite3
# :wq 保存即可
再次运行
[root@hecs-33592 web]# python3 manage.py runserver 0.0.0.0:8000
Watching for file changes with StatReloader
Performing system checks...

System check identified no issues (0 silenced).

You have 18 unapplied migration(s). Your project may not work properly until you apply the migrations for app(s): admin, auth, contenttypes, sessions.
Run 'python manage.py migrate' to apply them.
November 24, 2022 - 09:16:47
Django version 4.1.3, using settings 'web.settings'
Starting development server at http://0.0.0.0:8000/
Quit the server with CONTROL-C.
浏览器访问

报错了,修改ALLOWED_HOSTS
后面我们直接使用VSCode进行项目的编辑与运行,有条件的同学可以考虑使用Pycharm
文件介绍
web
├── db.sqlite3
├── manage.py			# 项目的管理,包括: 启动项目,创建app, 数据管理
└── web
    ├── asgi.py			# 接收网络请求
    ├── __init__.py
    ├── settings.py		# 项目配置(模板配置,数据库配置,注册app)
    ├── urls.py			# url和函数的对应关系
    └── wsgi.py			# 接收网络请求
简单访问
在 /root/python/web/web下新增一个 views.py 文件
from django.http import HttpResponse
def index(req):
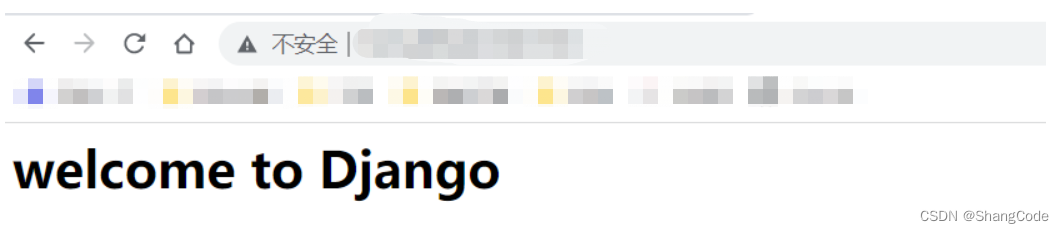
return HttpResponse('<h1>welcome to Django</h1>')
配置/root/python/web/web 下的urls.py 文件
from django.contrib import admin
from django.urls import path
from . import views    # 导入我们刚刚创建的views.py文件

urlpatterns = [
    path('admin/', admin.site.urls),
    path('', views.index),  # 新增这一行,''为空表示默认访问 ip:端口
]
启动
cd /root/python/web/
python3 manage.py runserver 0.0.0.0:5900
浏览器访问测试
APP
添加新的app
进入linux命令行,执行以下命令
[root@hecs-33592 web]# pwd
/root/python/web
[root@hecs-33592 web]# django-admin startapp blog
[root@hecs-33592 web]# ls
blog  db.sqlite3  manage.py  web
[root@hecs-33592 web]# tree blog/
blog/
├── admin.py
├── apps.py
├── __init__.py
├── migrations
│   └── __init__.py
├── models.py
├── tests.py
└── views.py
应用【blog】中各个目录作用:
- migrations: 用于记录models中数据的变更。
- admin.py: 映射models中的数据到Django自带的admin后台。
- apps.py: 在新的Django版本中新增,用于应用程序的配置。
- models.py: 创建应用程序数据表模型(对应数据库的相关操作)。
- test.py: 创建Django测试。
- views.py: 控制向前端显示那些数据
注册app
修改/root/python/web/web 下的settings.py

创建blog的页面
编辑/root/python/web/blog 下的views.py 视图函数
from django.shortcuts import render
from django.http import HttpResponse
def index_app(req):
    return HttpResponse('welcome to Django blog!')
编辑/root/python/web/web 下的urls.py 来指定访问路由
from django.contrib import admin
from django.urls import path
from blog.views import index_app

urlpatterns = [
    path('admin/', admin.site.urls),
    path('index_app/', index_app),
]
命令行启动Django应用
cd /root/python/web/
python3 manage.py runserver 0.0.0.0:5900
浏览器访问

再来一个
编辑/root/python/web/blog 下的views.py 视图函数
from django.shortcuts import render
from django.http import HttpResponse

def user_list(request):
    return HttpResponse("用户列表")

def index_app(req):
    return HttpResponse('<h1>welcome to Django blog!</h1>')
编辑/root/python/web/web 下的urls.py 来指定访问路由
from django.contrib import admin
from django.urls import path
from blog.views import index_app
from blog.views import user_list

urlpatterns = [
    path('admin/', admin.site.urls),
    path('index_app/', index_app),
    path('user_list/', user_list),
]

templates模板
为了使用HTML,这里开始引入templates模板
注意: 可以在app下创建templates目录,也可以在主目录下创建templates目录
接下来可以做个测试
编辑/root/python/web/blog 下的views.py 视图函数
from django.shortcuts import render
from django.http import HttpResponse

def user_list(request):
    # 1.优先去项目的根目录下寻找
    # 2.根据app的注册顺序去app的目录下templates下寻找
    return render(request, "user_list.html")
编辑/root/python/web/blog/templates下的user_list.html
<!DOCTYPE html>
<html lang="en">
<head>
  <meta charset="UTF-8">
  <title>Document</title>
</head>
<body>
  <h1>用户列表</h1>
</body>
</html>
编辑/root/python/web/templates下的user_list.html
<!DOCTYPE html>
<html lang="en">
<head>
  <meta charset="UTF-8">
  <title>Document</title>
</head>
<body>
  <h1>根目录,用户列表</h1>
</body>
</html>
浏览器访问测试

1.优先去项目的根目录
templates下寻找
2.根据app的注册顺序去项目app的目录下的templates下寻找
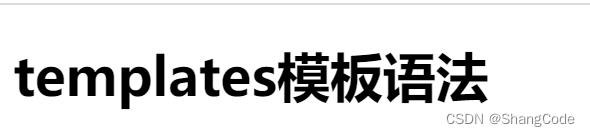
templates模板语法
创建一个新的模板页面
编辑web下的urls.py
from django.contrib import admin
from django.urls import path
from blog import views

urlpatterns = [
    path('admin/', admin.site.urls),
    path('index_app/', views.index_app),
    path('user_list/', views.user_list),
    path('tpl/', views.tpl),
]
编辑APPblog下的views.py
from django.shortcuts import render
from django.http import HttpResponse

def user_list(request):
    # 1.优先去项目的根目录下寻找
    # 2.根据app的注册顺序去app的目录下templates下寻找
    return render(request, "user_list.html")

def index_app(req):
    return HttpResponse('<h1>welcome to Django blog!</h1>')

# 新增下面的内容
def tpl(request):
    return render(request, "tpl.html")
在blog/templates下新建tpl.html
<!DOCTYPE html>
<html lang="en">
<head>
    <meta charset="UTF-8">
    <meta http-equiv="X-UA-Compatible" content="IE=edge">
    <meta name="viewport" content="width=device-width, initial-scale=1.0">
    <title>Document</title>
</head>
<body>
    <h1>templates模板语法</h1>
</body>
</html>
单一变量
如果说我们从数据库中取到了数据,如何在
html页面中进行展示呢,这里需要用到templates的基本语法
修改blog下的views.py
def tpl(request):
    name = "poker"
    return render(request, "tpl.html", {"name":name})
修改blog/templates下的tpl.html
<body>
    <h1>templates模板语法</h1>
    <li>姓名: {{ name }}</li>
</body>
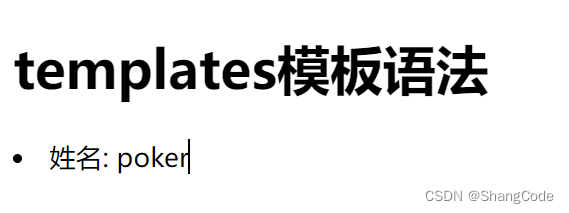
这样,
name参数就被传到HTML页面中展示了出来
列表
def tpl(request):

    name = "poker"
    roles_list = ['服务员1', '服务员2', '服务员3']

    return render(request, "tpl.html", {"name":name, "roles_list":roles_list})
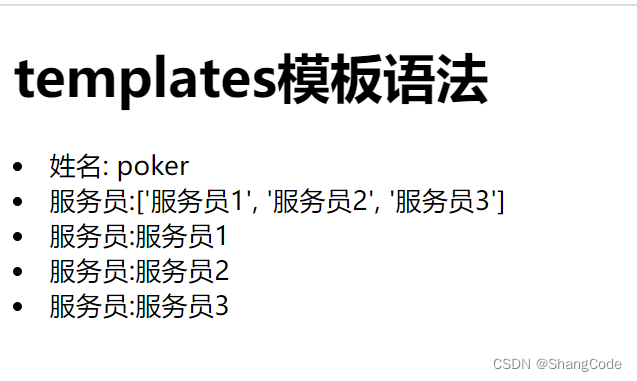
<body>
    <h1>templates模板语法</h1>
    <li>姓名: {{ name }}</li>
    <li>服务员:{{ roles_list }}</li>
    <li>服务员:{{ roles_list.0 }}</li>
    <li>服务员:{{ roles_list.1 }}</li>
    <li>服务员:{{ roles_list.2 }}</li>
</body>
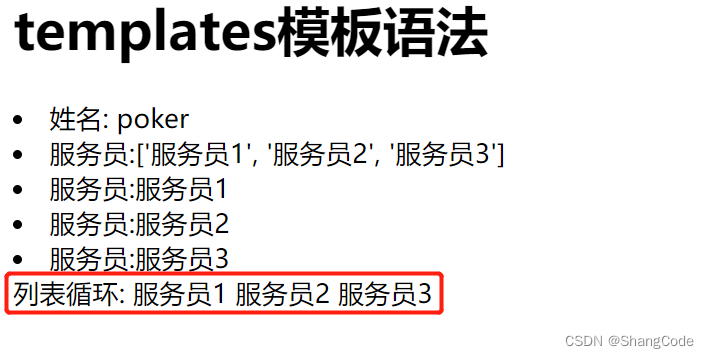
循环(列表)
修改blog/templates下的tpl.html
<div>
    列表循环:
    {% for item in roles_list %}
        <span>{{ item }}</span>
    {% endfor %}
</div>
字典
修改blog下的views.py
def tpl(request):

    name = "poker"
    roles_list = ['服务员1', '服务员2', '服务员3']
    user_info = {"name": "张三", "age": 25, "sex": "男"}

    return render(request, "tpl.html", {"name": name, "roles_list": roles_list, "user_info": user_info})
修改blog/templates下的tpl.html
<div>
    {{ user_info }}<br>
    {{ user_info.name }}
    {{ user_info.age }}
    {{ user_info.sex }}
</div>

循环(字典)
修改blog/templates下的tpl.html
获取值
values
<div>
    {% for v in user_info.values %}
        <li>{{ v }}</li>
    {% endfor %}
</div>
获取键
keys
    <div>
        {% for k in user_info.keys %}
            <li>{{ k }}</li>
        {% endfor %}
    </div>
获取键和值
items
<div>
    {% for k,v in user_info.items %}
        <li>{{ k }} = {{ v }}</li>
    {% endfor %}
</div>

列表套字典
修改blog下的views.py
def tpl(request):

    name = "poker"
    roles_list = ['服务员1', '服务员2', '服务员3']
    user_info = {"name": "张三", "age": 25, "sex": "男"}

    date_list = [
        {"name": "张三", "age": 25, "sex": "男"},
        {"name": "李四", "age": 18, "sex": "男"},
        {"name": "王五", "age": 22, "sex": "女"},
    ]

    return render(request, "tpl.html", {"name": name, "roles_list": roles_list, "user_info": user_info, "data_list":date_list})
修改blog/templates下的tpl.html
<div>
    {% for item in data_list %}
        <div>{{ item.name }} {{ item.age }} {{ item.sex }}</div>
    {% endfor %}
</div>

条件判断
修改blog/templates下的tpl.html
{%  if name == "poker" %}
    <h3>嘿嘿嘿</h3>
{% elif name == "toker" %}
    <h3>哈哈哈</h3>
{% else %}
    <h3>呵呵呵</h3>
{% endif %}
先介绍这些常用的语法,其实还有很多的语法,感兴趣的可自行百度.
请求和响应
重定向: 浏览器向某个网站发送请求,网站返回给浏览器一个新的URL,浏览器去访问这个新的URL地址
修改blog下的views.py, 根据情况去掉下面代码的注释进行测试
# 导入 redirect 包
from django.shortcuts import render, redirect
...

# 增加新函数
def something(request):
    # request 是一个对象,封装了用户发送过来的所有请求相关数据

    # 1.[请求]获取请求的方式
    print("用户请求的方式: " + request.method)

    # 2.[请求]在URL上传递值, 例如: http://123.249.26.154:5900/something/?n1=1&n2=2
    print(request.GET)

    # 3.[请求]在请求体中提交数据,目前是空值
    print(request.POST)

    # 4.[响应]HttpResponse("返回内容"), 内容字符串内容返回给请求者
    # return HttpResponse("返回内容")

    # 5.[响应]读取HTML的内容 + 渲染(替换) => 字符串,返回给用户浏览器
    # 需要在 blog/templates 下新建`something.html`
    #return render(request, 'something.html', {"title": "hello"})

    # 6.[响应] 让浏览器重定向到其他的页面
    return redirect("http://www.baidu.com")
修改web/web/urls.py,增加something
from django.contrib import admin
from django.urls import path
from blog import views

urlpatterns = [
    path('admin/', admin.site.urls),
    path('index_app/', views.index_app),
    path('user_list/', views.user_list),
    path('tpl/', views.tpl),
    path('something/', views.something),
]
案例: 用户登录
修改blog下的views.py,新增login函数
def login(request):
    if request.method == "GET":
        return render(request, "login.html")

    # 如果是 POST 请求,获取用户提交的数据
    print(request.POST)
    username = request.POST.get("user")
    password = request.POST.get("password")
    if username == "poker" and password == "123":
        return HttpResponse("登录成功")

    #return HttpResponse("登录失败")
    return render(request, "login.html", {"error_msg": "用户名或密码错误"})
修改web/web/urls.py,增加login
from django.contrib import admin
from django.urls import path
from blog import views

urlpatterns = [
    path('admin/', admin.site.urls),
    path('index_app/', views.index_app),
    path('user_list/', views.user_list),
    path('tpl/', views.tpl),
    path('something/', views.something),
    path('login/', views.login),
]
在blog/templates下新建login.html
{% csrf_token %} 必须加上
<!DOCTYPE html>
<html lang="en">
<head>
    <meta charset="UTF-8">
    <title>Document</title>
</head>
<body>
    <h1>用户登录</h1>
    <form method="post" action="/login/">

        {% csrf_token %}

        <input type="text" name="user", placeholder="用户名">
        <input type="password" name="password", placeholder="密码">
        <input type="submit" value="提交">
        <span style="color: red;">{{ error_msg }}</span>
    </form>
</body>
</html>
浏览器访问,输入错误的用户名和密码

数据库操作
Django开发操作数据库更简单,内部提供了ORM框架
安装第三方模块
mysqlclient
直接安装可能会报错
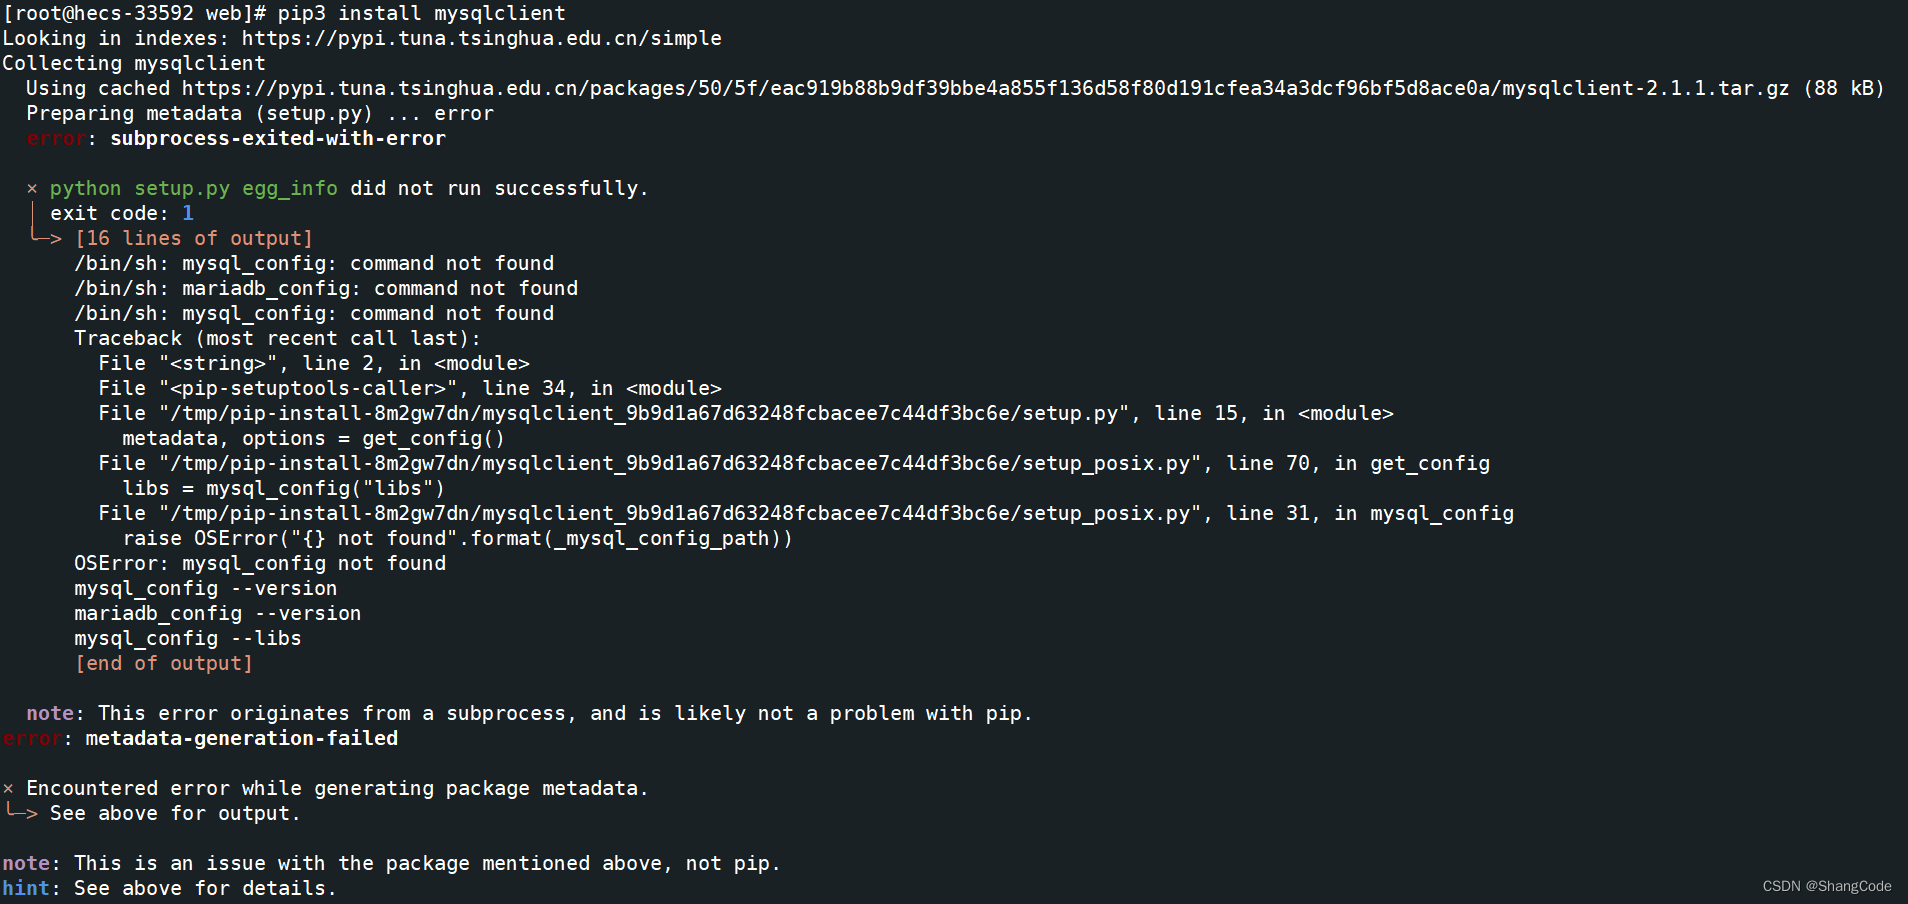
解决办法
参考链接: https://blog.csdn.net/m0_67155975/article/details/123138225
yum -y install mysql-devel
yum -y install python-devel
pip3 install mysqlclient
ORM
ORM可以帮助我们做两件事:
- 创建/修改/删除数据库中的表(无法创建数据库)
- 操作表中的数据
创建数据库
create database mydb DEFAULT CHARSET utf8 COLLATE utf8_general_ci;

Django连接数据库
修改web/web/settings.py

增加如下内容
DATABASES = {
    'default':{
        'ENGINE':'django.db.backends.mysql',
        'NAME':'mydb',
        'USER':'root',
        'PASSWORD':'Syz123!@#',
        'HOST':'127.0.0.1',
        'PORT':'3306',
    }
}
Django操作表
- 创建表
- 删除表
- 修改表
配置blog下的models.py
会根据自定义的类创建跟app同名的表
from django.db import models

# Create your models here.
class UserInfo(models.Model):
    name = models.CharField(max_length=20)
    password = models.CharField(max_length=20)
    age = models.IntegerField()

"""
create table UserInfo(
    id bigint auto_increment primary key,
    name varchar(20),
    password varchar(20),
    age int
)
"""
在服务器中项目根目录下执行命令
如果不想要某个表了,将class类注释后,重新执行下面的命令即可
python3 manage.py makemigrations
python3 manage.py migrate
注意: app需要提前注册

查看Mysql数据库

修改表的话,如果原表中存有数据,此时如果增加一个新的列,需要设定一个默认值
- 手动设定
age = models.IntegerField(default=2)
- 允许为空
data = models.IntegerField(null=True, blank=True)
Django操作表数据
- 添加数据
修改blog下的views.py
from blog.models import UserInfo
...
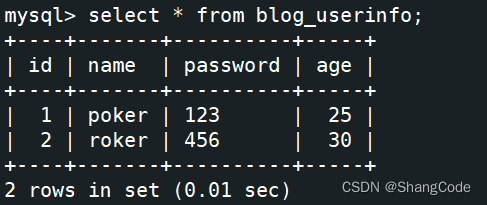
def orm(request):
# 新建数据
UserInfo.objects.create(name="poker", password="123", age=25)
UserInfo.objects.create(name="roker", password="456", age=30)
return HttpResponse("成功")
修改web/web/urls.py,增加orm
from django.contrib import admin
from django.urls import path
from blog import views

urlpatterns = [
    path('admin/', admin.site.urls),
    path('index_app/', views.index_app),
    path('user_list/', views.user_list),
    path('tpl/', views.tpl),
    path('something/', views.something),
    path('login/', views.login),
    path('orm/', views.orm),
]
浏览器访问页面

查看Mysql数据库
- 删除数据
	# 删除数据
    UserInfo.objects.filter(id=2).delete()
    # 删除表中所有数据
    UserInfo.objects.all().delete()
- 获取数据
data_list = UserInfo.objects.all()
print(data_list)
for obj in data_list:
    print(obj.id, obj.name, obj.password, obj.age)
浏览器刷新访问,观察工作台输出

- 更新数据
UserInfo.objects.filter(name="roker").update(age=35)

案例:用户管理
展示用户列表
修改web/web/urls.py,增加info/list
from django.contrib import admin
from django.urls import path
from blog import views

urlpatterns = [
    path('admin/', admin.site.urls),
    path('index_app/', views.index_app),
    path('user_list/', views.user_list),
    path('tpl/', views.tpl),
    path('something/', views.something),
    path('login/', views.login),
    path('orm/', views.orm),
    path('info/list/', views.info_list)
]
修改blog下的views.py
from blog.models import UserInfo
...
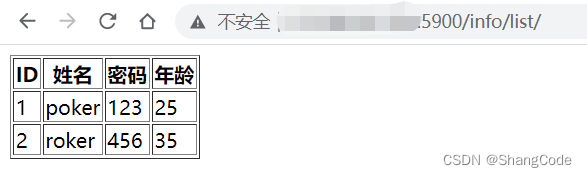
def info_list(request):
data_list = UserInfo.objects.all()
return render(request, "info_list.html", {"data_list": data_list})
在blog/templates下新增info_list.html
<!DOCTYPE html>
<html lang="en">
<head>
    <meta charset="UTF-8">
    <title>Document</title>
</head>
<body>
    <table border="1">
        <thead>
            <tr>
                <th>ID</th>
                <th>姓名</th>
                <th>密码</th>
                <th>年龄</th>
            </tr>
        </thead>
        <tbody>
            {% for obj in data_list %}
                <tr>
                    <td>{{ obj.id }}</td>
                    <td>{{ obj.name }}</td>
                    <td>{{ obj.password }}</td>
                    <td>{{ obj.age }}</td>
                </tr>
            {% endfor %}
        </tbody>
    </table>
</body>
</html>
浏览器访问测试
添加用户
修改web/web/urls.py,增加info/list
from django.contrib import admin
from django.urls import path
from blog import views

urlpatterns = [
    path('admin/', admin.site.urls),
    path('index_app/', views.index_app),
    path('user_list/', views.user_list),
    path('tpl/', views.tpl),
    path('something/', views.something),
    path('login/', views.login),
    path('orm/', views.orm),
    path('info/list/', views.info_list),
    path('info/add/', views.info_add),
]
修改blog下的views.py
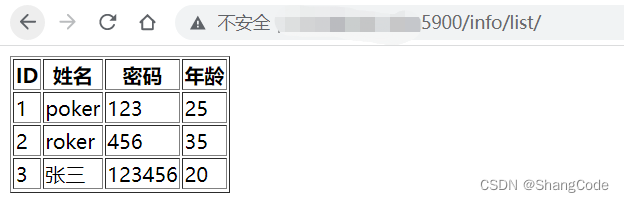
def info_add(request):
    if request.method == "GET":
        return render(request, 'info_add.html')

    # 获取用户提交的数据
    name = request.POST.get("name")
    password = request.POST.get("password")
    age = request.POST.get("age")

    # 添加到数据库
    UserInfo.objects.create(name=name, password=password, age=age)

    # 自动跳转
    return redirect("/info/list/")
在blog/templates下新增info_add.html
<!DOCTYPE html>
<html lang="en">
<head>
    <meta charset="UTF-8">
    <title>Document</title>
</head>
<body>
    <form action="/info/add/" method="post">

        {% csrf_token %}

        <input type="text" name="name" placeholder="用户名">
        <input type="text" name="password" placeholder="密码">
        <input type="text" name="age" placeholder="年龄">
        <input type="submit" value="提交">
    </form>
</body>
</html>
浏览器访问

点击”提交”
在info/list页面增加”添加”按钮
修改blog/templates下info_list.html
<!DOCTYPE html>
<html lang="en">
<head>
    <meta charset="UTF-8">
    <title>Document</title>
</head>
<body>
    <a href="/info/add">添加</a>
    <table border="1">
        <thead>
            <tr>
                <th>ID</th>
                <th>姓名</th>
                <th>密码</th>
                <th>年龄</th>
            </tr>
        </thead>
        <tbody>
            {% for obj in data_list %}
                <tr>
                    <td>{{ obj.id }}</td>
                    <td>{{ obj.name }}</td>
                    <td>{{ obj.password }}</td>
                    <td>{{ obj.age }}</td>
                </tr>
            {% endfor %}
        </tbody>
    </table>
</body>
</html>

点击”添加”后,即可跳转回添加页面
删除用户
修改web/web/urls.py,增加info/list
from django.contrib import admin
from django.urls import path
from blog import views

urlpatterns = [
    path('admin/', admin.site.urls),
    path('index_app/', views.index_app),
    path('user_list/', views.user_list),
    path('tpl/', views.tpl),
    path('something/', views.something),
    path('login/', views.login),
    path('orm/', views.orm),
    path('info/list/', views.info_list),
    path('info/add/', views.info_add),
    path('info/delete/', views.info_delete)
]
修改blog下的views.py
def info_delete(request):
    nid = request.GET.get("nid")
    UserInfo.objects.filter(id=nid).delete()
    return redirect("/info/list/")
修改blog/templates下的info_list.html
<!DOCTYPE html>
<html lang="en">
<head>
    <meta charset="UTF-8">
    <title>Document</title>
</head>
<body>
    <a href="/info/add">添加</a>
    <table border="1">
        <thead>
            <tr>
                <th>ID</th>
                <th>姓名</th>
                <th>密码</th>
                <th>年龄</th>
                <th>操作</th>
            </tr>
        </thead>
        <tbody>
            {% for obj in data_list %}
                <tr>
                    <td>{{ obj.id }}</td>
                    <td>{{ obj.name }}</td>
                    <td>{{ obj.password }}</td>
                    <td>{{ obj.age }}</td>
                    <td>
                        <a href="/info/delete?nid={{ obj.id }}">删除</a>
                    </td>
                </tr>
            {% endfor %}
        </tbody>
    </table>
</body>
</html>
浏览器访问,点击”删除”即可将对应的行删除

版权声明:本文内容由互联网用户自发贡献,该文观点仅代表作者本人。本站仅提供信息存储空间服务,不拥有所有权,不承担相关法律责任。如发现本站有涉嫌侵权/违法违规的内容, 请发送邮件至 举报,一经查实,本站将立刻删除。
文章由极客之家整理,本文链接:https://www.bmabk.com/index.php/post/100703.html

